31 August, 2005

Ah, new players...

It's strange. With my Red Mage now at 60, I feel like xp'ing it less and less. Maybe it's because I've already overshot past Akanea and Saoirse as it is, and while Aka is about 2k into Level 60, I'm 5k tnl to 61...>_<

So I think I'll take a short break from xp'ing RDM for a while. Besides, I already overshot Aka's Dragoon twice on my WHM and BLM (although his DRG has since taken over my WHM...) Maybe I'll switch back to White Mage for a bit? My Regen III and Raise III scroll's really starting to collect dust over with my mule...

I didn't actually xp today though. Instead, I went around helping Saoirse and Faeyth complete their Genkai 3 quests (on two different runs), and spent the rest of the time up in Rabao prepping for more Goldsmithing skillups (see the Goldsmithing blog for more information. ^^

One very amusing thing did happen though. ^^

On a whim, I decided to mule over my Summoner gear, and play around with it for a short bit. I'm not entirely sure just what possessed me to do so, probably a greater appreciation for the unique things a Summoner can contribute to a party, but anyway, I digress.

So I'm walking out to Qufim Island on my SMN24. I exit Port Jeuno, summon Carbuncle (I like having summons out ^^) and proceed to walk all the way through the tunnel to Qufim Island proper.

On the way, I pass by this Rank 2 RDM19/BLM09 Taru by the name of Darkanima, who after (presumably) searching up my name to see I'm a SMN24, decides to be very helpful and give me a little bit of advice:


Evidently, he noticed I'm over SMN20, but unfortuantely didn't realise that I'm also Rank 10. >_<

All things being normal, Rank 10 Summoners usually have their summons, in particular one little summon I'm very proud of...

And so, I run back to find Darkanima and show him my "other" avatar. ^^


Hehe, I found the whole situation to be very funny. ^^

Personally, I think Darkanima's all set to be a pretty good player. While yes, he did do some newbish things like miss the safe assumption that I have all my avatars, he at least knew the background behind another job other than his own, and the impression I got from him was pretty receptive to learning new things. In short, I don't think he will become one of those n00bs who tell you to "STFU! I KNOW MY JOBZ!" when you ask them to do something right.

Of course, time will tell how Darkanima turns out, but I'd have to say he's off to a prety good start. (Oh, and a fully leveled subjob too! That's always a plus! ^^)

30 August, 2005

Full fledged Taru Pimp! ^^

I have a few things to cover, first of which is that I have finally gotten RDM60 and can now wear my pimp hat! :D

The hat just looks soooo cute on a Taru- I particularly like it when Tarus rest with the hat on. Since we're so small, all you see is just one big HAT down there on the ground. I find it particularly amusing. ^^


Anyway, I've had the pleasure of going to new places to camp today. First of which was up in the Uleguerand Range, with a party that was 59-61. We camped at the exit to the first tunnel on the way up, beating up Nival Raptors for pretty decent xp. The nice part about the Nival Raptors is that, unlike their cousins elsewhere in Vana'diel, they do not Disease you, and instead their breath attack only Paralyzes. That means that you do not need a White Mage to party up here, since while Paralyna can be cast with a WHM sub, Viruna is still out of reach. >_< However, I wonder if like the other raptors, the Nival Raptors are weak to Water and strong to Fire. If these raptors are Ice based, shouldn't they be weak to Fire?

My next party later in the day was actually a 61-63 party, and they needed me as a RDM60 to tag along. We ended up going to Bibiki Bay, which I thought was fairly standard. However, we didn't go down to the camp with the five Hobgoblins. Instead, we went down to a small valley at F-6 and leveled off Tragopans, which are Bird mobs. Our party setup was also very good- we were NIN MNK THF BLM BRD RDM, and everyone did their jobs very well. All our kills other than the start of each chain were hovering at 180+ or 200+ xp, and in the scant hour and a half we were there for (I had to get going >_<), we got about 6-7k xp, except we lost quite a lot of it when the BLM accidentally cast Poison II on a Tartarus Eft by mistake. >_< Ah well, I wouldn't complain still. ^^

Later on, I joined an alliance to go do the Sleepga II quest in the Boyahda Tree. I already learnt Sleepga II, but I bought the scroll back when it was around 200k. When we left, the scroll was selling for just under 800k and was even sold out! Still, the high price tag is understandable. The quest, entitled Searching for the Right Words, has no less than six prerequisite quests, none of which are particularly convenient to get done. >_< Four of these quests involve the tarutaru fortune tellers in Lower Jeuno, and the last two involve the candle quests in Upper Jeuno.

However, the storyline behind the Sleepga II quest is very sweet, and very cute! It's one of those storylines that make you go, "Awwwwwwwww!!!!", and that should be enough information for now. ^^ I'm definitely glad I got to see it. :D

Anyway, the final quest for the scroll involves fighting an NM Floating Eye mob by the name of Agas that is a forced pop from a ??? that only appears at night. The fight supposedly can be done with just one party of Level 70s, but we overcompensated and decided to bring down a 12-man alliance of 70-75s for the job. :P Needless to say, Agas went down pretty quickly. ^^


Upon defeating Agas, click on the ??? again to receive a key item, a Moondrop, which you then take back to the old woman in Upper Jeuno who also starts the quest. The resulting cutscene is again, very well thought out, and also very touching.../sniff ^^ *ahem* Anyway...I'll leave it to you to see it for yourself. ^^

Of course, I also felt really happy to get a scroll of Sleepga II as my reward, and now I'm debating whether I should hold onto it, or sell it now and realise the {money}! 750k+ is quite a lot of money, no? ^^

Finally, while the servers are on maintenance, I've also come across a very good discussion in the Allakhazam forums. The post deals with the impact of powerleveling, and whether PL'ing is actually ethical or not, and how it affects the game. It's well worth your time to at least skim through, and can be found here.

28 August, 2005

Blitz Buffalo

The M.H.M.U. have cooked up another fiesty event to entertain us all- this time, the moogles have magically transported the Buffalo all the way from the Uleguerand Range down to the cities on Vana'diel, and it is up to many willing adventurers (such as myself) to try and conquer these beasts!

The Reward for this particular event is a Level 1 belt called a Red Sash that has Enmity +1, which I imagine would come in pretty handy when I go about leveling my Ninja. To be honest, I'm not sure just how much a difference +1 Enmity makes, but for now, I can't really think of any alternate Waist pieces that a Ninja could otherwise use.

What happens in this. Somewhere in either East Sarutabaruta, South Gustaberg, or West Ronfaure, a Buffalo named Toro will spawn. He does not aggro, but when attacked, can charge very quickly. He also incidentally has a lot of hit points. >_<

The good news is that he does absolutely no damage to you. After all, this is a common event, and thus a Level 1 newbie needs to be able to complete this event. All his attacks, if they connect with you, just knock you back quite a long way away, and in fact, I found this to be a rather handy way to run back to Windurst faster, with the Toro pushing me in addition to my running. ^^

The bad news is that if you anger the Toro too much (by dealing about 100 or more damage), his charge can be particularly effective, and throw you back to some place random. By that, I mean he can knock you all the way back to a random zone in one of the three cities, or even your homepoint! Poor Aka found out the hard way when he airhsipped down to Windurst for an LS picture (more on that later), engaged a Buffalo, then got knocked back all the way to Jeuno. >_< Toro is also immune to all status effects, so Stun, Bind, Sleep, and stuff like that don't work.

To make things more interesting though, sometimes, an HQ version of Toro can spawn. This tougher Buffalo, named Miura, has more HP, and may be more aggressive in his behaviour, and knocking people back. I once chanced upon Toro in Gustaberg when I was randomly down there, but when I heard about Miura, I wanted to try and get him instead. After all, the Reward for defeating Miura is not a Red Sash, but a Dash Sash which is basically a Red Sash +1. The Dash Sash adds Enmity +2, which is looking very good for a Ninja right about now. ^^

Anyway, I was headed down to East Sarutabaruta to take part in the LS photo, when guess who happened to be just outside the gate to Windurst Woods? ^^


It took a while to kill him. >_< The good news is that even if he appears purple to you, everybody can engage and attack him. In all honest truth, beating the buffalos is actually quite easy. They are too fast for you to run away from, so all you have to do is drag the Buffalo all the way to the city zone line, and then engage there. I'd basically Thunder IV Miura, then quickly run and zone into Windurst, then zone back out to repeat. Since I lost aggro upon zoning into Windurst, I am free to launch another Thunder IV nuke at him uncontested. But like I said, he has a lot of HP, so I can imagine this would be quite a sight for all the new players out there who have yet to tackle something like this. ^^

Upon defeating the Buffalo, a ??? will pop where the Buffalo fell. Quickly click on it to receive your reward- the ??? will disappear quickly, although whether the ???'s duration is determined by the number of people who click on it, or by length of time, I do not know.

Anyway, onto the LS picture. Simply put, due to real life issues, Lucifa, a member of TrueRune, is forced to quit playing and this was basically our way of saying goodbye. Harkening back to our picture back in the Ru'Lude Gardens, we didn't have as many people turn up for this picture, since by now, quite a lot of us had other endgame stuff to take care of, whether it be HNM, a Kirin fight, or other sky events. Still, some of us managed to make the trip, and after some arranging, posing, and what-have-you, we ended up getting a screenshot for Lucifa to remember us by.

Here you go Luc, take care and good luck in whatever you end up doing!

21 August, 2005

Jormungand! {Run away!}

Keeping with the theme of bumping into outrageously hard HNMs, I decided to tag along and join in BBQGold's run at Jourmungand today.

Actually, that's not quite true. As it turns out, I have a few friends in BBQ, and so when I logged on and looked at the friendlist, I was wondering what was going on at the Uleguerand Range, so I decided to find out. Upon hearing that they were going to try Jormungand, I asked if I could tag along for fun. As a Black Mage, well...

Onekomaru>> we can always use more blms ^^

So I found myself soon switching over to my Black Mage gear, and hoofing it up to the top of the Uleguerand Range. Fortunately, Jormungand is just next to where the King Buffalo camp is, so I knew the way there. And the map didn't hurt, either. ^^ Sure, I was a little reluctant to put on an endgame linkpearl on, seeing as how I make my disdain for endgame drama rather obvious, and I haven't popped into BBQ for a long time because of that, but I guess I can let that slip for one fight...

Anyway, I was going to be part of the adds alliance. The thing about Jormungand is, as if he wasn't hard enough alone, the place where you engage him is literally swamped with all sorts of aggro- Bombs and Ice Elementals, all of which are VT-IT to a Level 75, and all these are on a 5-minute repop. Needless to say, there needs to be some way to efficiently dispose of all this extra aggro, which is where the adds alliance comes in.

The main alliance seemed to be comprised of three parts- the tank party (where all the Ninjas and support are), the damage party (this, I'm not sure of- I imagine Summoners), and the Black Mage party, whose job it is to MB on the various skillchains, and keep a good Stun cycle up. Communication is important here, since skillchains are the only real way to make a dent in Jormungand's armour, and so the BLMs need to know in advance what skillchain the melees will be making.

The adds party consisted of about eight BLMs, with the requisite RDM and BRD support for mana regeneration. We also had some melee, whose job it was to pull aggro from the main alliance over to us. For obvious reasons, we camped well away from the actual fight, actually further down the valley towards the big slope, so we couldn't actually see what was going on, and just had to listen in to the "news" to get an idea of what progress was like.

Our first attempt went pretty smoothly, I think. With enough BLMs, we could easily take out the adds quickly enough to avoid things getting out of hand. Some care needed to be taken to make sure that the bombs don't Self-Destruct (the Ice Bomb's version is called "Hypothermal Combustion"), but that rarely happened. Sometimes, we'd end up in a little bit of a sticky situation, but because we had so much firepower, we only had three mobs to deal with at any one time at the most.


Well, one and a half hours later, we lost the first attempt in the end, with Jormungand at 1% HP too. >_<

Several things can be attributed to this, but the most noticeable thing, I felt was everybody starting to panic when Jormungand's HP was in the last 3% or so. Everybody went on {Full attack!}, and all semblance of a system, of order, went out the window. The main alliance was crumbling, and so a call went in /linkshell to bring in all the BLMs from the adds alliance. Unfortunately, this was not done quickly enough, and by the time the BLMs from the adds alliance were actually put into the main alliance so we could cast something on Jormungand, the magic aggro had caught up to us again, and we were killed before we could get any nukes off.

Granted, Jormungand starts going berserk at 20% HP, and by the last 2%, he starts spamming more and more AoE, including the dreaded Spike Flail. The battle, lost, it was time to start picking up the pieces, and try again.

Given that the last attempt took only an hour and a half, we figured a second attempt wouldn't be too bad. Besides, several members were getting rather adamant about beating him tonight. After all, it would be a waste to come here, get him to 1%, and walk off, no?

They should have just gone home.

The second fight took about four hours before we, once again, lost with it being around 5%. This second fight, was a disaster in my opinion, and showed almost a complete disregard for what mistakes were made in the first fight.

We made some improvements though. Noticing that the "swapping in adds BLMs into the main alliance" was taking too long (and the main alliance's leaders might be dead at the time), we decided to let the main alliance wipe at say, 1% like the last time, and then when Jormungand turns yellow, have the adds alliance "claim" it with a few Thundagas. A good idea, but unfortunately, one that we weren't able to test in the end.

The mistakes in the second run were rather numerous. I'm not sure about the main alliance, but from the adds perspective, first of all, people were getting sloppy. There were numerous occasions of Hypothermal Combustions, due to lack of Stuns. Overall, our failure on the adds side can be attributed to a lack of co-ordination (the multiple "NUKE NOW!!" calls didn't help- a time is really needed since people need to react and stand up to nuke), a lack of co-operation (despite times being called, only one or two BLMs started nuking), and a lack of concentration (There were so many things that could have been Stunned to make things easier, but people just weren't watching. That, and BLMs were starting to nuke the wrong target, despite the correct one being pointed out.)

Furthermore, another noticeable difference was a very distinct drop in power. Three BLMs had to leave during the course of the second fight, and by the end, there were only five of us left to do the nuking- and just three of us were BLM75. While a 3-man BLM party can easily take out a bomb here, or an Ice Elemental there, they cannot kill the adds fast enough to keep the main alliance free. That, and the reduced firepower meant a larger mana output for the BLMs, so when push came to shove, we did not have the mana to kill the adds anyway. What resulted in the end, was a buildup of mobs being brought over to the adds alliance, to the point where, handling eight mobs at once, we were in serious trouble, and had to call on the main alliance to help clean up.

In lieu of that, I'd definitely put at least six BLM75s in the adds alliance, simply because with Thunder IV and Blizzard IV available, it is the higher level BLMs that can do the significant amount of damage needed to clean the adds quickly, and efficiently, MP-wise.

When the call came for the adds party to go "claim" Jormungand, I was rather shocked at what I saw. Jormungand still had a lot of HP left- somewhere around 5-7%, and I could not fathom how three BLM75s could deal enough damage to kill it. It didn't matter in the end since I never got the chance to nuke. Wary of Spike Flail, I ran to the front of Jormungand to cast my Elemental Seal'ed-Thundaga III. However, somebody decided to turn Jormungand at that moment. -_-

Long story short, Jormungand turned, he Spike Flail'ed, and I took about 1500 damage and died. >_<

I Reraised to try and nuke again, but this time, Jormungand was in the air, and I was hit by some collateral damage and then died again, although if I had time (and mana) to Stoneskin up first, I might have been able to get a nuke off. However, in my weakened state, I only had enough mana for one nuke, so went for broke.

Overall, I still have to say fighting Jormungand was quite an experience, although I would've much rather been in the main alliance, for the kicks, despite {death} being handed out to you like flyers on a busy street. I still think people losing their cool had a lot to do with their ultimate loss in the end, but there were also some setup issues that needs to be fixed. Hopefully they (and others) will learn from what happened here to take down Jormungand the next time.

As for myself and BBQ, well...let's say there was quite a lot of behaviour going on that I didn't particularly take a liking to, especially when Kitsume popped down to watch, not to mention the general feel of the whole LS. I understand that Kitsume's relation with some of the members of BBQ isn't terribly ideal, but some of the things they were saying were really quite childish. >_< Maybe it's time to take a break from the endgame once again?

17 August, 2005

Dynamis Lord! {Run away!}

It seems that Explorer has decided to dedicate all their Thursday runs to farming the various ice zones of Dynamis, namely Dynamis-Beaucedine and Dynamis-Xarcabard. On a more personal level, that unfortunately locks Akanea, who had wanted to join Explorer, out of the linkshell more or less, since he cannot attend the Sunday runs, where we take on the four basic cities.

Since we also largely lack the resources to clear Dynamis-Xarcabard, recently, we've taken to just farming the Dynamis-Beaucedine and Dynamis-Xarcabard zones for people's AF, which I certainly can't complain about, especially if it gets me one step closer to a Sorcerer's Petasos. In fact, one Petasos (our first, I think), even dropped in tonight's Dynamis-Xarcabard run! Now, only another eight more to go before it's my turn...-_-

Surprisingly enough, we actually managed to clear the whole zone, with about fifteen minutes to spare. With that, we decided to engage the Dynamis Lord, the {Mega Boss} of Dynamis-Xarcabard, and all the Dynamis zones for that matter, just for kicks. We knew we didn't stand a chance against him, since he normally requires a full 64-man raid with multiple RDM/DRKs on Chainspell-Stun duty, and enough firepower to make the Tu'Lia gods weep.


At the end of the day, after many weaponskills, Elemental-Sealed nukes, attacks, and what-have-you, we, as a linkshell had managed to deal a grand total of ZERO damage to him. I thought I knew the general outline to defeating him, but now I haven't the foggiest idea.


Maybe he has some riduculous form of Stoneskin up that we needed to take care of first before we could even start work on him. But flat, outright resisting nukes and other assorted magic is just wrong! >_< Did I also mention that he has permanent Chainspell on as one of his traits, and can create clones of himself?

Actually, I'm not sure just what the clones have to do with things, since we were kicked out of Dynamis soon after, but the Chainspell was our downfall. Despite our RDM/DRKs activating Chainspell and going berserk on Stun, one Stun got resisted. Of all things, he then decided to cast Sleepga, sending pretty much the entire linkshell to sleep. One jump from him and a smash from his great axe later, pretty much all the mages were killed. >_<

It was fun to at least see the Dynamis Lord, even though we were probably the equilavent of little mosquitoes against the likes of him. Someday, if we ever expand, we will take him down. But until then, it's more AF farming for us. ^^

On one last note, at least the sight at Xarcabard was rather funny after we were booted from the zone. ^^

A Stuntaru- Duo'ing Mission 5-1?

Yesterday, I mentioned about a little something Faeyth had come over to try and do. Well, this was it. We were going to attempt to duo the Rank 5-1 mission.

For those who need a bit of a refresher, this mission involves a Level 50 capped BCNM fight in the Qu'Bia Arena, against one main boss- the Archlich Taber'quoan. Alongside him, are two Ancient Sorcerers, and a multitude of lesser Ancient Warriors to make things more interesting.

Grendal, one of the more well-known Red Mages in the FFXI community, had managed to solo this BCNM fight some time ago, and the video he made of his attempt was inspiration to Faeyth and I to try something similar. However, Grendal's accomplishment was done before the patch that removed all of one's buffs upon entering a capped BCNM fight. Because Grendal was already very pushed for time when he was able to bring his buffs from outside, in, it was soon said that 5-1 was now impossible for a Red Mage to solo, simply because of time constraints.

However, duo'ed on the other hand...^^

The plan was simple. Faeyth and I would buff up, then Sneak and go to a separate Ancient Sorcerer each. Then, at the same time, we'd Chainspell, and spam the bejeezus out of the sorcerers with Fire II. Once they were dead, I'd focus on meleeing the Archlich Taber'quoan while Faeyth assisted me by taking out all the Ancient Warriors that would spawn and join in to help their master.

At least, that was the plan.

We ended up buying and borrowing a bit of gear for the task. I purchased a Brigandine (NQ) and two Ametrine Rings for the dexterity bonus, and also managed to borrow an Empreror's Hairpin off Opticon for the fight. With some Hi-Potions at the ready, we soon ran off to Fei'Yin and the Qu'Bia Arena for the battle, dragging Nappycat along for the ride, who, also needed 5-1 done and wanted to watch.

All was well at the start, and after buffing and resting, the Chainspell-Fire IIs took out both Ancient Sorcerers with little trouble. Actually, Faeyth, being Mithra, didn't quite have enough starting mana to take out one Sorcerer without needing to Convert, but myself, being Taru, had enough mana left in me to Fire II a couple more times after my Sorcerer was dead, so that was settled quickly.

I then went on to take on the Archlich himself.


What can I say, this took a while. >_< Looking back, we definitely needed more practice at this fight, since there were multiple points during the fight that were rather clumsy. Faeyth couldn't target the Ancient Warriors in time to save myself the damage, while myself, being in a different state of mind, would occasionally forget certain things, like reapplying Enfire and Blaze Spikes. I even went through the first half of the fight forgetting Haste! >_<

In the end though, we lost. We ran out of time and were then kicked from the battlefield as a result. Good thing too, since by that point in time, I had just fallen to the Archlich, and Faeyth was already trying to make a break for things. Good timing too, I might add. ^^

We took another look at Grendal's fight to see what gear he had on though, since we felt we were hitting for very little damage. What resulted next was rather...embarrassing. >_< We had completely the wrong setup of gear for the fight. While I was with Dexterity and Evasion to increase my hit rate and survivability, Grendal was all +Attack and +Strength. Most important of all, our swords made a huge difference.

We were trying to poke the Archlich with two Buzzard Tucks, mostly due to the Enspell enhancement the sword has. However, Grendal was with a Knight Sword +1, which in combination with his other gear, ended up dealing twice as much damage as our swords. Seeing as how we had managed to get the Archlich down to just under half his life, the extra damage could have very well won the fight for us. Ah well.

The buffing and resting time was also a problem in the fight. I think what might be better would be to activate Chainspell, put only the essential buffs on, and then go on with the Fire II spam. Mana conservation is very important here, to the point where I'd go with Yagudo Drinks over Refresh, just because Refresh takes both mana, and more time to cast.

Hopefully with these lessons learnt, our next attempt (whenever that'll be) will be successful! ^^

15 August, 2005

Paragon of Red Mage Excellence

Today was the day my friend Faeyth, and I set out to get the Warlock's Chapeau, better known as "the pimp hat", for good reason- that hat just looks awesome! ^^

Faeyth is a real life friend of mine, and so, he came over to my place (in preparation for something we'd try tomorrow) and we basically ended up playing the night through. Eventually, we managed to get help from some of TrueRune to go down to Fei'Yin and the Garlaige Citadel to take on the Red Mage AF3 quest, including Opticon, who, of all things, decided to go as WHM/NIN. -_-

The problem with this particular quest (at least, the first part), is that Miser Murphy in Fei'Yin is only spawned when a Red Mage with the quest activated zones into Fei'Yin. That meant, in short, that I could not go as my Black Mage. Fortunately, Misr Murphy was also rather easy, and with the help of Opticon (WHM/NIN) and Katoke (THF/NIN), we took Miser Murphy down twice with not too much trouble, although there was the occasional hairy point here and there. ^^

With Miser Murphy defeated, it was now time for the main fight- the Guardian Statue in the Garlaige Citadel. While Faeyth and I ran down to San d'Oria to activate the second leg of the quest, Ncloud (BLM) and Chummy (SAM) came down to help, and it's a good thing they did as well. Also, I could now go back to Jeuno and switch over to my Black Mage to make things easier for us, and a good thing I did, too. >_<

The fight would take place in a small room literally behind the first banishing gate There are some Oaken Boxes in that room, which area all sealed tightly, and need a Nail Puller to open. Which just so happens to drop off the Guardian Statue that you pop when you first click on the box,


We were confident at first, until we soon figured out that the Guardian Statue is incredibly resistant to magic, to the point where all nukes have their damage cut by 50%, and stuff like Dispel and Stun were all resisted. Things got worse when the Guardian Statue started using one of his special moves, Typhoon, with greater and greater frequency. It's an AoE knockback and Stun move that deals about 200-300 damage to everybody, and with things going haywire, Typhoon was starting to become a real pain.

Sure, one Typhoon could be countered with a Curaga II, but as he started using it more and more, we had a very real chance of losing the fight. That, and the undead started aggro'ing on us because of our low HP. Fortunately, we managed to pull through in the end and defeat the Guardian Statue, getting me a nail puller by which to open the box.

The contents of the box...were not the most pleasant thing in the world. Somebody had killed Rainemard, Curilla's Red Mage father, and locked his remains in the box. No wonder his spirit was not at peace. >_<

We killed the Guardian Statue again for Faeyth, before heading down to San d'Oria, where a surprise lay in store for us as soon as we zoned into Northern San d'Oria. The evil that was out to twist Curilla against Prine Trion was taken care of, thanks to Rainemard's spirit arriving just in the knick of time to save the day, although I'll spare the fine details for those who would like to find out more about the Red Mage storyline for themselves. ^^

However, as appreciation for what we had done for him, Rainemard left us a small token of thanks, which, at least to us, wasn't really such a small token at all. ^^

Behold! The pimp hat! :D


(Now, to actually level up my Red Mage so I can, you know, wear it. -_-)

Darkness Named

Oh yes, Darkness has a name. And it is called...


Yep, it's that time. >_<

We decided to plan for today to continue onwards through the Chains of Promathia storyline. While Riverne Saite #A01 was the last really trying BCNM fight, this next fight would take the cake.

For completeness's sake, I'll just gloss over the prepatory work, which involves killing an NM Malboro in Carpenter's Landing, and another Antlion NM, then climbing a mountain in the Attohwa Chasm (which, by the way, is actually quite fun ^^). All this was setup leading up to our introduction to Pso'Xja, for what Allakhazam refers to as CoP 3-5, otherwise better known as the Diabolos fight.

First off, one must gain the Tenshodo's approval to enter the inner realms of Pso'Xja. That requires farming some chips in Pso'Xja to bring back to the Tenshodo in exchange for a key item pass. The chips are found in three different places in Pso'Xja, but the easiest (for us, at least) was farming the Diremite Assaulters in one of the uncapped areas of Pso'Xja. The particular entrance we went to can be found at F-7 of the Beaucedine Glacier. From the entrance, make a turn right, where you will find a small, square hole, and drop down to find Bats and Diremites. These all have a chance of dropping a coloured chip, and the drop rate is high, so this isn't particularly difficult.


The mobs here con Decent Challenge to a Level 75, and while there are three different coloured chips, each person only needs one of the three to gain access. Florid Stones also drop, but those were for the ENM fight, so we didn't bother with those. ^^

Then came the hard part. Diabolos.

All in all, we tried a grand total of eight times before finally beating him, and even then, we only just managed to beat him by a sliver. As you may know from reading other sites, Diabolos has multiple abilities, such as Phalanx, and a multi-Absorb-stat move. However, what really makes Diabolos hard is a particular move of his called "Nightmare".

What Nightmare does is put everyone in the party in a deep sleep, one that poison, or other DoT effects do not wake you up from. Not only that, Nightmare comes with an incredibly lethal Bio effect, that drains 20-22hp per tick! In case you didn't notice it earlier, I'll reiterate this part: This Bio DoT does not wake you up from Sleep! Not only that, the affected area is essentially the entire battlefield, so there's little chance you will be able to get out of range to avoid Nightmare, although it certainly is possible.

To give you an idea of how silly Nightmare can be, on one of the attempts we did, Diabolos decided to use Nightmare really early into the fight. In fact, we hadn't even gotten into position (more about this later) before Diabolos used Nightmare. And there I was, with Barsleepra and Stoneskin on when Nightmare hit me. When the Bio finally killed me, I still had not woken up from the Sleep effect of Nightmare. It is that silly.

That being said, it is very important that one party member be able to Cure another. Even then, the problem then becomes trying to cope with the Bio effect, since there is just not enough time for the White Mage to Erase the Bio off everyone in the party, especially if another Nightmare just sets everyone back to square one.

However, Nightmare can be stunned. The window might not be terribly long, but there's a long enough pause for anybody to jump in and try to interrupt it. Dark Knights are clearly the best job for the task, especially since a DRK is the only job within the Level 40 cap that can cast Stun. Samurai can use Tachi: Hobaku, while any melee with a Sword can Flat Blade in an attempt to stop it.

Stunning Nightmare is of paramount importance. Forget stuff like skillchains and all that- save TP for stunning weaponskills, and use Meditate, Meikyo Shisui, or Icarus Wings to make sure your melee are always ready to Stun that Nightmare when Diabolos readies it.

Sometime during the fight, Diabolos will also take away some parts of the floor! Should you then go off the edge, you will fall down to the bottom floor where six Diremites will be more than happy to take care of you, so that's a sure death. To make matters more interesting, Diabolos also has a knockback move which, if you're positioned badly, will promptly knock you off the top floor, down below, end of story.

There are only a few possible patterns in which the tiles are removed. Long story short, there are two (actually) three safe "tiles" on which to fight on. When you enter the arena, you will notice that the battlefield is essentially a 5x5 grid. The two safe squares are Diabolos' starting square, and the square directly opposite Diabolos. Put melee on one square, mages on the other. Simple.

Our party at first was myself (WHM), Akanea (SAM), Saoirse (THF), Ksayyah (SMN), Skurlover (RNG), and Moonbeam (PLD). Having no stunners, we tried, and failed all four attempts we made before calling it a night. We did learn that Akanea's Tachi: Hobaku would prove to be very important, and we also learnt that Diabolos is actually quite easy to enfeeble with regular spells, like Silence and Slow. Paralyze, in particular, seemed very useful against him. Despite all that, one Nightmare from Diabolos can easily lose the battle for you. >_<


After giving up, we decided to try again the next day, except this time, since Moonbeam couldn't make it, we swapped him out for Tesutamento, who was nice enough to come on his Ninja. Once again, we wiped three times because of Nightmare, before the last time in which he did not use Nightmare until fairly late into the battle, which Akanea was then able to successfully stun with Tachi: Hobaku. The next Nightmare resolved though, and suddenly, the fight was on the ropes.

We were so close to beating him that time too, it was one of those "now or never" moments. Two hour abilities started flying all over the place, and in retrospect, I don't think the fight could have been won if it weren't for that. Granted, I only noticed one Searing Light go off, and Meikyo Shisui was integral at keeping Diabolos at bay, while I made a last-ditch effort at a Benediction to keep the other party members alive after Tesu bit the dust. Eagle Eye Shot...um...missed. >_<

When Diabolos literally had just one line of health left, I decided to go all the way, and activated Reraise to toss one last Cure onto Akanea and Dia Diabolos one more time. I was completely spent at this point, weakened, and with no health or mana to contibute. Thankfully, Saoirse managed to get in a SA'ed Viper Bite for the kill, and there was much rejoicing. ^^


Heh. We (those lying face down) were grimacing at how close the battle was, and were literally spamming the party chat with "{death}{You can have this.}" and "OMG!! KIILLLLL!!!!!" Suffice to say, we were very relieved to have won. ^^

To those of you out there who have yet to attempt this fight- I strongly recommend the following. Do a dry run first, just to get used to what the battle is like. Try to have a Dark Knight if at all possible, and keep him Hasted to reduce the Stun recast. Have melees with a weaponskill that Stuns bring an Icarus Wing to make sure they are prepared to Stun Diabolos when the time comes. Everybody, including mages, bring multiple Hi-Potions. Yagudo Drinks are a must for mages.

White Mages, keep Stoneskin up. Any time you can buy yourself in the event of Nightmare is very valuable, and Stoneskin could very well make a difference. Also Barsleepra also helps shorten Nightmare's duration. Regen is a buffer against Nightmare as well, although since it wears off quickly, it's not exactly the most practical of precautions to take. I'd Regen yourself and the tank, and try fitting it on the other members as you see fit.

Make sure everybody is at least capable of curing themselves with Hi-Potions. Thinking about it, I would say that a Paladin tank is preferred over a Ninja tank, simply because Diabolos' physical attacks will wake the Paladin up from Nightmare first, and the Paladin is then free to wake the White Mage up with Cure. A plan against Nightmare is very important in this battle, so don't underestimate it.

Of course, you could have everybody bring in a Vile Elixir +1, but I don't think people are willing to risk that much money on one fight. ^^

In any case, it's onto the Level 50 cap series of the Promathia missions- good luck for those who have yet to attempt this!

10 August, 2005

Barely 18 Mithras!

It's amazing what can happen during a really, really long update. From my understanding, the folks down at SquareEnix are replacing their actual hardware, and so are taking a pretty long time getting everything set up again. Eighteen hours, to be exact. >_<

Fortunately, being on the Asian end of the planet meant that the update only started at 11p.m. for me, and having slept through about half of it, the wait wasn't as noticeable as say, those people down on the U.S. East Coast, or something like that. ^^

However, people have rather ingenius ways to while away the time before setting off to adventure again.

I don't know who decided to dig this up from the Windurstian Underground, or some San d'Orian bootleg factory (must be the Elvaans, for sure!), but that pervertaru of a Dragoon, Akanea came up and showed this to me!


That, and he's getting married. Hoo boy. Can't say I feel sorry for his {wife} though, she'll be sure to have a lot of {excitement} in the future...heheh.

*ahem* Sowwy...

In all seriousness though, Akanea and Saoirse are both getting married, and Akanea's asked me to be his chaperone! Not only that, Akanea has also invited me to be the best man at the wedding, standing alongside Sheldan as the bridesmaid!

Only problem is...I'm a girl taru, so... >_<

At least that's easily solved- I'll just wear a hat, like my Wizard's Petasos. After all, nobody can tell if a Taru wearing a hat is a guy or girl, rightaru? ^^

In any case, I will have to start organising and planning the eventaru soon. So far, the only things we've decided is that the wedding will be held sometime on a weekday in October, by the cliffs overlooking the Pamtam Straits in Sarutabaruta. We're going to invitaru as many guests as we can accomodate, so with just over a month to go, hoepfully there will be a date free, and then I will be running my taru legs all over Windurst picking up supplies and getting ready for this!

I think Akanea thinks he's really burdening me with organising the wedding, but I'm actually quite enjoying myself- it's an honour, and something new to do in this world. After all, there're only so many Robber Crabs you can kill before you go insane. >_<

On another note though, I've been feeling somewhat...burnt out as of late. Maybe I was leveling my Red Mage a littaru bit too fast, although my last party also might've done the trick. It was slow. Really, slow. Like, 2k xp/hr slow, but oh well. It's a little bit griefing to know that my Red Maging suffered as a resultaru, because I was nodding off because we we doing so poorly! Ah, maybe I've been spoiltaru by my other parties...

But playing has been getting a little tedious. I think it's time to reevaluate my goals and see what I would really like to do before calling it quits and going into retirementaru, and then actually go out there and settle it. ^^

The last time I felt this way was way back at the start of December. I actually made a list of things I wanted to accomplish in the game back then. Here it is again, just as a quick check on what I've done since:

1) Have a Lvl 75 Job. Got that!
2) Goldsmithing 100. Still working on this.
3) Go to Dynamis. Yep!
4) Participate in an HNM run. Yes. Of an interesting note, this was before I knew the difference between HNM and sky. ^^
5) Get BLM60. Kinda overshot. ^^
6) Defeat Fenrir. Rawr!
7) Attain Windurst Rank 10. And proud of it, dammitaru! ^^
8) Go through the Ru'Avitau teleport scene myself. ^^ Done that!
9) Whilst I'm in , complete “Divine Might” See here ^^
10) Get a good amount of experience with NIN/BLM at Level 60+ Ah, nope >_<
11) Get RDM60. Almostaru! ^^

Not too bad- of the eleven goals I set out to do, I've accomplished most of them, except for the more long-term goals, one of which I'm still working on (Goldsmithing), one of which is almost completed (RDM60), and one which probably needs some re-evaluating (NIN/BLM >_<).

Lots of things have obviously changed since then. I think while I'm in the spirit of things, I'd best redraw up my goals. Here they are:

1) Get San d'Oria Rank 10
2) Get Bastok Rank 10
3) Attain "Dynamis-Xarcabard Interloper"
4) Complete the Zilart storyline
5) Complete the Chains of Promathia storyline
6) Get RDM75
7) Goldsmithing 100 (still :P)
8) Defeat Ark Angel TT solo, with Red Mage. ^^

Those are the immediate goals that come to mind. ^^ You might have noticed that the shift in focus is very different now, and all of these new aims are a much more involved process. Of particular note is that very last aim of mine, to solo Ark Angel TT. 'Course, it might be a little difficult, since I've already beaten Divine Might, but I can probably get someone to let me into the arena to do it. Unfortuantely, while many Red Mages have tried, none have succeeded- not even the mighty Grendal, or Avesta, whose solo feats in Red Mage (and Black Mage for Avesta) were quite an inspiration. Ah well, I'll probably check up on these in a few months time to see how things go. ^^

08 August, 2005

Sorcerer's Sabots!

I'm not quite sure what possessed me to try and stay up until 4 o'clock in the morning to start a Dynamis-Jeuno run, but for some reason, I felt that I really wanted to go on this run.

Normally, I find it hard enough to stay awake for the duration of Explorer's Wednesdays runs, which start at twelve midnight and go on to around four o'clock, let alone actually starting at four and going on to around half past eight. >_< In addition, I had managed to talk to Elmas about letting in some of the TR members, and so far, Chummy and Akanea will be joining Explorer soon. Today's run would be Chummy's introductory run, and as usual, I was given the honour of initiating him and explaining all the LS rules and procedures.

When the run began, I was quite surprised at how brutally efficient our methods had become. Normally, we take our time through Dynamis, slowly and methodically taking out a few mobs at a time, but Elmas just kept asking Kitsume to keep pulling. Then again, we did seem to have quite a lot of new members, and quite a lot of Black Mages at that, too, so I guess our pace could've been quickened. Instead of going straight for the trigger NMs to spawn the Goblin Golem {Mega Boss}, we ended up clearing a lot of the mobs, including the Auction House, the center fountain, and even killed the respawns, so essentially went through Dynamis-Jeuno twice through.

For some reason, I also had first priority in lotting for BLM AF2, which in the case of Dynamis-Jeuno, are the feet, the Sorcerer's Sabots. Actually, Elmas (who is currently leveling up BLM) also wanted the boots, but he withdrew after he found out I also wanted them. (Maybe he realised I had yet to get anything out of Dynamis? >_<) Even still, given my absence, I was surprised none of the other Black Mages wanted their Sorcerer's Sabots, which are one of the better pieces of the BLM AF2 set. I can only assume they've already gotten them, leaving only me. :P

Unfortunately, BLM AF2 really seem to be one of the more scarce pieces, if you ignore that really strange run that dropped three (unfortunately, unwanted) BLM AF2s which I briefly touched upon here. Sure, we got Ranger AF2, Dark Knight AF2, Thief AF2, and even two pieces of Warrior AF2, but no Black Mage AF2! >_< As the run was drawing to a close, I was starting to get increasingly worried that I would not get my AF, never mind the fact that at this point in time, the sun was starting to rise, and I was finding it harder and harder to stay awake. >_<

When we eventually defeated the Goblin Golem to officially clear Dynamis-Jeuno, Black Mage AF2 still hadn't dropped. Normally I would call it quits there, and after the obligatory おつかれさまでした~s (Grammar note: Does that even work?!), warp back home, especially since at this point, I still hadn't slept and it was eight o'clock in the morning. Trust me, that bed looked very tempting. >_<

However, I figured this run might as well not go to waste, and stuck around for a little more, hoping that the sabots would drop.

Of course, by the title of this post, one can tell that I did not stay on to regret my decision. For soon after the Goblin Golem died and we started farming the extra pops, what dropped but my Sorcerer's Sabots? ^^

Tuufless: !!!

Trust me, the jolt from seeing the Sorcerer's Sabots drop would put any cup of Expresso to shame. ^^ I felt so happy when I saw it drop- it would be my first AF2 piece, kind of like proof that all this work I had put in would not go to waste. At least I got something for all my efforts in the LS. And it is really is a nice piece of equipment at that, too:


Granted, its power is a little subtle, but from my understanding, the main attraction here is the "Converse MP +5", which granted, is still a mysterious stat, since while everybody knows it helps conserve mana (d'uh!), nobody really knows how it works. However, I've heard that the boots really do make a difference over extended periods (such as, during BLM parties), so I'm happy I got them. In fact, there's a lot of debate over which is the best BLM feet out there- it's either the Sorcerer's Sabots, or the new Rostrum Pumps. I've heard that the Sorcerer's Sabots are the best feet piece for Tarus, but the stats on the Rostrum Pumps are simply insane: -30HP, +30MP, INT +3, MND +3, and enhances "Fast Cast"? Sign me up! The Fast Cast enhancement apparently is no laughing matter either, some Black Mages with the Pumps say it reduces the recast time of Stun down to a mere 25 seconds, which is KING! Unfortunately, I probably won't get a pair for myself without an HNM linkshell of some sort, so I'll just have to imagine it for a bit. ; ;

My last comment deals with an increasing concern for how things are being run in Explorer. First off, because of Starfox's mishap, Starfox more or less chose to quit Explorer, but letting Elmas know that he would like to come on one more Dynamis-Jeuno run. Well, he was denied that, even though he has some points left to spend. Apparently, Elmas removed his name (and his points) from the LS roster, and even called Starfox opportunistic. I have to admit, Elmas is a little...dry in the people relations department, but still...

The other comment is once again about dropping AF. Kitsume and I both strongly oppose throwing away AF, since people come to Dynamis for their AF. Sure, you have a few people here and there who are also after the ancient currency to upgade their relic weapons, but for the most part, AF2 is the main attraction. That being said, the vast amounts of AF2 we throw away really make Kitsume and I feel like we are wasting our effort trying. Of the six pieces of AF that dropped in this particular run, only the Ranger, Black Mage, and one Warrior AF were picked up by members. Yes, that's right. We threw away half of the AF2 that dropped today.

As I put it to Kitsume, "In a linkshell with twenty Black Mages, throwing away three pairs of sorcerer's gloves just feels wrong" (once again, referring to my last Dynamis-Windurst run). I still feel the rigid point system has something to do with it, and if I ever follow through with my plan to split away with Explorer and organise my own run, I'll definitely keep that in mind.

It's too bad. I've grown to quite like some of the people in Explorer. Frisk is my huggy-wuggy Galka whose lap I always sit in, and a lot of the other members, like Lostman and Ageale are very friendly with me as well. Oh well, we'll see what happens...

...I guess. >_<

06 August, 2005

Spoilt Red Mage ^^

Granted, the following doesn't happen very often, but it's a rather amusing look into just how easily a Red Mage or a Bard can waltz into a ready-made, good-to-go party setup in...well, take a look for yourself:


I've encircled the relevant parts to take note of.

Yes, that is two separate invitations within seconds of logging in. Granted, they were from the same party, but still, it's quite astounding what the demand for a MP refresher can be. I'd imagine BRD75s come across this quite often as well. Come to think of it, I don't recall ever seeing a Bard seeking for more than five minutes at 75.

It's also quite scary to think what might've happened had I been someone else, maybe one of those Red Mages who really disgrace all that the job can do. You know the type I'm talking about. :P

Anyway, I'm glad I accepted. The party setup was NIN THF DRG RDM SMN BLM, between 45 and 48. We weren't quite sure where to go- both Rumble Crawlers and Anticans in the Crawler's Nest and Quicksand Caves were taken, when Katoke suggested Garlaige Citadel.

I have to admit, I was a little skeptical at first, since the Chamber Beetles are good to Level 51, which really is a tad too high for our party's level, especially since it was the BLM who was Level 45, so she'd encounter a whole lot of resists. In the end though, we went on the premise of "might as well find out", and I'm glad we did.

We were the only party there, camping at the bottom of the steps in the Garlaige Citadel basement. We started off a little clumsy, with Chamber Beetles really being a little too hard for us to take on with any regularity, so instead we focused on killing the Funnel Bats instead, which were much easier to deal with, and occasionally throw in the Chamber Beetle or two for a nice xp boost.

How nice, you say? Well...


^^

That wasn't the only time we hit the insane xp numbers. At least three chains ended with a finishing mob of 250+xp on the last kill, so we were quite a happy party. That, and the fact that we were the only ones in the basement probably helped out a lot there, too. ^^

Anyway, this party was also the first time I had partied with a Summoner in a long while, and from a Red Mage's perspective, the addition of a Summoner really changes things. Even down to positioning, I found myself endging closer and closer to the mob so as to gain the benefits of Garuda's Hastega. That, in turn meant that melee'ing was a more viable option, especially with both Katoke (NIN) and myself covering the basic enfeebles. I meleed a lot that fight- my Sword skill actually went from 115 to 120. :D

In the end, I got two levels in that party, and I am now sitting very happily at RDM49. Just a few more levels to go before I get to re-equip my beloved HQ Staves collection. Definitely looking forward to that. :D

For future reference, I don't see too much problems with a 45-47 party coming down here to xp off the Funnel Bats, if they are good. Later on, as party members approach 49, and especially 50, the xp gained from Funnel Bats take a severe hit, and that's when to start focusing on Chamber Beetles instead. Good to keep in mind for future reference. ^^

03 August, 2005

Charybdis {Found it!}

Today was one of those days that I just randomly felt like being helpful, for one reason or another. I'm not sure what it was, but after starting out the day wiwth some heavy duty crafting-related stuff, I eventually get called over by Masasume, who unfortunately...well, died.

He and Monstar were busy hunting damp Hakutaku Eyes all the way up in Ifrit's Cauldron, and evidently, something went wrong, and so they needed a Raise. In the end, I figured I'd head down to the Cauldron anyway, since the bombs surrounding the Dodomeki also drop a Cauldron coffer key, and I'd certainly like to get my maps collection underway. ^^

What I did not expect though, was getting entangled in a chain of events that would last the entire day.

FIrst off, was the matter of the two eyes that both Monstar and Masasume needed, which as anyone can tell you, needs more than a smile. Eratosthenes and I were both down as well, and we were after coffer keys. The first eye and key dropped in relatively short order, but the second took ages to show itself. In fact, I even managed to take a break, go out for lunch, get some errands done, log back in, and still find them there, although thankfully, they only needed the second eye then. >_<

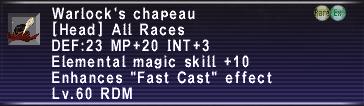
After the eyes, Monstar expressed that he'd like to start recon on getting a Joyeuse for himself. For those who do not know, the Joyeuse is a 
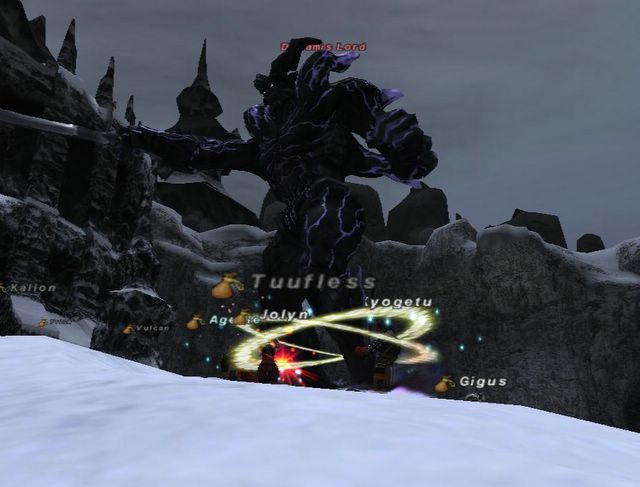
very sweet sword that Paladins and Red Mages can equip. Unfortunately, the only way to get one (it, being RA/EX) is to kill an NM in the Sea Serpent Grotto named Charybdis, who, while isn't on HNM level, is still a pretty tough fight. Charybdis is a Sea Monk tyle mob, on a 8-12 hour lottery spawn on the various Devil Mantas that spawn in the same room as he. There was no way Erat, Monstar, and I could take out Charybdis with just the three of us, so we decided to head down and just get the time of death so we could come back the next time more prepared.

When we got to the camp, there was already one Japanese person there by the name of Asyuu, camping. His search comment indicated that he was after a Joyeuse, and for a moment, we were quite disappointed. I'm not sure what NM rules dictate, but I've heard that, out of respect for those who have been killing the placeholders, the person who gets to the Sea Serpent Grotto first usually has right of way with Charybdis. After some conversation, I determine that whiel he is alone at the moment, he has called friends who are ready to rush down to the Sea Serpent Grotto, and so, they can handle it.

It's then after some checking with Monstar that I offered to help him out with camping, even giving him the Joyeuse should we manage to kill Charybdis.

It took a while (mostly because he was a little in disbelief ^^), but I explained to him that I only wanted the time of death. That, and some of his friends started trickling in, starting with Bebelly, who apparently recognised me! Actually, his name was initially familiar to me, but I just couldn't place where I've met this taru before, but he soon reminded me as being one of the members of ZenryokuZenkai, the {sky} LS which I randomly helped out with once. Good to see random helping has at least gotten me somewhere. ^^

And so we start killing Devil Mantas. And killing. And killing some more. In fat, it took so long that Monstar actually managed to fall asleep at the keyboard for a few hours, and when he finally woke up again, Charybdis still hadn't spawned. >_< I'm not sure just how long we were down there for, it must've been around three hours, just killing the Devil Mantas (which are on a 15-minute repop), and the occasional Sahagin outside when we got bored.

To make matters worse, another linkshell started coming in towards the end. I suppose they knew the ToD, and I can see where the drama comes from- it's really disheartening to see hours of your own work go to waste when some random passerby comes along and takes your NM.

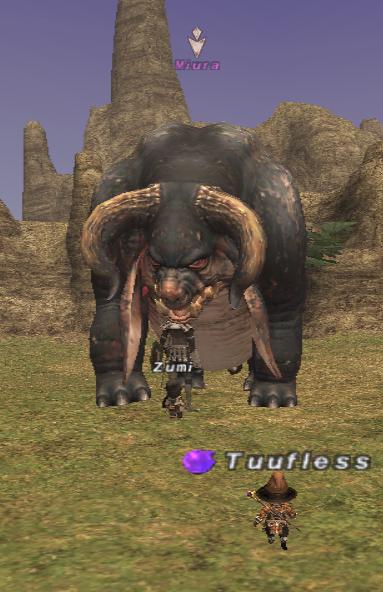
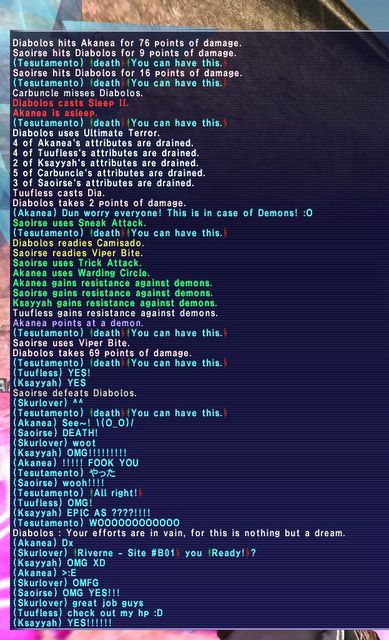
Soon after, one of the members starts counting down the seconds, and I have no idea how he knew, but just as he hit 0, guess who popped up right in front of me? >_<


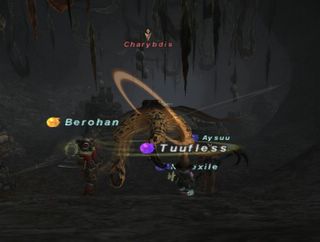
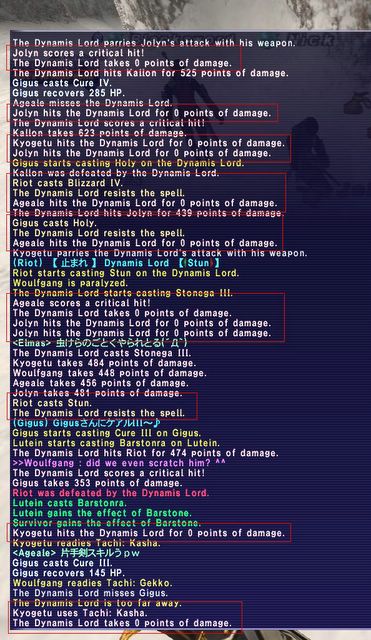
I got to see firsthand what the update did to the claiming system. I couldn't claim Charybdis by Stun- just nothing happened. That left our Paladin, Berohan to take it about a second later, with Provoke, and Charybdis was claimed by us.

Unfortunately, out of anticipation of competition, we were grossly underprepared for the fight. It didn't take long before Charybdis had managed to kill most of us, and soon it was just Neoexile (BRD), Bebelly (NIN), and myself trying to kite Charybdis around while we kept the linking Devil Mantas slept. Unfortunately, we didn't have a RDM (I had Warp II'ed Monstar, who had _just_ woken up and was rushing down here as fast as his taru legs could take him) and with no Gravity, it was, suffice to say, pretty darn hard to kite Charybdis. >_<

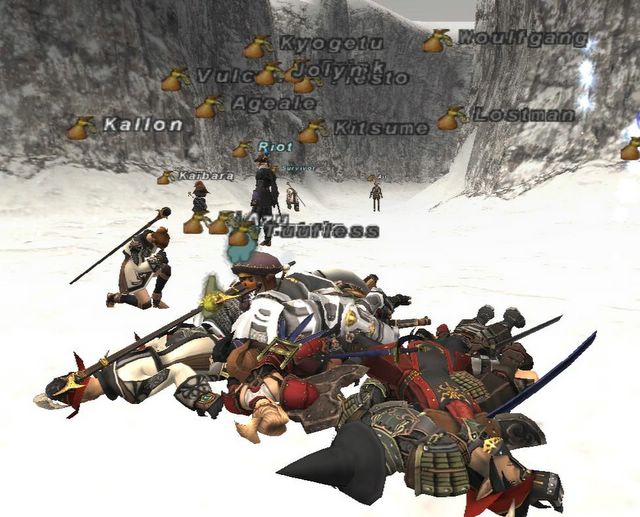
Eventually, Bebelly died, and everyone else followed suit. ; ;

The second LS moved in, ready to claim, much to the dismay of everyone here. Luckily, I had Reraise on, saving us time in picking everyone up, and went to work Raising everybody. During this time, Aysuu's reinforcements came down- another party of six, and Monstar had finally made it to us. The other linkshell started killing the Devil Manta, so they wouldn't have to deal with it.

Then, before our reinforcements could get here, they moved up and claimed Charybdis. ; ;

Suffice to say, we weren't very happy, having been here, killing Devil Mantas three times as long as they were. Fortunately, they only had one NIN tank, and a while bunch of mages, so there was still hope they'd fall, at least, before their reinforcements got here.

It took a while, and the NIN had several close calls, but due to their number of mages, everytime the NIN was low on HP, a whole barrage of Cure IIIs would set him straight.

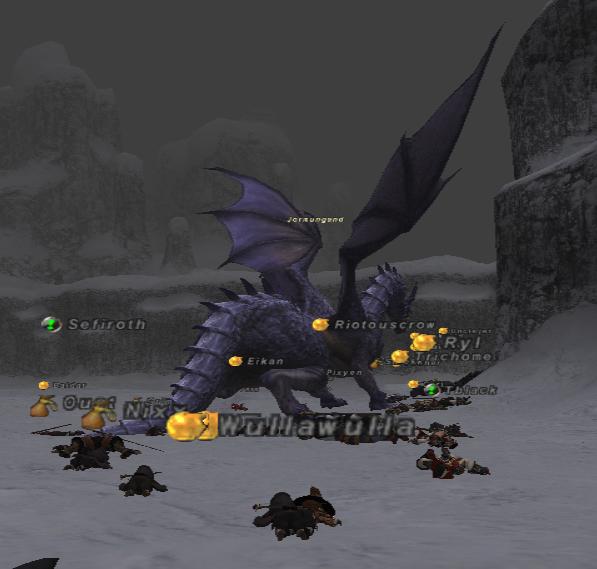
Then a Water Elemental spawned, and aggro'ed their party. Eventually, they could not handle the adds, and while it took a while, after a few AoEs and critical hits from Charybdis (with some of our members /cheering Charybdis on in party chat >_<) their NIN went down, and with no more damage on it, Charybdis quickly turned yellow.

While some HNM LS'es dictate that one wait for the entire party to wipe before reclaiming, evidently that was something we did not practice. We took it from them as soon as we could (a good idea, imo, since we saved all their mages from getting killed- there was no way five mages could beat Charybdis), and now, with twelve of us, Charybdis eventually went down to much /cheering.


As promised, we let Aysuu have the drop, and many, many {Congratulations!} were on their way. It was very late by the time we had killed Charyb, in the end, I think we must've spent something like five or six hours down in the Sea Serpent Grotto camping, and killing Charybdis. Extra forms of entertainment really are a must for this fight...

So Monstar got his ToD, and is hopefully organising a party/alliance to go grab Charybdis on his next open window. I, on the other hand, have three new additions to my friend list, and was soon whisked off by Aysuu, Neoexile, and Bebelly to do the Bionic Bugboy ENM75 down in Mine Shaft #2716- my first ENM!

This post is getting long enough as it is, so I'll spare you the grizzly details, but in the end, we beat Buyboy in a pretty easy fight, but unfortunately, our drops were horrible. >_< 3k xp each and er, one Dragon bone. 15k for the night's work, but oh well. It was fun. ^^