30 June, 2006

Ranger, Complete! (at least, for now)

Over this past week, I had finished leveling my Ranger to 36 (with just @1k to 37), without having ever stepped in the Garlaige Citadel. Okay, so I did go into the Crawler's Nest, but hey, you have to /bow down to conventionality sometimes, alright? >_<

In retrospect, I really did enjoy Ranger. The nature of a puller is certainly different from a mage, particularly late at nights when I would sometimes fall asleep in the few seconds of shuteye I'd get in between pulls. That, and for some reason, plugging arrows and bolts into (flying) things, is strangely amusing, I can't quite get enough of it.

OMG, Barrage is silly!

OMG, Holy Bolts are silly!

That pretty much sums up my feelings once I hit Ranger 30. ^^ With two Hawker Knives and HQ Noct Gear, my Ranged Accuracy finally got to the point where I'd actually hit most of the time. Barrage also gave me the following skillup run, which literally caused me to sit back and chuckle for a good couple minutes, before continuing:


In any case, my particular path to RNG36 is as follows:

0-11: Solo'ed this before the Ranger nerf. I don't remember much about this stage, to be honest.


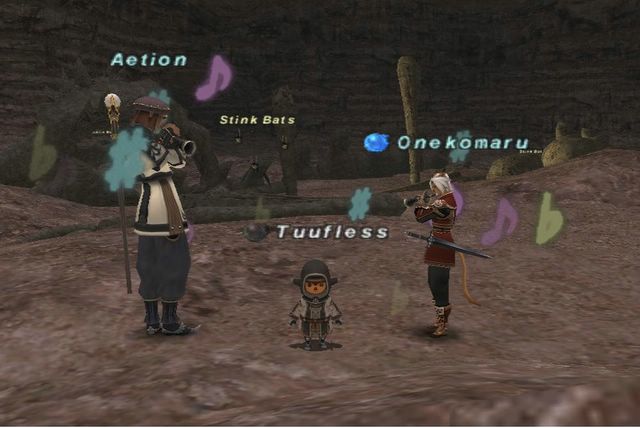
11-12: This level was done with the help of Onekomaru and Aetion, who both decided to help powerlevel me with their Bards. I still miss the 4x Minuet. ^^ Too bad it was late at night, and they were sleepy though. >_<


12-18: This was one of the more memorable parties in my Ranger career. As a Corsair now, I find myself constantly trying to duplicate this, but for some reason, there has been a total lack of Rangers around. Seriously, a "/sea all rng 12-15" would turn up maybe, one, maybe even two RNGs if I was lucky.

In any case, I guess I have to consider myself lucky on this one. I grabbed together RNG RNG RNG COR BRD WHM and we went to town on Worms from the Maze of Shakrami, to Korroloka Tunnel, getting all of us 5-6 levels in the process. Hooray for skipping past the accursed dunes!

18-21: I think Coejus helped powerlevel me from 18-20 back in the Maze of Shakrami here. I probably found the Land Worms too hard to hit without all the +RAcc gear for my liking, and besides, I needed to skillup my Marksmanship at the time, too. Later on, I'd find myself a BRD and a COR, and the three of us took out Land Worms in Qufim for a bit.


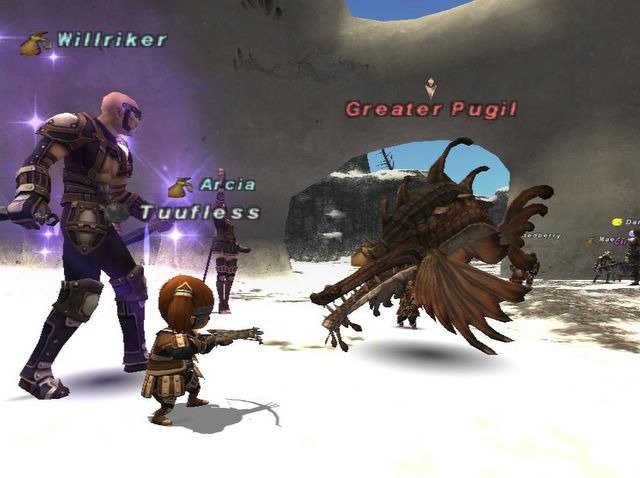
21-23: I think I got this in the Qufim party I had with Willriker, although it feels like a lot of xp for just one party, especially since while it was decent, I don't remember the xp being fantastic. But I do know that I was looking to perhaps moving onto the jungles at this stage, which was something I'd find trouble doing.

23-25: I was invited to a terrible party in Qufim, with a "know-it-all" noob, that just irritated the heck out of me. When half the Pugils con "Tough" to you, and xp is a whopping 65xp/kill, it's time to move on. His reply? "I don't have the Kazham keys yet." Fair enough, but don't go about holding everybody back. That, and don't tell me when to pull, gawd dammitaru!


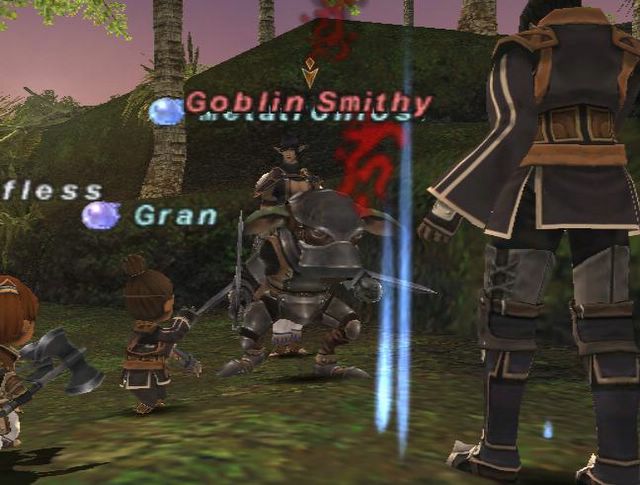
25-26: Yuhtunga Jungles! I had two so-so parties off Mandragora and Goblin Smithies here. One was NA, the other JP, and I can't really say one was any better than the other. My Japanese party, however, did end up straying away from the usual "just outside of Khazam" camps, and ended up camping at the Yhoator Jungle zone after the leader made a mistake, and tried fighting Yhoator Mandragoras instead (oops...) I had seen other parties use the same camp, and I have to say, I wasn't terribly happy with it. Pulling was annoying because of the unavoidable Goblin Smithy right at the mouth of the tunnel, and the rest of the mobs were at the next tunnel down.


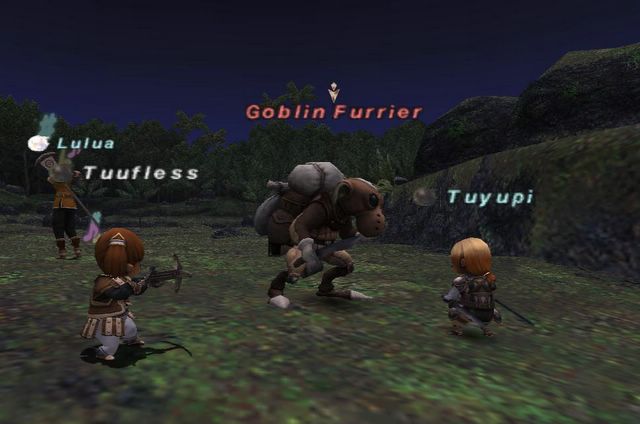
26-30: This was my other favourite party as a Ranger. When my JP leader assembled a party of NIN RNG RNG COR WHM BRD, I have to admit, I was a little bit skeptical at first. But then Goblin Furriers at the Yuhtunga Jungle Outpost were so soft, we were immediately chaining for xp in the high 200s, and leveled up to 30 in no time. Two Rangers (the part I was worried about), turned out to be very good in the end- our Ninja did a pretty decent job at holding hate (what, with two of us wailing arrows), and I had someone to help me pull the somewhat spread-out Furriers. Definitely want to come back here again.


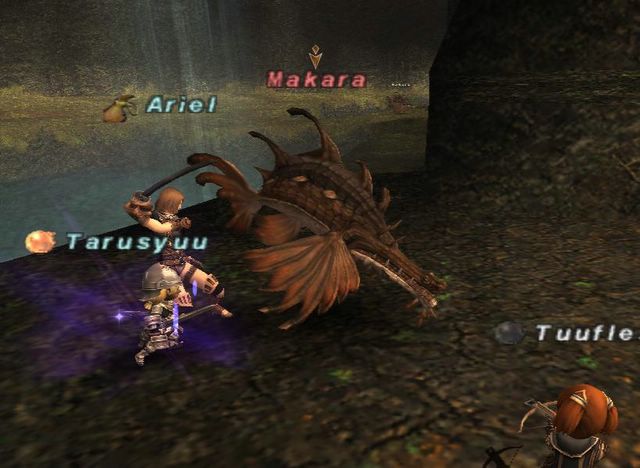
30-31: I got another JP invite, and dragged Cerin (RDM) along for a party off Sahagin and Makara, just outside the Sea Serpent Grotto. I have to say that it definitely got a lot easier as time went by, though. We still managed a decent pace, although I think the trick here is to somehow manage the transition from Sahagin up to Makara well. A good party, although not spectacular.

31-32: NA party down in Yhoator Jungle off Mandragoras. There was this diva WHM however, that annoyed the heck out of me, insisting that I wait for full MP before I pull, even going as far as to sarcastically fire a shot at me when I suggested he raise another party's WHM when his mana was ready ("That must be the first time you've waited").

Like, I'm sorry if you can't manage your MP bub, but I've played 282 levels of mage classes to know when you have enough mana. Besides, does he want the chain or not?

"No death > No chain," he says.

"And we haven't died yet," I reply.

I think I win that argument there, although the above isn't quite true- I did die, but that was after I quickly remembered that pulling a Goblin Pathfinder brings his Goblin's Bee pet along, which then links with all the Yhoator Wasps around, which....uhoh...>_<

At least I told the others to run away, leaving me as the only one dead from that. >_<

32-33: I assembled an English party of RNG THF NIN WHM RDM COR, and after some debate, we decided to take on the Worker Crawlers at the start of the Crawler's Nest. I have to say, I didn't really like this party. For one, the mobs were too spaced out, at least in clumps, so I'd have to watch for links (could take a while), then ater clearing one cluster, run over and start pulling from the other cluster (even more time), and then once I got there, watch for links again (even more time).

The worst part was the THF who was a complete noob. Didn't know how SATA worked, heck, he tried SATA'ing off me, although I knew something was up when I saw him ready Sneak Attack behind me, and quickly moved out of the way before his Trick Attack. Despite our instructions, he showed typical noob behaviour, and never learnt. Definitely the downpoint of this otherwise solid party. Oh, did I mention that his SATA Viper Bites were dealing a grand total of 80 damage?


33-34: Another one of my parties, I got together a group of NIN RNG BLU WHM COR BLM, and dragged them all the way to Purgonorgo Isle. XD

In all seriousness, yes, it's really, really out of the way (and I should've split the party into two and just Tele-Mea'ed), but the xp is so free-flowing here, it's quite hard to resist, unless you don't know what you're doing. Soft, squishy Alraunes, and even softer, squishier Toucans (flying mobs ftw) got us constant chains in the decent numbers, at least, until a bunch of us hit Level 34, when it just turned to "decent xp."

34-35: Tried solo'ing Flesh Eaters in the Attohwa Chasm, which was something I had periodically done from time to time, but unlike say, the Maze, or Korroloka, or Qufim, I hate solo'ing in the Chasm. For some reason, whether it be the silly patches of weeds, or the slight bends in the side paths, you actually have to get in really close to the Flesh Eaters in order to shoot, otherwise "You cannot see the Flash Eater". Of course, that meant that you also couldn't run away from Stonega in time, although you could easily survive one or two Stonegas.

There were times, however, when certain Flesh Eaters would be particularly Stonega-happy, not to mention that they pop in clusters, so you'd have to deal with the unavoidable, "cannot run away in time from" link. However, Hirushi came down to save the day, and when the Flesh Eaters started conning Decent Challenge, we took a little tour of Vana'diel, trying to find mobs he could powerlevel me off, before settling down (surprisingly), on Marine Dhalmels in Bibiki Bay, which were strangely easier than the Ravens, partially, I guess, because of everybody's favourite Dhalmel move, Berserk.

35-36: My final party as a Ranger was strange, yet very entertaining. I was on my way to Jeuno, when I got a tell for a party in the Crawler's Nest. When the leader told me he had a powerleveler, I was even more skeptical, and when I asked him on his proposed setup (RNG SAM SAM WAR THF BRD), I was even more put-off, to say the least.

For some reason, I decided to accept, and boy, this party turned out to be fun. Not because I could pull nonstop, due to the powerleveler, but we camped in the famous "sack room" in the Crawlers Nest, competing against three other parties. I still managed to outpull all of them, including our THF, who was helping me pull, getting a "Damn, you're fast" out of him. The reasoning was simple:

I had Widescan, and they did not. ^^

It was the first time I had ever used Widescan for my pulls, but it turned out great in the end. A few seconds before the Crawler would die, I'd open the map, check Widescan for a red dot in the surrounding tunnels, and then tell the THF where the next mob was, and then he'd Flee over for the pull. It was very amusing, to say the least, although as the THF was also controlling the BLM that was powerleveling us, I eventually because the sole puller instead, especially when the place emptied out.

I was surprisingly keeping up with both SAMs in the party, and throwing in a few Barrages into the mix allowed me to have enough TP buildup such that I could create a Distortion skillchain with both Samurais (they'd just alternate) via Split Shot → Tachi: Enpi.

We were also camping next to some gilsellers, and it was amusing to see them die over and over again.

That pretty much sums up my Ranger career thus far. I might've missed out a fvew parties, or gotten some of the details wrong, but I think that suffices as a decent summary of my experience. I am now @1k to 37 after soloing some more in the Attohwa Chasm, but the place is now too slow for my liking to really go there and solo xp. I figure I'm more or less done with Ranger, at least for the time being, and I can always just do an escourt quest on another job and use the scroll to ding RNG37 should the need arise.

I've sinced moved onto Corsair, and like I said, it plays very differently from Ranger, which is something I miss. My Corsair adventures so far include several terrible Dunes parties, teaching a bunch of JP newbs party dynamics (more on this another time), and I actually managed to make myself a good Valkurm Dunes party!

I have to say though, compared to RNG, COR's Ranged Accuracy SUCKS. I was so eager to take out my Bandit Gun +1 and start plugging Goblins with bullets (hooray for capped Marksmanship), but I think the only shots that hit were the ones that I fired with Sharpshot on. -_-

29 June, 2006

Horns of War

I took a break from leveling my Ranger to do some good 'ol-fashioned KSNM fights with Evilstar and his BLM crew. I have to admit, it had been a long time since I last did anything with this group, but it was a nice change of pace from the leveling grind to RNG37 (more on that later).

Evilstar's BLM manaburn linkshell, named Conclave occasionally offers to manaburn Kindred Seal fights for willing people. These aren't the BLM KS30 Operation Desert Swarm fights that took Odin by storm not long after I started the first few runs of this service, but the meaty KS99 fights instead.

Y'know. Kings.

I had previously fought (and defeated) the Aspi and Fafnir lookalike mobs in the Waughroon Shrine and Balga's Dias respectively, but I had yet to take on Behemoth. Needless to say, I was quickly brought up to scratch with the strategy, and it was pretty smooth sailing from there.


Except from the occasional death here and there, of course. -_-

I have to say, fighting Behemoth is quite fun, if anything because of the running around you have to do in this fight in order to avoid having huge, fiery rocks being hurled at you, otherwise known as everybody's favourite, alliance-wiping move, Spike Fla...I mean, Meteor.


Because of my refusal to take part in endgame activities, I had never seen Meteor up to today, and I have to admit, for a first-timer, it was quite a sight. Of course, death and destruction in the form of blazing fiery rocks of doom wouldn't really be anything other than spectacular, I suppose, but when I found out that with Stoenskin and a good, Neptune's Staff-powered Barfira on, I could actually survive Meteor, quite often by considerable amounts.

There was one run where I actually got hit by three Meteors, and survived all of them. Alas, the fourth kill me. >_<

I can hear the printing presses starting already with the "I SURVIVED METEOR" T-shirts to be circulated around Vana'diel. Or Midgar. Your choice.

Even Gorokai came down to do a run of his own, which you can read about here. In any case, I came out of that, hopefully with a tidy chunk of change to help ease the pain of leveling Ranger to 37. To date, I have spent about 2m gil getting Ranger up to 37, and am quite hurting from it, but Ranger was really, really fun, and I might just turn around and level that up instead of Corsair. But to give Corsair a fair look, I'll level it up for a bit for now and see how I feel about it. I can say though, that it feels very different from a Ranger...

26 June, 2006

Taru can do anything!

I found what must be the cutest taru video ever that I've seen yet on Frohike's blog. Yes, Taru rule the world! XD

24 June, 2006

Life of a {Tarutaru}{Ranger}

One week (and a bit) since my last post, and I'm standing at RNG30 now.


I have to admit, plugging arrows and bolts into monsters is a lot more fun that I thought it would be. ^^

In this past week, I've had my share of amazing, terrible, and downright trying parties and people, which I suppose I could detail out in all its bloody glory. After all, it's been a while since I last wrote about my doings in this world we call Vana'diel.

As I detailed last week, I managed to completely bypass the dreaded Valkurm Dunes with a fantastic Ranger party that took me all the way from 12 through to 18.

I tried to solo some of the Worms, to no avail- my accuracy was bad enough that whenever I tried racing a Worm to the death, I'd end up with the short end of the stick, and dying. I believe Coejus was nice enough to PL me through this period of time in the Maze of Shakrami, while I worked on getting my Marksmanship up to scratch. I also got a "party", which was essentially me, a BRD, and a COR trio'ing Land Worms in Qufim which took me to 21, I believe.

Qufim came and went surprisingly quickly. I managed to land an unexpected party with Willriker, after I noticed him leveling up his Ninja (and complaining to him about my dearth of invites ^^), so he picked me up to join in his party after one of his Warriors left. To be honest, I think that was my first time actually, seriously pulling. XD I'm not sure what constitutes "serious pulling", but it sure felt different from the Valkurm Dunes.

Willriker mentions how big a difference a puller who knows what he/she is doing can make, and to an extent, I have to agree. It's interesting being on the pulling side of things, and directly playing a role in controlling the party's flow of xp. Granted, as Willriker said, we were camping a little far from the Pugils I was trying to pull, but I guess it turned out okay in the end. ^^

In any case, since he was nice enough to honour me in one of his posts, I'll return the favour and send him a littaru Vana'diel postcard:


There. I think he'd appreciate it. ^^

Qufim Island was also strange. It seems to me that Campsitarus is getting me quite a lot of fame in Odin, at least amongst the English-speaking population. This past week, I've gotten quite a few tells from strangers thanking me for my work over on Campsitarus, including one that literally opened with "Hey, you're the campsites taru!"

Glad to see people actually notice my profile over on that page. ^^

Then came the inevitable letdowns. I finally figured out what it must be like to be on the receiving end of an endless string of commands of "pull" and "don't pull". It was only a few times, but it was irritating enough that I just wanted to leave the party right there and then. Like, if you have enough trouble struggling to do your own job, don't very well turn around and tell me how to do mine. What's that you say? You're rank 2? Without Kazham access? On your first job?

'Nuff said, really.

I hit a bit of a dud at 24, when I felt that I needed to be out of Qufim, but was still a little too early for the Jungles. I eventually got a few Yuhtunga Jungle parties, nothing too spectacular, except for the one this morning, which had my favourite job base- COR BRD NIN. The party ended up being COR BRD WHM RNG RNG NIN, and I think we were 26-27 when we started. We ended up heading down to the Yuhtunga Jungle outpost and literally chaining the Goblin Furriers there like crazy. Of course, having two Rangers to pull certainly helped, and having everybody sub NIN, kept the WHM's mana high, not to mention with the added benefits of Healer's Roll and Mage's Ballad.


From 200+xp/kill, we stuck it out until too many Furriers were conning Tough to those of us who leveled twice, and eventually moved down to the Sahagin camp before calling it a day. At this point, I was RNG28, and loving my new pair of Archer Knives I picked up before I left. +20 Ranged Accuracy made such a noticeable difference in my shots, I was wondering how I survived without it...

I then got another party in the Yuhtunga Jungles with yet another "know-it-all" noob, who insisted on telling me when to pull and when not to pull, which once again really got on my nerves, especially given his inability to conserve mana, and insistence on waiting for 80% or more MP before my pulling. I almost pulled out the "I am more experienced than you" card, but chose to bite my tongue in the end.

I mean, I know I've been accused of being bossy before, but seriously, when someone who is probably more experienced at understanding and controlling party dynamics comes into something you're clearly not familiar with, it'd do you good to listen. -_-

Then again, I'm guilty of that myself- I remember a good argument in Doom waaaay back in my WHM40 days, where I was complaining to Armageddon about how WHMs aren't wanted in the later levels, and how ridiculous it was that RDMs got Cure V. (I have BradyGames to blame for that- according to them, Cure V is also a RDM75 spell. -_-)

Anyway, after that party disbanded, I grabbed three of its members (myself included), found three more seeking people, and then showed them how it was done. With like, proper party configurations and moving to a less crowded camp. Yeah. I'm nto sure how fast we went, but some people got two levels in just over an hour, so....yeah...

I hit RNG30 in that party, and came to meet my new friend called "Barrage". It's a lot of fun, although I have to admit that the TP gain from a good Barrage is downright silly. One shot took me from around 10%TP to 95%, with 280 damage thrown in for good measure. Seriously, with stuff like that, who needs Meditate? (Other than the occasional dud Barrages. -_-)

So here I stand, after making all my next purchases, including a new crossbow, bow, Holy Bolts galore and Nocto +1 gear. There're a bunch of other things I really ought to be picking up, like a Genin's Earring, but Ranger is expensive! I've just dipped below 2 million gil, and that was from the 4m I had before embarking on RNG. ; ;

Granted, 1.3m of that went to buying myself some Leaping Boots, but still...

...Ah well, it's all in good fun anyway. ^^ Seven more levels to go before switching over to COR!

17 June, 2006

Ranger Party!

Leveling Ranger over the past few days has been very trying, I have to admit. After Onekomaru and Aetion PL'ed me in the Maze of Shakhrami the other day, I've been returning to the Maze every now and then to try and solo some xp, because I hate the Valkurm Dunes that much.

Unfortuantely for me, I wish I could say my soloing experience as a RNG was at least respectable, but after whiffing like crazy on Maze Makers, and dying to inopportune Stonegas, I had actually deleveled back down to RNG12. >_<

Suffice to say, I was frustrated, and needed a break from the game for a bit. ^^

As luck would have it, when I logged back in later at night, I decided to see what jobs were seeking, so I did a "/sea all inv 12-14". Certain things immediately leapt to mind- RNG RNG BRD COR, all seeking. Thinking back to the Maze of Shakhrami, the gears started to turn.

To be honest, I wasn't sure what level range the Maze would take. It had been so long since I last partied there way, waaaay back in my newbie days, that xp'ing in the Maze is just a blur now. I started off by asking one of the other Rangers what he thought of the idea. He, too, was unsure of what it'd be like, although he was willing to give it a shot (No pun intended.)

Encouraged by this, I sent tells to the BRD and COR, both of whom agreed to come. I then picked up the second RNG, and then a WHM to round things off, completing the party makeup.

RNG RNG RNG BRD COR WHM ftw! ^^

One problem though, with low level parties, is that people generally don't seek in one location. In my case, I had party members seeking all the way from San d'Oria, to the Valkurm Dunes, to Gustaberg, to Bastok.

Thankfully, someone in Sandy could Warp back to the Aht Urhgan Whitegate, someone else could Warp to Jeuno, and I could easily pick up the BRD from Bastok via the Korroloka Tunnel trick, and meeting the last two members at the Crag of Dem was a piece of cake.

All that was left to do after I had (finally) ferried everybody to the Crag of Mea, was to Warp back and somehow get a teleport for myself. >_<

Thankfully, that was a rather painless ordeal, and within minutes, we were off!


I have to admit, this party revitalized the lower levels for me. That we could do so well, without a powerleveler (which seems to be the norm nowadays -_-) is testament to what can be done by people who know what they are doing, and who are equipped for the task.

Our WHM had all his spells, and was keeping up with the pace with Pineapple Juices he was synthing. With Hunter's Roll (and RNGs in the PT, too), none of us had any real issues hitting any of the mobs, and our Bard kept things flowing smoothly, supporting all of us who were each well equipped for our level.

We literally tore through the Maze of Shakhrami for an hour or two until I had reached RNG15. Seeing as how so many Maze Makers now started conning as just Tough to our WHM (who was the highest level among all of us), I decided to move us to the Korroloka Tunnel, and so told everybody to wait outside the Maze while I Warped back and switched to WHM.

It's very convenient that the Teleport-Altep trick not only is a quick way to get to the Korroloka Tunnel, but the consequent Escape also puts you right outside Bastok so you can change jobs and restock on supplies! There is also the added amusement of running through the Altepa Desert for the first time on Level 16 jobs, too. :P

When we got back to plugging holes through Worms, the xp went back to being great. Just like in the Maze, we were chaining Worms, heck care for links or what not (except when we got two links. >_<), and the end result was Chain #5s, each for over 200xp for the kill, some even hitting 300xp, all without an Empress band.


That we could Chain #5 such good xp at this level, when everybody else was struggling to meet Chain #2...

...I was moved. /sniff ^^

Later, when people were getting tired, Aetion came down to PL us as well, and then the fun of a BRD PL'ed party started. Just like before, we were plowing through Land Worms with over 100 damage a shot, and it even got to the point where we cleared all the Worms in one room, and had to kill the IT Seeker Bats just to keep the chain. (And my HP went all {excitement}, again. -_-) Thanks Aetion for coming down again! ^^

When the dust settled, and people decided it was time to go to sleep, I had gained a nice six levels from that one party, and now stood pretty as a Tarutaru RNG18. Only another 19 levels before the RNG subjob is complete, although I wonder just how much can be done off Worms alone? ^^

10 June, 2006

TrueRune in {sea}!

To TrueRune's credit, I saw one of the smoothest Airship run I've seen yet today. In short, we cleared the Airship battle with a good ten minutes to spare, using just 5/6 CCB Polymer pumps, a few 2-hours, just one wipe, and all with a Paladin tank.

Take THAT to all who say you must Ninja this fight! ^^

Of course, I'll leave it up to Seraphpdh to write a guide of "How I entered the Airship fight as PLD and won", if he ever gets around to first, writing it, and then posting it up on all the various forums around the internet. :P

Instead, I'll write about the fight from my point of view.

First off, Chummy arranged that we all meet up at the Sealion's Den at 4pm EST, ready and raring to go enter the fight. Unfortunately for me, now that I have left the United States, this set our run to commence at the ungodly hour of 4 o'clock in the morning. Needless to say, I said my warnings to the rest of the linkshell crew, saying that they had better be ready, lest they fear the wrath of a very tired and cranky taru. ^^

So of course, when my alarm clock wakes me up at 4am and I log into the Sealion's Den, only 5/6 of us were there. -_-

Anyway, after sitting around for half an hour, I decide to turn off the music and go back to sleep, leaving the sound effects on in the hopes that various call sounds would wake me up when the last member decided to show up.

It took an hour, since he was apparently held up by work, but at 5:30am, we were ready to go. >_<

Our party setup was PLD NIN SAM BLM BRD WHM. This wasn't TrueRune's first attempt at the Airship battle- we had attempted the battle earlier this week (I hadn't written an entry on it) as a bit of a pseudo dry-run, and managed to get Ultima Weapon all the way down to 4% before running out of time, but more importantly, getting Ultima down to 4% on their very first try clearly was a sign that this was indeed very possible, despite our initial fears regarding Seraphpdh and the word in the air that PLD sucks in this particular mission.

On an interesting note, we were also half-prepared for that first attempt, too. I basically came on the linkshell after a Dynamis run and said {Airship}{When?}, and eeryone was pretty much up for it there and then, except for Seraph, who we had to pry away from his girlfriend and their real-life plans (fortunately, Ararith is also on the LS, although I don't think she appreciated that. >_<). It's kinda amazing what people can accomplish once they set their minds to it. -_-

So anyway, after that initial first battle, we had our strategy ironed out, and after farming up another set of six CCB polymers a couple days ago, we were ready to try again.

Once again, PLD NIN SAM WHM BLM BRD.

I brought ten Yagudo Drinks, a Reraise Hairpin, a Pro-Ether and a Vile Elixir +1 along with me to the fight. I believe all the mages found room for about 8-9 Yagudo drinks each, which when coupled with dual Ballads from Tumble, would give us a very good flow of mana. Oh, and I came /SMN, too.

Our strategy for the Mammets was unlike the "split-em-up" strategy I used on my winning run a little while ago. We tried the "split-em-up" style on our first attempt, and it got a little messy, and so we decided to simply things out in a strategy we have affectionately dubbed "SuperPLD".

Harkening back to our previous encounter with the Mammets back in Riverne Site #A01, the idea was that Seraph would first run in and aggro all five Mammets, and take them to a corner. The trick here is that he would not engage any of the Mammets, exploting a little loop in the programming that lets everybody else cure the heck out of him without drawing aggro. In the meantime, the other five of us worked at dispatching the Mammets, literally "peeling" them off him, one at a time.

In Riverne Site #A01, Seraph managed to do this to the tone of 29 Hi-Potions, although thankfully, our higher level and better gear now meant that just he and I alone could comfortably manage the Mammets. We eventually cleared the Mammets with about 35 minutes left on the clock.

Omega was up next, and this was the one we were worried about the most. We had decided that Saoirse would open up the CCB order, followed by myself while she casts casting the high-damage Ancient Magic on Omega. In the meantime, the rest of us would try to whittle Omega down, using CCBs to keep things under control, before eventually wiping (yes, wiping once was actually part of our strategy :P).

This didn't quote go according to plan, however. Somewhere before Saoirse got off her first CCB Polymer, Guided Missile from Omega one-shotted Chummy, at which point our plan changed to "just do some damage" without any CCB Polymers. We figured that we might as well do some harm first, and then save the CCBs for once we had Reraised. What we didn't count on though, was getting Omega Weapon all the way down to about 20% hp without any 2-hr abilities, or any CCB Polymers, all with one member down, too. ^^

When the eventual wipe did come, we simply Reraised and waited the weakness out. Something I learnt from our first attempt (and reading more online) is that pulling Omega at this point will cause him to always open with a special move, so I had Saoirse "pull" with a CCB Polymer.

We re-engaged, and things got a little dicey when Saoirse's CCB effect wore off, and Omega was spamming Pile Pitches, but we managed to outlast him with no 2-hr abilites (I was tempted to Bene though ^^;) and with all of us at red health, and Omega Weapon at just a sliver, I did what any White Mage would do.

...

Holy ftw! ^^

(Okay, so I'm still a BLM at heart. :P)

We cleared Omega with about 20 minutes left on the clock, leaving us with an amazing position versus Ultima. We had access to five CCB Polymer pumps, and all six 2-hr abilities. Needless to say, Ultima was a cakewalk, as we were liberally using our remaining CCBs, and everyone was on {Full attack!} mode, powered by Soul Voice-fuelled buffs.

In addition, I think one thing that made Ultima's fight easy was that, for some reason, Ultima Weapon seemed to be doing nothing but Chemical Bomb (Slow + Elegy) on Seraph for what seemed like half the fight. I was literally spamming Erase on Seraph over and over, and each time I'd Erase a debuff, Ultima weapon would put it back up again. -_- Maybe Chemical Bomb is the only move that isn't blocked by a CCB? >_<


In any case, as you can see, we defeated Ultima Weapon with quite a lot of room for random things to go wrong, which, fortunately never happened, although I still think it would've been funny if Aka's killing Mijin Gakure hadn't actually killed Ultima Weapon off. XD

For the record, we cleared the Airship battle in 33 minutes, 18 seconds.

Once again, "Take THAT!" to all the PLD nay-sayers! ^^ (Though to be fair, we did have a NIN in that fight... :P)

At this point, I left to go run some outside errands, and have lunch. When I came back, I found the four of them trying to complete the three NM fights that sets up for the battle with Tenzen. Since they were all very easy and straightforward, I won't go over them in any detail, although I will say that we bumped into another CoP group led by Tyseng, who were evidently at the same point we were.

Putting our two groups together meant that there were seven people who needed to beat Tenzen- THF SAM SAM PLD MNK BRD BLM. We juggled around with various setups a little bit in order to maximise each party's potential. I had originally divided the two runs into PLD MNK SAM BRD BLM BLM and NIN SAM SAM BLM BLM THF. However, I was less confidant with the setup setup than I was with the first, so I decided to have the "B" group go first. Unfortunately, the NIN I was planning to have on the run had warped back to town to get something, so in haste, I had Seraph take his spot instead.

Lo and behold, PLD SAM SAM THF BLM BLM. Otherwise known as "TrueRune" + a BLM. Coincidence? >_<


I'm not exactly sure what went wrong, but we lost that one, although I heard it was close. I know that for some reason, the damn tarus could still see me even though I was standing below them, supposedly out of view. A Stonega III and a few ranged shots later, I was eating the deck of the ship, although at least I had managed to empty my mana pool by the time I died. >_< However, the others couldn't quite deal enough damage to Tenzen before he went ahead and completed his Level 4 skillchain: Cosmic Elucidation, kicking us all out of the BC.

On a side note, Cosmic Elucidation looked pretty, although Tenzen holding up his Great Katana much like the Sand People in Star Wars amused me. ^^

At this stage, Tyseng decided that he needed to get some sleep, which left just six people who all needed to clear the BC. After some thought, we decided to just let the six of them at it. Sao felt that she wasn't doing anything as THF though (something a few of us thought as well), and so she went to swithc to her BLM61, for curative magic. :P I'm not sure how the fight went, although with PLD SAM SAM MNK BRD BLM, two Meikyo Shisuis, a Hundred Fists, Soul Voice, and a Manafont available, all I heard was that they completely owned Tenzen to the point where the Samurais didn't even complete their Meikyo Shisuis. XD

It's finally done. {/welcome} to Al'Taieu, TrueRune.

09 June, 2006

RNG + 2x BRD = {fun}

Recently, I've been inspired by Russta's LiveJournal about leveling Corsair, in particular this post, and this post, detailing his experiences with the job. Since then, I've contemplated picking up my Corsair again, since after giving it some thought, it's a job that has elements of everything I like- a good support class for merit parties, ranged weapons, and a funky hat, to boot!

However, reading through his posts, as well as the various discussion boards have led me to the realisation that I would have to have a Ranged subjob, at least for up to COR60, when I hear /NIN is the way to go (which I'll also have to level up at some point, too ; ;).

Thus began my foray into the world of melee. Over the past couple days, and some very painstaking Dunes parties, I finally got around to getting my WAR to 17, and NIN to 18. My NIN18, in particular, would serve as an adequate sub-subjob to COR, allowing me to level a RNG37 to compliment a COR75.

Unfortunately, the dunes suck. (Yeah, yeah, I know, nothing new, huh?)

On the bright side, while I did manage to get some adventure and more data for Campsitarus in a party I somehow convinced to go to the Buburimu Peninsula (btw, try taking a good screenshot of a Bull Dhalmel as a Taru tank. -_-), the xp rate was so slow, it was almost torturous. I tried making a party, and even made one I thought was pretty decent, with PLD WAR RNG BRD BLM WHM, where only the BLM did not have a subjob, but that was a bigtime flop.

/sigh

And so it was off to solo'ing. And all Rangers know what to solo- Worms!

Attempt #1 took me to the Maze of Shakrami, where unfortunately, IT Maze Makers were just too hard. I spent like, five minutes just trying to hit a Maze Maker from a distance that let me run out of Stonega range. After finally killing one in about ten minutes or so (for 200xp too, mind you), I give up and Warp back to town.

Attempt #2 brought me to King Ranperre's Tomb, where slightly weaker Worms were my target of the day. Unfortunately, I never actually got to camp, as I drew aggro from two Skeleton Warriors (I didn't realise it was night ; ;) and died before I got very far into the tomb. Yes, for the record, Piercing damage sucks against bone mobs. :P

Attempt #3 was in Dangruf Wadi. I found DC-T Worms here, making for potential solo xp. Unfortuntely, all the Worms were surrounded by T Goblins, making solo'ing iffy at best. >_<

What was a poor Taru Ranger supposed to do? ; ;

I then went back to Russta's livejounal, where this post mentions how he leveled his RNG subjob- grab two Bards, and go to town. ^^

I have to admit, I quite liked the idea of that, so when Onekomaru offered to PL me as her Bard in Giddeus, I leapt at the chance. We were doing pretty good, too, until I accidentally drew aggro when she was in the middle of Mage's Ballad, and I died. XD

I went back to town when I then bumped into Aetion, a BRD75 I've merited with before. He was bored, so asked me for something to do. Well, I had just the thing in mind, too. Heh.


Maze of Shakrami, HO!

If there's something I learnt tonight as a Tarutaru Ranger, it's this...


...Four Minuets equals...


A whole @!#$load of Attack! o.O


Seriously, my damage literally soared. I was shooting Maze Makers for over 100 damage per shot when I actually connected, and with two Bards, I could afford to run right up to the Maze Maker and engage from a distance where I actually stood a living chance at scoring a hit with Onekomaru and Aetion both trying to keep me alive. My HP bar was very {excitement}, I have to say. ^^

'Course, the problem then became what to do when the songs wore off. Seeing your damage go from 100+ to a measly 5 is rather....embarrassing. ^^;

I died once, when (guess what), I accidentally engaged when both Aetion and Onekomaru were singing Ballad, but a quick Raise fixed that, and it was back to chaining IT worms for 200xp each, 300 with my Empress Band. And that was without chains. o.O

We eventually decided to tone down the ATK and went with 3 Minuets and one Prelude to help me out in the accuracy department though. ^^ It felt like we only stayed a half hour, but it was enough to get me about a level and a half, and I had a great deal of fun doing so, too! Many thanks to Oneko and Aetion for coming down tonight! ^^

04 June, 2006

The Road to Sea (Part 2)- The Warrior's Path

After clearing the Airship battle, I felt I was really close to getting sea access, which was something I wanted to get done before I would have to take a break from the game (which did not last nearly as long as I had hoped it would. ; ;)

After expressing this to Xmode and Sakurato, they decided to come help me finish the last few fights leading up to Al'Taieu, namely the three NM fights in Bibiki Bay, Carpenter's Landing, and the Misareux Coast, before moving onto the fight against Tenzen. I also managed to enlist Thazienne's help with the NMs, and so, the four of us went on a tour of Vana'diel.


The NMs were all really easy to a 75 party, even with just four of us. The only really dicey one were the Tonberries in Carpenter's Landing, mostly because of Mijin Gakure and Astral Flow. However, Mijin Gakure can be avoided by killing the NIN (the main Tonberry) first, as it seems he will immediately Mijin Gakure as soon as any of his three helpers die. Astral Flow hurts, but it's not as devastating as say, Kirin's Astral Flow, so we just weathered it out by killing the SMN last. However, given that all three Tonberry helpers have the same name, it's a little difficult to tell which is which, although I soon found out that you can differentiate the Tonberries and their jobs through the weapons they hold:

Dagger: THF
Staff: BLM
Star Wand: SMN

All three can use their respective 2-hr abilities, too.

On the bright side, as if to forshadow what was to come, our actions evidentaly attracted the attention of those infernal Taru trio, who sent us death threats in what must be one of the more amusing lines in the game, ^^


After clearing all the prerequisite NMs, it was time to get ready for Tenzen! Getting additional help from Saiddict and Ladyrikku, we were raring to go kick some Samurai butt as NIN WAR WAR RNG BLM BLM. The strategy was simple- because we do not change areas, and that the fight against Tenzen was uncapped, all buffs follow on through to the battlefield from outside Sealion's Den.

Thus, everybody gradded their Opo-opo necklaces and slept to 300% TP. The plan would then be to open with a Slug Shot to Calamity for Impaction, letting Sakurato and I both MB Thundaga III, and then just continue with whatever damage we could do, 2hrs and all. Unfortunately, Thazienne kept d/c'ing while sleeping for TP, losing TP each time he reconnected, and so on a whim, we decided to just try and 5-man Tenzen instead. ^^

NIN WAR RNG BLM BLM ftw.


To be honest, I have no idea what happened, since it was over so quickly. One moment, we were in there, and I was spamming through the cutscene, the next moment, I was casting Thundaga III in anticipation for the skillchain, and then, Tenzen gave up. o.O My screenshots show that I landed the killing Thunder IV, and given how I usually open with Thundaga III, move onto Blizzaga III before moving onto Thunder IV, Tenzen must've gone down really quickly.

Heck, we knew to treat him like the Snoll Tzar, so all I saw was a whole bunch of pretty lights and 2-hour abilities go off. ^^

And just like that, I was in Al'Taieu, with congratulating cheers going on about me. ^^

I have to admit, I could only spend about fifteen minutes exploring sea before I got a little...dare I say, "seasick"? For some reason, the sight of me walking on water ala "you-know-who"-style was rather disorienting, not to mention having to look up and down for aggro at all times. I eventually came back and got my map, and now, the planning begins as to how to get the rest of TrueRune up to here. ^^

Thank you, Xmode, Sakurato, Thazienne, Saiddict, and Ladyrikku for the help!

02 June, 2006

The Road to Sea (Part 1)- One to be Feared

For those who aren't quite familiar with the infamous Airship battle, it is reputedly one of the hardest BCNM-style fights in the game. It's by no means impossible, after all, several people have gotten past this stage, however, it is certainly wise not to take it lightly.

To briefly summarize, the Airship battle is actually a series of three fights put together. To start, you have to first take on five Mammets (yes, those Mammets back from Riverne Site #A01), following which ou then have to fight Omega Weapon, before culminating in the final showdown against Ultima Weapon.

While the Mammets aren't all too difficult, both Omega and Ultima Weapon have plenty of monkey wrenches that they can throw into your plans. However, the kicker here is that you only have 45 minutes to clear all three fights, and this includes cutscene time (there are three cutscenes, too!)

After defeating the Snoll Tzar about a month and a bit ago, TrueRune had been very laid back when it came to CoP missions. I guess a large part of that was because ToAU also came out, and people found new things to get distracted by. However, I still very much wanted to at least see sea.

It was while I was randomly on my way through Mount Zhayolm to solo some xp for my BLM when I got a /tell from Sollanon, inquiring if I had a WHM60+, and if I was wiling to help them out. There was some initial confusion when they didn't realise that we were on the same CoP mission, but eventually things got straightened out, and all of a sudden, I had the chance to give the Airship battle a shot.

But first, some introductions are in order. Sollanon, Joachim, and Ladyrikku are all members of a Singapore-based linkshell called Doom, that was set up by Apocalypse a long time ago, and was my first linkshell that Glueforever gave me when I started the game. Since then, I've since moved on, although am still friends with the people inside the linkshell. When Apocalypse decided to hang up his scythe for greener pastures in Azeroth (HAH!), the linkshell kind of stagnated, and everyone else went their own way.

Yet, somehow, small as though it may be, the linkshell somehow survived all this time, and now I could work together with old friends to try and clear the Airship battle.

And so, I decided to join them for the ride.

Our party setup was NIN NIN MNK RDM WHM BLM, comprising of myself, three people from Doom, and two Japanese who were with the Doom folks. Of the six of us, only Ladyrikku had previously cleared the Airship battle, and we took our time to first enter the battlefield to clear the initial cutscene, and discuss strategy while we, y'know, actually had an airship to stand on. Each of us had the requisite medicines, not to mention a Reraise item of some sort.

Things to do before entering the battlefield:
* Enter the battlefield and exit so you can opt to skip the cutscene on the real run.
* Having someone with a timer to keep track of the time remaining is very useful.
* Bring Reraise items!
* Bring medicines!
* Bring CCB Polymers!


We spent a good time going over the details of the plan. The good news with the Mammets are that they feel like they are the same level as those fought back in Riverne Site #A01, so they aren't too difficult to handle. However, you should recognise that they are a speed bump, and it really is in your best interest to clear this part of the battle in as little time as possible.

In other words, your party needs to be able to clear the Mammets with no deaths, no 2hrs, and no medicine.

It's still not too bad, really. We had the NINs each tank two Mammets, while Joachim and Sollanon (MNK and BLM respectively) tried blasting their way through the fifth, while Zeek and I (RDM and WHM) ran around trying to keep some semblance of order around. Yellow Liquids are nice here for locking Memmets into Dragoons when they change into them, and better yet, they drop aplenty from fallen Mammets.


Some things to note:
* Once again, your goal is to clear this without any deaths, 2hrs, or medicines.
* You are told the amount of time remaining at the start of each section. Finishing the Mammets with around 35 minutes left on the clock is good.
* Use Yellow Liquids liberally to help make things easier.
* Remember Mammets have buffs that let them absorb physical or magical damage, so be attentive.
* Try keeping all the Mammets Silenced, even if they aren't in BLM form, as a pre-emptive measure.
* As the Mammets have a lot of AoE moves, spread out to minimise collateral damage.
* After clearing the Mammets, there will be another "rest period" before continuing onto Omega Weapon, where your HP and MP will be reset to full. Dead people however, sta dead.


After the Mammets come the real challenges: Omega and Ultima Weapon. Omega first. (D'uh.)


As you might be able to discern from the screenshot, we are fighting in specific spots on the airship. When you exit the cutscene after the Mammets, you "spawn" at one end of the ship, with Omega Weapon standing opposite you where the door is. You are far enough such that Omega Weapon will not aggro you, and you want to stay at this end of the ship for a very simple reason- you will probably wipe, and in doing so, you must be able to Reraise without getting aggro from Omega.

While I'm on the topic of wiping, both Omega and Ultima Weapon will return to their spawn point in front of the door in the event of a full party wipe. However, the important thing to note is that they do not regain health while unclaimed and yellow. This means that it is perfectly viable to wipe, reraise, rest up, and pick up from where you left off. However, given that recovering from a wipe is a rather time-consuming process, you really don't want to wipe more than twice in the three battles. Three wipes is certainly pushing things.

The thing is, Omega has quite a number of really annoying TP moves, and as he approaches death, he starts spamming them more and more. Your White Mage will need to be very attentive and alert to keep up with things. Two moves- Ion Efflux and Rear Lasers require -na attention (Paralyna and Stona respectively). Target Analysis drains stats, although the effect is negligible enough that you don't really need to worry about Erase.

What you are worried about is a move called Pile Pitch, that is a Throat Stab-like move, in addition to a hate reset. Omega Weapon will start spamming this move as he gets closer and cloer to death, and this is where you want to start using those CCB Polymers to jam things up a bit, because otherwise, maintaining any semblance of hate control practically becomes impossible, not to mention that people start dropping like flies.

Because of that, one observation that people have made is that it is actually quite likely that you will wipe to Omega Weapon with Omega at just 1 or 2% HP. What you can do here is just to Reraise and then have your BLM cast Ancient Magic on it once it has returned back to its starting location. Your BLM will need to have enough mana to cast Ancient Magic while Weakened, though, through food and gear.

About Omega Weapon:
* In my opinion, Omega Weapon is really the big stumbling block in this whole sequence of fights, so be prepared.
* Omega Weapon has a LOT of HP.
* Aim to defeat Omega Weapon with about 20 minutes left on the clock.
* Ion Efflux = Paralyze
* Rear Lasers = Stona
* Use CCBs proactively.
* Mages should use their mana aggressively, for maximum efficiency in the event that the party might wipe.
* Your White Mage will probably need Ethers for this stage. I personally used my Pro-Ether here, and just barely had enough mana left, and this was with /SMN, too.
* To use a CCB Polymer, you just "Use" it from the menu. You do not need to run up to Omega/Ultima Weapon to use it.


Once you're through with Omega Weapon, only Ultima Weapon stands in your way.

Ultima Weapon is very much like Omega Weapon, except that while Omega Weapon has a lot more HP, and thus takes longer to kill, Ultima Weapon has deadlier moves, but less HP. Ultima Weapon can do most of what Omega Weapon does, including directional Paralyze and Petrifies. To add to that however, Ultima Weapon also has a move called Chemical Bomb which puts both Slow and Elegy on the target. If you have NIN tanks (which we did), be sure to Erase them off, for Chemical Bomb quite literally kills NIN tanks. I'm pretty sure it overrides Haste, too. Once again, you want to be standing in the same positions as you did for Omega Weapon- at the back of the ship with melee and mage separate on starboard and port.

The two moves that you really don't want to be seeing however, are Equalizer and Anti-Matter, both of which are massive amounts of damage, AoE and single target, respectively. Once Ultima Weapon starts using those, it's time to kick things into high gear, and use the remaining CCB Polymers on him while everyone goes on {Full attack!} mode. Even still, chances are you will just run out of CCB Polymers and wipe with a sliver of health remaining.


If you are fortunate enough to be in this situation, you can always get the BLM to quickly Reraise and try landing Ancient Magic on Ultima for the kill. Of course, make sure he puts Reraise back on first, just in case. ^^

That outlines the general strategy for the fight. I cannot stress to you how important a good, solid plan is for the fight. We tried a total of three times to get this fight down, and might've very well won on our first try had Ladyrikku not realised halfway that she had come as a NIN/WHM by mistake. (Divine Seal from a NIN in the middle of the fight got a {Huh?!} out of me, although at the time, I thought it was a rather odd plan to being able to Paralyna herself. XD)

Our second attempt was more shaky, and I ended up dying to the Mammets through a whole bunch of collateral damage. We quickly aborted that run after we cleared the Mammets, choosing to return to the mainland instead.

Finally, things fell in place on the third run, now that Ladyrikku actually, y'know, came as NIN/WAR. -_- We powered through the different stages of the battle in excellent time, and when we eventually wiped to Ultima Weapon in the screenshot above, with Ultima having just a sliver of life left, we still had a good ten minutes to go on the clock. Granted, Sollanon accidentally messed up by casting Blizzard II instead of say, Freeze, but a Chi Blast from Joachim and a Holy from me quickly took care of that. ^^

From my perspective, I came as WHM/SMN because I wanted the mana, and I am very glad I did. Despite the increased Max MP pool, and Auto-Refresh, I found that, once I had the feel for the battle, I was very busy. I sitll had my filters up from Dynamis on my first run, so I missed all the detrimental effects, like Petrification and Paralyze, so I was slow in reacting to them, but taking the filters off fixed that. On the third run, I ended up using my Pro-Ether and Benediction after an Equalizer as a rather pro-active Cure. For one, I was low on mana anyway, and the hate reset was actually a good thing, since Ultima Weapon did not come chasing me around the ship after the Bene. XD

As a WHM on the fight, being attentive is very important. I'd sub SMN if at all possible, and bring at least a Vile Elixir +1, Pro Ether, a CCB Polymer, and a couple Yagudo Drinks to the fight. Like I said, if things are going correctly, you should be continually casting, which was something I wasn't doing on our first run.

In any case, TrueRune is finally starting to look towards its own run of the Airship battle, so now it's time to see how well this strategy templates onto our job setups, with a Paladin tank. (/grin Seraph ^^)