The Bluegartr forums had a quick post that documented some of the testing behind the medal- namely how much MAB it gives based on the moon phase. They were pretty spot on, but the testing seemed to be left incomplete. There was also a lot of conflicting information regarding how the medal worked on other websites, like FFXIclopedia and FFXIah, so this was an open invitation to complete the test and set some numbers straight.
Results
I won't bore you with the details of the testing, but the results can be summarized with the following diagram:
Some points to take note:
The MAB gains is not tied to the actual moon percentage, but is instead linked to the moon phase.
Both Gibbous and Crescent stages are split into two moon phases, but the in-game command, /clock does not differentiate between the two.
Analysis
As of now, this is the best neckpiece for damage in the game, of course, depending on the moon phase. After all, +10 MAB is nothing to scoff at, even if it doesn't happen all that often.
But we don't want to carry around situational pieces of equipment like this, so how does it interact with the other neckpieces in the game, namely the Uggalepih Pendant and Goetia Chain? (Or if you're RDM or SCH, Lemegeton Medallion +1).
Based on my previous post comparing INT and MAB, I know that (at least for me) 1MAB is roughly equal to 1INT. Using this as a rough guide, we can say that Goetia Chain adds roughly 3.8MAB, while Lemegeton Medallion +1 adds roughly 2.7MAB.
From here, the analysis is easy- Artemis Medal is king until the MAB bonus reaches +6, where you will want to start swapping in Uggalepih Pendants. After that, you will continue using Artemis' Medal until the MAB bonus reaches +3 before swapping in Goetia Chain, or +1 before swapping in Lemegeton Medallion +1. Still, notice that even against a Goetia Chain, an Artemis' Medal will still be better more than half (7/12ths) the time!
That's all fine and dandy, but the next question comes from all Spellcast users- how do I script all this?
Unfortunately, the designers up in Square-Enix and their infinite wisdom (/sarcasm) made it such that the moon cycle is not actually symmetric. That is to say, if you wanted to use the moon percentage to determine which neckpiece to use, there isn't actually a set number. The last day on the Early Waxing Gibbous has a moon phase of 71% and the first day of the Late Waxing Gibbous has a moon phase of 74%. The problem is, the last day of Early Waning Gibbous is at 79%, while the first day of Late Waning Gibbous is 76%, so no matter what number you pick, you will miss out on some optimization somewhere.
In pseudocode, the process might look something like this:
equip "Artemis' Medal"
if(moonphase < 73)
{
if(moon phase < 30)
{
equip "Goetia Chain"
}
if(MP after cast < 50%)
{
equip "Uggalepih Pendant"
}
}
As for the actual code, well, I'll figure this xml jazz out eventually. :)
Of course, adjust the numbers if you're not using a Goetia Chain. In addition, I haven't quite pinned down the transition times between Waning Crescent or Waxing Crescent subphases, so that's something to look out for.
I was browing around the forums, when I came across this Allakhazam post, where the OP poses the following question:
For a long time now, I have been using a full enmity set for casting Flash to maximize as much hate as I can get out of flash. However, I am curious, over the course of an extended fighting session, say HNM/God/Ground king/Omega etc, would it be mathematically better to use Haste when Flashing?
Judging from the responses, the general consensus is to emphasize Haste over Emnity. This would probably be true based on observation.
We would like to give mathematical support to verify this claim.
But before we start, we need to establish how Enmity works, and how +Enmity and +Haste affect your overall enmity gain.
Once again, if the equations don't display properly, your browser is probably blocking the HTML or Java script that takes the code and turns it into equations.
Enmity 101
In late 2007, Kaeko (of Odin) began a series of tests to break down and analyze exactly how Enmity (also commonly referred to as just "hate") works. I won't go over the whole series, but to briefly summarize the basics,
Enmity has two components:-
Cumulative Enmity (CE)-- Enmity that does not decay over time, but instead decays when you take damage.
Volatile Enmity (VE)-- Enmity that naturally decays over time, and is not reduced through taking damage.
The sum of a person's CE and VE is that person's Total Enmity (TE), and the one with the highest TE value "has hate" (i.e. the mob goes after that person).
Both CE and VE share the same base unit of measurement (E), defined as "the enmity generated by casting Cure 1 for 0HP," and each is capped at 10,000E. Therefore, there is an overall "hate cap" at 20,000E.
The goal would be to reach this hate cap as fast as possible, and once you have reached the cap, maintain it.
Constructing the model
For any particular action, be it Flash, Provoke, Dispel, or what-have-you, the Total Enmity, $E$ that you gain as a result of performing that action can be thought of as a function of one variable, that variable being the total +Enmity from your gear and merits ($e$) that modifies the base enmity gain ($e_0$). Notice that I said a function of one variable, even though $e$ and $e_0$ both appear in the equation, but because I am talking about a specific action here, $e_0$ is really a constant.
+Enmity is a straight percentage increase over the base enmity gain, so
Now that we've got some quantities, it's important to be clear what exactly we want to model. Since one of a tank's main goals is to maximize the amount of Enmity they have, you could just model the current amount of Enmity a tank currently has as a function of time, and maximize that. However, there are several complications in doing so, including taking enmity decay into account, not to mention that such a function is not even continuous.
We can accomodate for all that with the appropriate substitutions, but the question is whether all that is actually relevant to our problem.
Sure, we'd like to maximize the amount of Enmity that we have, but we don't consider Enmity's rate of decay when choosing what gear to wear. Instead, we load up on +Enmity and +Haste gear, and aim to generate as much enmity as we can, with as low a recast as possible.
That is to say, the quantity that we really want to maximize is not the actual amount of enmity we have, but rather the enmity generated per unit time, or the rate at which we generate enmity.
This is thankfully much simpler to model, and is the classic "rise over run" function:
\[f(e,h)=\frac{E(e)}{R(h)}=\frac{e_0 (100+e)}{r_0 (100-h)}\]
Now that we have the quantity we want to maximize, it's time to use calculus.
Calculus
In order to answer the OP's question, we want to see how the rate at which we generate enmity, $f(e,h)$ changes as we change either $e$ or $h$. We can then analyze the resulting quantities to hopefully establish a relationship between the two.
So, in order to approximate how the rate changes as I change one of the input variables, I first compute the partial derivaties:
First, the partial with respect to $e$:
\[\frac{\partial f}{\partial e}=\frac{e_0}{r_0 (100-h)}\]
Then the partial with respect to $h$ (this one uses the product rule):
\[\frac{\partial f}{\partial h}=\frac{e_0 (100+e)}{r_0 (100-h)^2}\]
Notice then, that
\[\frac{\partial f}{\partial h}=\frac{100+e}{100-h}\frac{e_0}{r_0 (100-h)}\]
\[\frac{\partial f}{\partial h}=\frac{100+e}{100-h}\frac{\partial f}{\partial e}\]
Recall that the two partial derivatives approximate the incremental gain in the rate of enmity generation as we increase either +Enmity or +Haste.
Thus, if $(100+e)/(100-h)>1$, that means that $\partial f/\partial h > \partial f/\partial e$, so +Haste has more impact than +Enmity on the rate of enmity generation.
Conversely, if $(100+e)/(100-h)<1$, then $\partial f/\partial h < \partial f/\partial e$, so +Enmity will have more impact than +Haste on the rate of enmity generation.
Clearly, that fraction acts as a boundary of sorts that separates the two cases, and in order to get an idea of what this boundary looks like, we set the two partial derivatives to be equal. So,
\[\frac{100+e}{100-h}=1\]
\[h=-e\]
This is thankfully simple, although you might expect such a simple relationship, since both +Enmity and +Haste act on the base enmity and recast time in a similar way. In any case, the relationship can be illustrated using a graph as follows:
Thus, we get the following conclusion:
If the sum of your +Enmity and +Haste is greater than 0, you will gain more by increasing +Haste over +Enmity.
Otherwise, if the sum of your +Enmity and +Haste is less than 0, you will gain more by increasing +Enmity over +Haste.
Since the vast majority of Paladins out there (hopefully) have a positive sum of +Enmity and +haste, this analysis shows that you will benefit from increasing +Haste over +Enmity the vast majority of the time.
(Q.E.D. ^^)
Further questions and limitations
While the simple analysis above illustrates that +Haste should generally be prioritized over +Enmity, it only tells us that the gains from +Haste is more than +Enmity. What it doesn't tell us is how much better +Haste is over +Enmity, under given conditions.
So while we can say +Haste is generally better than +Enmity, the only way we have right now to compare two pieces of gear against each other would be to plug the values into $f(e,h)$ and see what numbers come out.
Since the function is simple enough to compute numerically, I won't go down that line for now, and is not a typically asked question, anyway. But if you wanted to, you can simply repeat the analysis I did on INT vs MAB to better understand the relationsihp between +Enmity and +Haste.
More importantly, understand that this model only captures a small part of tanking mechanics-- the first part where the goal is to generate as much Enmity as you can, as quick as you can. This would be fine if there weren't a cap to the amount of CE and VE a player can have, but there is, and this analysis does not directly apply to the latter part of tanking, which focuses on maintaining the hate cap after it has been established.
Fortunately, that analysis is also simple, since any extra Enmity over the cap is effectively wasted, your focus now shifts to just trying to use your actions with as high a frequency as possible, so stack +Haste all the way.
More importantly, this analysis does not actually tell you how to tank. For example, a new RDM tank may misinterpret this analysis and believe that all they need to do is stack up on +Enmity and +Haste and spam Blind until the cows come home, not realising that Blind does not have a CE component-- thus once that RDM's VE is capped, all Blind does is re-establish the VE cap, but does nothing for CE!
In other words, the mathematics and formula in this case are used to manipulate known data to illustrate and verify a claim that we've already known. It will not make you a better player, not will it make you a better tank.
All it is is solid verification, a proof per se, and to some the proof is really what it's all about.
It has been long known to Black Mages that resists aside, Magic Attack Bonus, or MAB for short, is the stat that you want to focus on when it comes to raising your nuke damage. However, it is also known that for lower tier nukes, INT adds more damage than MAB.
Out of this comes the question of when the transition period is, and thus there is a need to relate the two together.
Today, a fairly common rule of thumb is that “2INT ≈ 1MAB,” which has been largely shown to be true from general observation.
However, I have not yet come across any mathematical support for this statement.
As advanced warning, there is a decent amount of math involved, which brings about two issues—first, not everyone likes math, so I’ll have to step away from the mathematics from time to time to explain what is going on. In addition, I have no idea what kind of math background my reader, you, would have.
To be safe, I am going to write for someone who has a high school background in Calculus, or someone in their freshman year in college. Bear in mind that the mathematics detailed below will not necessarily make you a better player, nor will unveil some great profound secret that will change the way you look at nukers forever. It is simply an insight into the logic and reasoning that goes behind our decisions.
By providing mathematical support for the claim, not only do we get absolute, logical proof that the relation holds true (under certain circumstances), but we can verify its accuracy, and if need be, further refine the rule.
But in all honesty, I was bored. Very, very bored. ^^
By the way, if the equations don't display properly, your browser is probably blocking the HTML or Java script that takes the code and turns it into equations.
The damage formula
To begin, let’s start with the damage formula (D) for a nuke:
\[D=k(1+\frac{M}{100})[B+\lambda(I_Y-I_M)]\]
The equation above has a several variables, so I’ll briefly explain each component.
k is the product of all the modifiers you get from elemental staves, day of the week, weather, magic burst, and type of mob.
M refers to your total Magic Attack Bonus from both Job traits and equipment.
B is the spell’s base damage, which can be looked up elsewhere.
λ is the nuke’s tier-modifier, again, further details can be found elsewhere.
I refers to total Intelligence (again, base INT and gear)- the subscript Y or M tells you whose INT the equation is referring to- You, or the Mob.
For more information, you can look at its FFXIclopedia entry here.
MAB is divided by 100 and added to 1 to signify that MAB is a percentage bonus. If you have a total of 32 Magic Attack Bonus, then your MAB multiplier is 1.32.
Model limitations
Bear in mind that this equation is not entirely accurate because of limitations in the computation, which is a topic that is usually touched upon in college under Numerical Analysis.
Because a computer can’t store an infinite number of decimal places, it has to truncate the working figure at some point, which means it just ignores all the numbers after a certain position.
For example, if you were to multiply 1.4 and 3.7 together, but your calculator could only store one number after the decimal point, your calculator would give you the answer, 5.1, instead of the real answer, which is 5.18. Because the calculator cannot store any more numbers past the 1, the 8 is lost through the truncation process.
In Final Fantasy XI’s case, all the numbers that go into the damage formula are truncated down to their integer values, and so because of this, our calculated values from the equation above will have a little bit of error in it.
Calculus
Once again, the equation for calculating your damage is,
\[D=k(1+\frac{M}{100})[B+\lambda(I_Y-I_M)]\]
The typical textbook question here would ask you to maximize your damage.
Notice that this question by itself does not make sense, because the answer would just be to make your Intelligence and Magic Attack Bonus infinitely large. The unspoken fine print is to find the maximum value of D within some kind of boundary, which would represent the gear selection currently available. This is a topic typically covered in a college freshman math course in multivariable calculus.
Still, the question is not very interesting because you can just go out there and try different gear sets yourself, or just plug in numbers to compare. The problem is easily solved by just going out there and testing it yourself, without having to actually using college mathematics to do so.
What is more interesting is the relationship between INT and MAB, which will help when evaluating gear choices, or to better understand in what proportions of INT and MAB work well together. Are Vicious mufflers better than Yigit gages? What if SE produced a pair of gloves that added +9INT? Which is best?
Differentiation
Because we want to find out how much INT we need to make up for 1MAB, we need to first determine the increase in damage by changing INT and MAB. Hence, we need to differentiate.
The first stumbling block is that the function has multiple variables. Most, if not all of the functions up until high school calculus involve only one variable, so what do you know when there are two?
Let’s re-examine what the differentials actually mean.
Taking the derivative with respect to MAB as an example, it refers to the change in damage with respect to your Magic Attack Bonus. In other words, how much would my damage change if I increased my MAB by 1?
This may sound familiar to those who have studied basic microeconomic theory, in particular, marginal costs and/or marginal benefits. In this case, the marginal benefit of hiring a new employee refers to the benefit (profit) gained as a result of hiring one more employee, and changing nothing else.
Likewise, what we are looking at here is the marginal benefit of adding 1 MAB.
The key here is that the only thing you are changing is your MAB, therefore everything else can be treated as a constant!
This is called the partial derivative, and is used in functions with more than one variable. The idea is, how much change would I expect by increasing this variable while holding all other variables constant?
Because we are only interested in the relationship between I_Y and MAB, we only need to compute the derivates with respect to those two variables.
Also note that it does not make sense to compute the derivative to any of the other variables, because they are just outside our control.
So, if
\[D=k(1+\frac{M}{100})[B+\lambda(I_Y-I_M)]\]
I can differentiate this using the product rule, but I personally prefer to just expand the brackets and rearrange to get
Likewise, taking the partial differential with respect to your INT,
\[\frac{\partial D}{\partial I_Y}=\frac{\lambda kM}{100}+\lambda k\] \[\frac{\partial D}{\partial I_Y}=\frac{\lambda k(M+100)}{100}\] Thus, I now have a say of calculating the amount of change my damage will incur if I change either my intelligence, or my MAB.
Back to the question!
Going back to the original question, I want to know how much intelligence I have to add in order to match MAB. In other words, I want to know when the two partial derivatives are equal. In particular, I want to know how much intelligence I need to add (remember, that’s just dD/dI) when dD/dM is 1.
Using the principle of small changes, I can write: \[\frac{\triangle I_Y}{\triangle M}\approx\frac{\partial I_Y}{\partial M}\]
In this case, ∆MAB=1, so \[\triangle I_Y\approx\frac{\partial I_Y}{\partial M}\]
Finally, using the chain rule, I can now deduce an expression to find the change in I_Y with respect to MAB.
Voila! We now have an equation to calculate the amount of I_Y required to match 1MAB’s worth of damage.
Notice that MAB is found on the denominator, which indicates as MAB increases, less INT will be required to match that increase in damage. In other words, as your MAB increases, raising INT will become more and more damage-efficient.
Using the formula
To use the formula, pick a nuke and look up the required values. For example, let’s assume I’m nuking Thunder IV, which has a base damage of 541 and a tier modifier of 2, on an Ebony Pudding (89INT). I have 125INT and a total of 71MAB, including my Job Trait Magic Attack Bonus, so plugging those numbers into the equation, I get:
So I need roughly 1.8INT in order to match 1MAB’s worth of damage. Pretty close to the 2INT=1MAB claim!
Note that this number obviously varies from person to person, depending on that player's own stats, so if you want, you could quickly go through the calculation yourself to find your own INT:MAB ratio, but it should be quite close to the 9:5 ratio as suggested here.
Edit (16th April 2010): (Finally) got rid of those equation borders...only about 8 months late. :P
Edited to clarify some things pointed out by Robonosto.
Okay, I know the actual picture says Chain #40, but I but forgot to take a screenshot of the Chain #41 kill. Of course, I finally got a resist on the next tiger and lost the chain there without a screenshot of that new personal record. Go figure. -_-
As you might be able to tell, I've been obsessing over this camp as of late. Not because the camp is good, although that certainly helps, but because this camp just feels like it has so much potential.
The actual meriting process is very simple- walk up to a Gigas’ Tiger and nuke. Parsimony whenever it is up, saving the other charge for Alacrity in case of emergencies. Rest for one or two ticks, depending on how far your next mob is, before continuing.
So, just how good is this camp? Tigers here are level 75-76, which is 100-130 base xp, which goes up to 150-195xp/kill once you're past Chain #4, or an average of 172.5xp/kill.
So, if you kill one mob every minute, your xp/hr will be about 172.5 x 60 minutes = 10,350xp/hr. Not too bad.
But in reality, I was killing one tiger every 50 seconds on average. 3600 seconds/50 seconds per kill = 72 kills = 172.5 x 72 = 12,420xp/hr!
So this camp is very, very good. You want in. So, what do I need?
Minimum standards
The entire camp revolves around being able to one-shot a Gigas's Tiger. This creates a very interesting bar to entry and I am very curious if the development team actually took this into consideration (though I think that’s giving them too much credit).
I think I’ve shown by now that this camp surpasses Puddings in terms of xp/hr, but note that is only applies to Black Mages that meet the minimum standard, so here it is:
The minimum standard: To deal 1400 damage on an unresisted nuke consistently.
If you cannot do this, your xp/hr rate literally plummets to the point where you would probably be better off sticking to Ebony Puddings. This number is a lot easier to meet with frequent ice weather and day bonuses, but such things are inconsistent- to truly benefit from this camp, you would want to be able to come here at any time.
Why one-shot? The obvious reason why is that two nukes obviously take longer to fire off, especially if you need to Bind or Sleep in the middle.
Secondly, one common speed bump in pet camps is that you have to wait for the mob to turn its back to you, or navigate your way around the camp until you are behind the mob so that the master does not see its pet coming after you.
However, if you can one-shot the pet, you can nuke from any direction because the master will not link with a dead pet.
Together, those two reasons result in immense time savings, which become invaluable when you need to meet the 60-second time limit for everything beyond Chain #5 and still rest sufficient mana to continue the chain.
To give the reader just what kind of standard is required, this is my current nuking set for neutral day/weather:
As a Taru with full Elemental skill merits and full INT merits, I nuke with 133INT and +29MAB in gear. I also have maximum Lightning potency merits.
Yet, my neutral Thunder IVs land for just 1369 damage, off my estimated minimum requirement by 31 damage, so I still have to wait for Ice/Lightningsday to come around before I can merit in this camp! >_<
For BLMs who would like something more familiar to compare against, I use the same gear setup, to nuke Ebony Puddings with a /RDM subjob for 1515 damage without food, 1540 damage with.
BLM/SCH!
Today, /RDM has become the default subjob of choice for Black Mages everywhere, and it's not difficult to see why. Here's what you get from /RDM:
Fast Cast II
Dispel
Gravity
Phalanx
Stoneskin
Blink
Of these, the most valuable are Stoneskin, Blink and Gravity. These are all defensive in nature, and provide Black Mage with the survivability required to function effectively.
However, if you can one-shot pets, there is no need for defense!
Your concern shifts from survivability to one wholly focused on pure mana conservation, which is where /SCH shines. This is what /SCH has to offer:
-10% mp costs through Dark Arts.
-10% cast time and recast time.
-50% mp cost through Parsimony (using one charge.)
-50% cast time through Alacrity (using one charge.)
You are most interested in the mana conservation through Dark Arts and Parsimony, whose effects add up immensely:
Let's say that with a cooldown of two minutes, you would Parsimony every third nuke. Thunder IV costs 154mp under Dark Arts, and 77mp under Parsimony.
Thus, you consume 385mp in total for every set of three nukes, in the following cycle:
Thunder IV → Rest two ticks → Thunder IV → Rest two ticks → Parsimony → Thunder IV → Rest two ticks → Repeat.
With Clear Mind V and +24hMP in my healing set, I get back 51mp on the first tick, and 54mp on the second tick for a total of 105mp restored through resting in between nukes, for a total of 315mp restored through healing per cycle.
If I nuke every 50 seconds, the whole cycle will take 2:30. With 1mp restored every three seconds from Sigil, Sigil restores 50mp in that time.
Thus, the total mana restored per cycle is 365mp.
Therefore, you have a net mana consumption of just 20mp every three nukes!
Camp orientation
Now that I've talked a little bit about the mechanics of the camp, one important final part is actual knowledge of the camp and its surroundings. First, you will never stay at one stationary spot. You will keep moving around, depending on several factors.
In total, I counted five Gigas Floggers in the area. One of them is to the far west, the other towards the eastern tundra. The other three are all clustered very close to each other in the center, and it is these three that you want to focus on.
However, you only need two Beastmasters to recur, so a good idea would be to just alternate between the two Beastmasters until one of them moves into an unfavourable location.
I'll be frank- this camp is very mentally taxing. Because you are /SCH, you have very little defense should something go wrong, other than perhaps Alacrity-Sleepga. Once you reach Chain #5 and above, pressure is constantly on you to keep the chain, which means you have to be able to answer the following questions quickly:
Where is your next tiger? How far is it?
Do I have to stand up early to get to the tiger in time?
Where are the surrounding Gigas?
Where are the Greater Amphipteres?
How close should I stand when I nuke to avoid the pet moving out of range mid-cast?
How far should I stand when I nuke to avoid aggro from the beastmaster?
As a rough gauge, if you have the Distance plugin on the unofficial Windower, a player character moves at a base speed of 4.0 yalms per second, so you can use that to decide whether you should stand up early to move to your next tiger.
Resists
It’s still a bit of a bummer that so far, my chain is completely dependent on not getting resisted. Theoretically, you can still keep the chain by timing an Alacrity-Tier III nuke in between tiger swings, but there are two problems to this.
One is more focused on player skill. Because resists are so unexpected, when they do occur, I find myself in a sudden state of panic even though I planned for such contingencies. With experience, I ought to be able to react accordingly and maintain a smooth flow.
The other, bigger issue is that if you nuked the pet in front of the beastmaster and your nuke was resisted, the beastmaster will see the pet and link, thus ending your chain even though you manage to kill the pet in time.
Yes, you could maneuver around the beastmaster to set yourself up for an ideal nuking spot, but if you focus too much on that, you forgo one large benefit of being able to one-shot pets. All I can say is that at least the Xarcabard [S] camp here has the benefit of choice, and with multiple Gigas Floggers around, at least you have the luxury of picking and choosing from the tigers available.
If, unfortunately you're forced into one particular tiger and you get resisted, well, that's life Final Fantasy XI. Just Sleepga, finish off the pet, curse, Retrace, and come back to start anew. :(
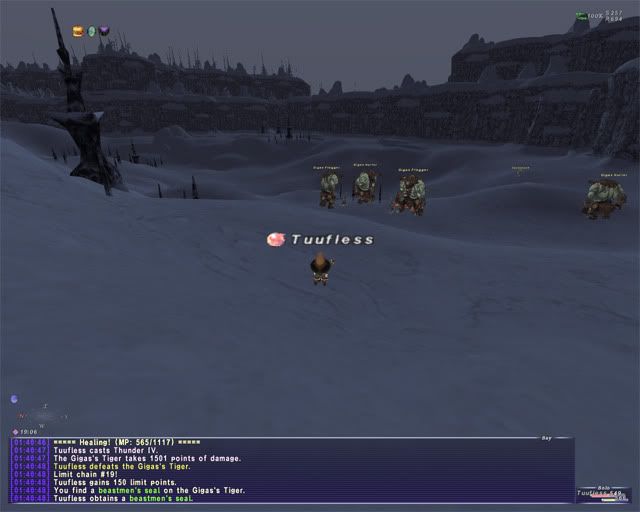
I thought I was loving the new beastmen pet camps as a Scholar, when I posted my picture of getting Chain #9 solo, but I just went back there as a Black Mage, and well, see for yourself:
Chain #19! Solo!
For those who are interested in trying this out for yourself, I went BLM/SCH, nuking with Thunder IV only, resting for two ticks between each pet and using Parsimony whenever it was up. Sometimes, if the next tiger was far away, I'd have to get up after only one tick of rest.
The fact that I managed to get Chain #19 and still have 566/1093mp suggests that with this method, I could very well see something around Chain #40, assuming no resists. That being said, my chain breaking around #20 does not surprise me, as with my magic accuracy capped at 95%, I'd expect one in twenty mobs to resist my nuke.
I did however, learn a few things:
First, you only really need two Beastmasters to go infinite. However, as I mentioned in my last post, there are five Beastmasters in the area, so this wasn't really a problem. You must also be decisive- interrupting your spell midway will break the chain, so I'd sometimes risk getting aggro from a Gigas that was walking towards me in order to keep the chain.
I also learnt that I was just a little bit short of damage once Lightningsday came to pass. The tigers would end up at just 1% HP after my Thunder IV, which leads me to believe that you need to consistently deal 1400 damage to fully utilize this method outside of Ice/Lightningsday. I am just 31 damage short of that. :(
(For the record, I was nuking with 133INT and +27MAB from gear.)
There are still gear improvements I can make- it's just a matter of getting around to obtaining the stuff. :P
But all that aside, the big question- just how much xp was I getting? I sat down to manually calculate it, taking the time from my first Thunder IV to the first Thunder IV of the next chain. Overall, I was getting about 11,300xp/hr! That's better than Puddings! :D
Wow, I'm liking this update. I haven't gotten around to trying out all the additions the update brought, but the first thing I did upon logging in was to beeline straight for Beaucedine Glacier [S] and subsequently, Xarcabard [S].
I think Xarcabard [S] must be one of my new favourite zones now.
I like the music, the mobs...and did I mention the xp?
The past couple of times I've been there, I counted a whopping five Gigas Beastmasters (Gigas Floggers) in the area. This would easily support two pet solo players, but when there's just one, the results are very, very nice. :o
Chain #9 solo. :o
Soloing here has been a very nice bridge between Vunkerl Inlet [S] tigers and Ebony Puddings, which has been a godsend to me since at SCH72, I really wasn't in a position to take on Ebony Puddings. I could kill them, but they'd take so much effort it really wasn't worth it.
Not to mention, you have your moments of {excitement} doing this camp, as you'll often have to dodge Gigas aggro and run in the path of a flying Greater Amphiptere (read: death from above) to keep your chain. :D
I stuck around Xarcabard [S] for a couple days, getting SCH72→SCH74 in the meantime. I think 74 would be the time to leave, since all the base xp goes down to 120-160xp/kill, and Puddings should now be a lot easier.
Best part of all though- the camp is right next to the Campaign Arbiter! Easy transport to and fro from camp, and to make things better, frequent Ice weather in Xarcabard [S] makes me a very happy nuker. :3
On a completely random note, I am in love with the Star Onions remix of Gustaberg.
It has come to my attention that all last written posts (I hesitate to use the word “recently” here) have nothing to do with my actual in-game activities. Sure, there were a few videos of me soloing Brothers, and a layout or two on the Campsitarus revamp (which is trundling along very slowly, I might add), but nothing answers the question of just what have I been up to in game?
I’m not exactly sure what to think of that. On the one hand, much of the FFXI-related blogs out there revolve around one’s own accomplishments and gains in-game, and to be quite frank, this very blog was along the same lines too.
However, somewhere along the road, I had difficulty fathoming that anyone would be interested in reading about my own conquests in game, especially when the posts start to resemble some variation of “We did this, I got that and the world goes on anyway.”
Occasionally there comes an interesting issue or hot topic which warrants a response, like my last post a couple months ago about Elmerthepointy’s questionnaire, and more recently, the Gardening bannings.
So in recent news, probably as a result of all the Astralburning that's been going on, Windurst took over Gustaberg.
{Nice to meet you.}, Kuuwari-Aori, W.W.
I haven’t really been all that involved in-game recently. I suppose I am at the stage where I’ve played long enough and am stuck in that not-so-pleasant limbo of trying to find meaning in what I’m doing, which is about the same time most people decide to just pack up and move onto other worldly pursuits.
I joined TeamKanican back in October last year to try and experience playing in a committed HNM linkshell. Things were initially both hectic and jam packed, with us camping Ixion, Sandworm, Fafhogg, (King) Behemoth and to a lesser extent, Khimaira along with all the other events that go on like Einherjar and Dynamis.
While you could say that continually having things in game to do were good, I quickly found myself disliking the rush from one camp to the next, only to stand around checking Widescan every few minutes, or spamming Stun every half hour.
More recently, we've laid off camping Ixion and Sandworm, going down to just Kings and Khimaira, which isn't so bad. We seem to have put Dynamis on hold, and I haven't been able to make our Einherjar runs either, so things have definitely cooled down in-game, or so to speak. The problem still remained though- I wasn't sure what I was playing for.
I realized that the main draw to me for TK was the image that Kaeko had portrayed, that TK was a shell that pioneered strategic advancements and so-and-so forth, and while I can say that with Kaeko’s help, we still do some of those things, the reality is very different.
Our latest pursuit lies with the trio team up between LimitBreak, BBQ and TK into Awsomeland to try and take down Absolute Virtue.
For obvious reasons, we haven't succeeded yet. Besides, if we had succeeded, chances are you would've heard about it by now.
But our rehearsal did lead to the following exchange, where I somehow found myself playing the role of Absolute Virtue,
Aside from that, much of my in-game time now revolves around low-manning ENMs, primarily Brothers and Shell We Dance, with the occasional Apollyon NW duo thrown in here and there, splitting the drops afterwards. It’s purely a money-making scheme, especially as I try to push for lower and lower numbers to maximize our returns per person, but it’s been satisfying working with people I’m familiar with once again and trying to push limits (no matter how small) as a small group.
I don’t know if I’m in a position to rightfully give strategic authority to others, but it was with that intention that I started taking videos of my solo runs with the intention of trying to improve other people’s play, by highlighting the general strategy required to win, as well as showcasing the mistakes to avoid.
It was this intention to share my knowledge and experiences that led me to agree when Ringthree asked me to contribute a mage-based column to his blog-turned-web magazine (though real life commitments have kept me from contributing much lately).
I also set up another personal blog along the same lines at thunderiv.blogspot.com which I hope will deal with my specific experiences as a Black Mage (and I suppose to a lesser extent, Scholar). It’s still largely empty though, but I do have several ideas I would like to put down on paper, but it’s just a matter of actually sitting down to write and flesh them out.
Then in addition, I also casually mentioned to Kallo back in April that I had an idea to talk about Campsitarus on Limit Break Radio, and we pieced together a brief outline which we just finished recording yesterday.
I’m not sure when the episode will air- it obviously depends on Aniero’s own schedule, but showing up as a guest speaker on the show was quite an experience and taught me a lot, even though the covered material itself was rather basic.
Honestly, camps and experience points is a huge topic, with lots of leads we could've followed, and in the interest of not wavering too far, we found it difficult to properly segment everything and just stick with the bare basics.
I definitely don't think we broke any sound barriers with what we spoke about, and I’m actually a little afraid people will think we’re talking about things that are overly basic, and I’m afraid we might've spent too much time just vaguely talking about things without really going down to things that might not be considered general knowledge.
Finally, I've been leveling my Scholar. It's currently sitting at SCH72, and once it hits 75, it'll mark my fifth 75 job along with BLM, RDM, WHM and SMN (notice a trend here?). It was interesting, especially in the earlier levels when I was trying to see just how far I could just on Beastmen pets only, but eventually, I just got sick of large tnls and started joining regular parties instead.
I did have a rather strange party the other day in East Ronfaure [S] though- it was a powerlevel TP Burn party, synced to 38, so I joked that I'd come SCH/DRK to melee with Attack Bonuses.
To my surprise, the party leader said "yeah, why not?" :o
It clearly didn't work out, so I decided to go and pull instead since we had no BRD with us. I ended up pulling an 11k/hr party as a SCH/DRK, and we were all set to leave East Ronfaure when we hit 41 until we found out that we were going 14k/hr afterwards. ^^
Don't try SCH/DRK pulling though- seriously, SCH/NIN would've been soooooo much better. >_<