Showing posts with label Chains of Promathia. Show all posts

02 December, 2005

Promyvion-Vahzl, Part I

It was time for TrueRune to venture into what would hopefully be the last Promyvion zone we would ever step into. We had heard horror stories from other groups who have attempted to clear Promyvion-Vahzl, not to mention the ludicrous amounts of time it takes to even get to the final closed battle. Because of the long time this mission would take, we decided to split Promyvion-Vahzl into two parts- tonight, we would just get to the final floor, and finish off with the boss fight the next day.

Originally, our plan was to travel through Promyvion-Vahzl together with Subligar Connection, since having an alliance of twelve would make it somewhat easier to get to the top, but Onekomaru had homework to do on the night we planned for, so it ended up being a TrueRune-only thing. >_<

We didn't know too much about what to expect when it would come to Promyvion-Vahzl. We had snippets of ideas like the various floor bosses, some of which were reputedly harder than their BC-counterparts, and other horrors like "the gauntlet" that would be lying in wait for us somewhere inside Promyvion-Vahzl.

And so, we took no chances and came fully prepared with medicines and several animas, because good grief, we would need it. Hysteroanimas are your friend. Really.

Unlike the other three Promyvion zones which are accessed through the various shattered telepoints at the crags, Promyvion-Vahzl is accessed through the uncapped section of Pso'Xja. Just enter the tower at (F-7) of the Beaucedine Glacier, and heep heading straight once you enter Pso'Xja (at least, once the place offers you an option of which way to turn). There will be a door there with a Snowball guarding, which is easily taken care of.

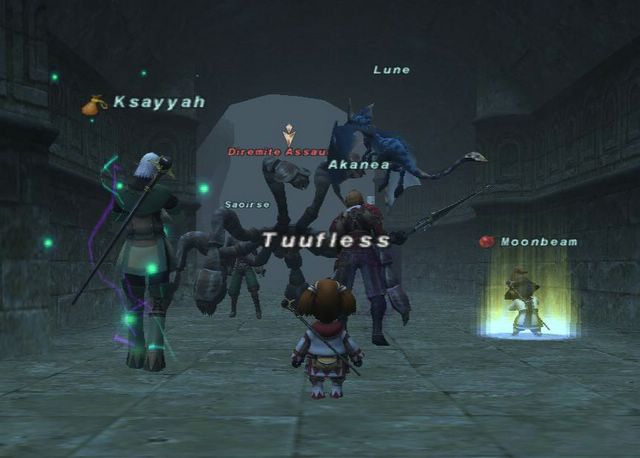
The door is trapped. Trying to open it will spawn a (very large) Golem, which has a very high auto-regen on, something to the tone of 100hp/tick. Fortunately, he doesn't have that much HP, and really is quite laughable. Then again, since this was in an uncapped zone, having several 75+ people beat up on it wasn't really a fair fight either. I suppose a Level 50 party might have some trouble, but I really can't say for sure. I remember Akanea's Impulse Drive practically one-shotted the Golem though. ^^

You only need to defeat the Golem once- if you have already previously beaten the Golem before, the door's trap will remain forever "broken", which is a good thing, since things would get rather annoying otherwise. -_-

Take the life down to the bottom floor (do not cast magic!) and there will be a stone door that is the zone to Promyvion-Vahzl. Enter it to be treated to two lengthy cutscenes which really start to dig deeper into just what is going on in this place. Here are some teasers to whet your appetite. ^^


Unlike the other Promyvions, which are a rather grey-ish colour, Promyvion-Vahzl is instead a bit of a muddy-brown colour. You still have all the assorted type of Empty mobs- Wanderers, Weepers, and so forth, but unlike their Promyvion-Holla/Dem/Mea counterparts, these can also take on Light and Dark elements as well as the regular six elements. Also unlike the other Promyvions, which have four floors in total, Promyvion-Vahzl comes with an extra fifth floor that you must also navigate through.

As usual, to proceed onto the next level, you need to defeat a Memory Receptacle that may or may not result in a portal leading you up. I'm not sure if fake Memory Receptacles are still in place at the basic three Promyvions- I've heard they've been removed- but believe me, there are fake Memory Receptacles in Promyvion-Vahzl. ^^

Like the other Promyvions, the mobs gets tougher and tougher as you proceed higher up in floors, although this rate is somewhat slower, with mostly VT mobs crowding the top floor.

One interesting note is that the Strays the Memory Receptacles spawn are no longer all Wanderer-type mobs, in fact, Strays can even be Weeper or Seether-type mobs, although thankfully, they're still just as weak and easy to take down.

On the second floor, we encountered what has since been nicknamed "the gauntlet". This is basically a rather narrow stretch, ala "gauntlet" that you need to pass through, that is filled with Empty mobs. Good timing will get you through this easily, and if you're lucky, all the Empty will be on one side of the gauntlet, allowing you safe passage through.

Alas for us, we had neither good timing, nor luck, so we ended up stringing up a sacrifical lamb (a.k.a. "Seraphpdh") to run through, getting aggro, and thus clearing a path for us to run through. He quietly died in an isolated spot on the other side of the gauntlet, where we waited for the Empty mobs to return back to the gauntlet before raising him. ^^

The third floor is where things start to get interesting. On the third, fourth, and fifth floors of Promyvion-Vahzl is a Memory Flux somewhere. These didn't do anything in the basic Promyvion zones, but here they spawn an NM which you need to defeat in order to move on. Bear in mind that you get no warning when spawning the NM, so make sure nobody touches the Memory Flux until everybody is ready.
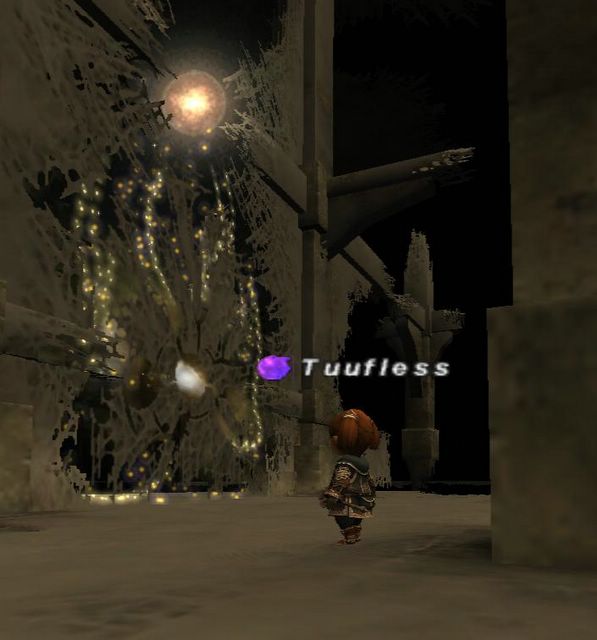


The NMs that spawn are essentially the three basic Promyvion bosses, and should be treated as such, although they do have different names. I'm not sure whether they are harder than the normal Promyvion bosses- they certainly feel harder, but in either case, be prepared for a good fight, since they are not walkovers. Well, that's not quite true. The third floor boss is a Propagator, which is basically the Promyvion-Dem boss. He's easy.

Defeating the boss not only you to proceed onwards through Promyvion-Vahzl, but if you touch the Memory Flux again after defeating the boss (don't wait too long!), you'll be treated to a cutscene and the Memory Flux is now a "save point". Should you need to re-enter Promyvion-Vahzl again for some reason, you can warp straight to the Memory Flux from the stone door in Pso'Xja. Convenient, no? ^^

The fourth floor boss is a Solicitor, a copy of Promyvion-Mea's boss. For some reason, we had a lot of trouble with this one, mostly because it has some really damaging moves. Impalement would bring Seraph's HP down to double digits repeatedly, while other moves like Carousel and Promyvion-Brume throw massive monkey wrenches into things (Promyvion-Brume is also a hate reset).
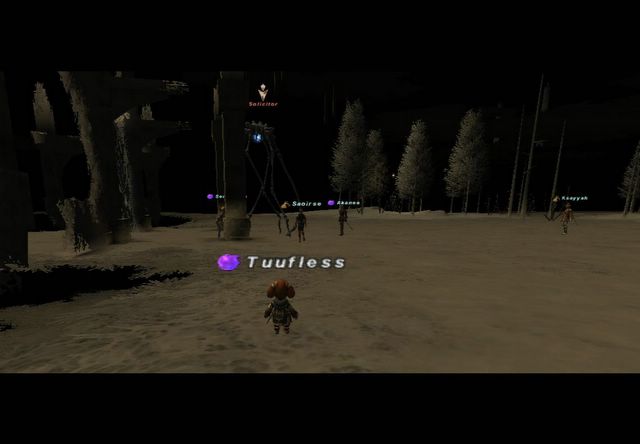


On our first attempt, we ended up spending a few Hysteroanimas, and almost beat it, except Impalement and Carousel took out Seraph and Akanea. Saoirse was soon to follow next, and then Akeem. I managed to throw a few nukes at it, but the final Thunder II which was supposed to be the finishing blow, got resisted. I died. >_< I tried Reraising and nuking it one last time, but by then it had regenerated enough HP to survive (still just a very tiny bar of health left! >_<) and it killed me again. -_-. As much as we would've liked it, no, Ksayyah and Carbuncle was not able to finish the job, and so we were left with the six of us lying dead on the ground and no more Reraises. ; ;

One problem we found was that there was a lot of lag for goodness knows what reason. We all went back to our Home Points and I decided to switch over to WHM/SMN since I figured the extra healing support with Cure IV and Curaga II would be worth it, not to mention having access to Benediction if we really needed it (as opposed to Manafont).

And so we each individually went our own way up to Xarcabard and over to Pso'Xja, where we warped straight to the third floor. Except that for goodness-knows-what reason, as we were trickling in, someone accidentally touched the Memory Flux, spawning the Propagator again, and a whole stream of "..."s and "WTF!"s followed suit. Yes, we wiped again, although thankfully I managed to squeeze in a quick Reraise in there somewhere so we didn't have to come all the way around yet again.

We fought our way back up to the fourth floor and went to take on the Solicitor once again. This time, we decided we'd go all out and actually commit to beating the Solicitor with our animas and what not. This time, we were actually successful, although it took us four of our six Hysteroanimas to do so. It probably is a lot easier to beat with an alliance, but we were the only ones in the zone at the time. >_<

Finally, we got up to the fifth and final floor. Simple process of elimination would tell us that the Promyvion-Holla boss was waiting for us (named a Ponderer this time). By this time, it was getting late and a number of us were feeling tired, so again, we decided to just throw the rest of our anima at it and just "beat the damn thing." The Ponderer isn't as hard as the Solicitor, but towards the end, it spams AoE damage effects like there was no tomorrow, including the infamous Shadow Spread which we were prepared for, and brought Poison Potions to counter the sleep effect.

After beating the Ponderer, we touched the final Memory Flux to "save" our progress, and /cheers went all around. It was a very long night. We started at around 11pm and by the time we finished it was post 4am. If you intend to go through this, be prepared with a lot of spare time on your hands. ^^

Tomorrow: the {Boss}{Battle}!

20 November, 2005

The Secrets of Worship

In contrast to the month's delay it took TrueRune to organise a reattempt at Ouryu, we decided to go make a Sacrarium run just one scant week after Ouryu fell. Thankfully, Sacrarium isn't nearly as trying as Ouryu, although there still was a little bit of prep work that people needed to do.


First off, it is a good idea to head down to Sacrarium first and farm up two Coral Chest Keys, which drop from the Fomor there. We did this yesterday in preparation for "the run" today. The drop isn't too horrendous, although be prepared to stick around here for a while. Here's a map of Sacrarium.


Fomor can be found on the passageways through the second map, and you can camp just outside any of the six rooms to the north and south of the map. Not too close to the doors, mind you, otherwise you might pick up some unwanted aggro.


However, to get to this section, you must first navigate through the maze, which is displayed on the first map. The maze changes with each Vana'diel day, but navigating it isn't too difficult. However, it's still quite easy to get lost inside the maze, and in particular, it is easy for people to get separated, so stick together.


Lunaofsevi of Midgardsormr has penned up some fantastic maps to help you navigate Sacrarium, which I stumbled across on the Kool-Aid Linkshell's FFXI website. Alternatively, you can go visit Lunaofsevi's own website as well.


Basically, Lunaofsevi's managed to plot out just what the maze really looks like on the appropriate days, which is a huge help in nagivating through this place smoothly.


We had already come here previously to farm up some Coral Chest Keys off the Fomor here. You will need two Coral Chest Keys among your party in order to complete this mission. However, in order to open the double doors that's required for this mission, you need a second key, a Sealion Crest Key, which is a drop from a Corse NM named Keremet. This is where the "main event" starts.


Yes, that was just prep work. >_<


Before you set off to complete this mission, ensure you have the following things: First, have your two Coral Chest Keys. Secondly, make sure everybody's Fomor hate level is zero.


Here's how the mechanic works. Similar to Tonberry hate, your Fomor hate level increases as you kill Fomor. To lower it, simply kill the beastmen mobs (Orcs and Gigas) that are found in the Lufaise Meadows and the Misareaux Coast. I'm still not quite sure just how many beastmen you need to kill in order to lower your Fomor hate, but Alla has a rough equation at two beastmen for every Fomor killed. Having higher Fomor hate does not increase the amount of damage you may take from abilities like Everyone's Grudge, however, with higher Fomor hate, Fomor will start to aggro you, and will even start to aggro through Sneak if your hate level is high enough.


You can check your level of Fomor hate with Resauchamet on the top floor of the Tavnazian Safehold, (K-7). He will babble on about the dark blood of the undead dripping from your garments or something like that. Regardless of what he says, the important part is the line after he goes "Hmmm..."


You want him to say "Hmmm.../You still have a farily good head start, but they will not let up until they have found you and filled your heart with poison and pain."


If he says that, then good job, you have the lowest level of Fomor hate possible, and are now ready to proceed on with the rest of the mission. Please make sure everybody has reset their hate level, otherwise you may jeopardize the mission.


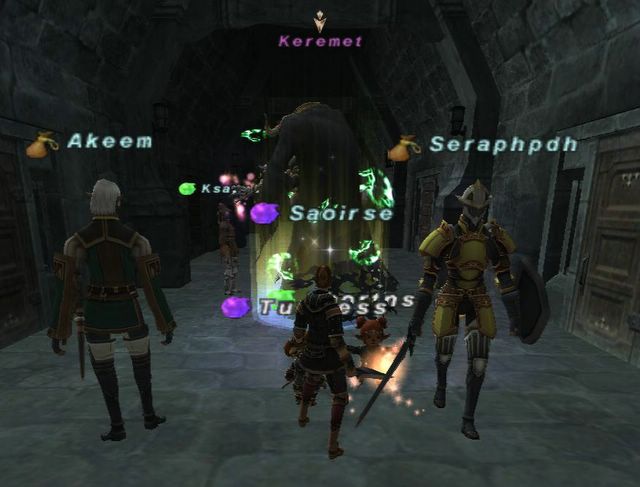
Going back to the mission, you will need a Sealion Crest Key from Keremet, who is found on the very eastern room of Sacrarium, on the second map. There are two passageways leading up to that big room, lined with six Azren skeletons each. The skeletons will all link with Keremet when Keremet is pulled, so clear all twelve skeletons before proceeding onto Keremet. Fortunately, all the skeletons are pushovers.


Keremet himself, on the other hand, is a bit of a pain to deal with. He is a Corse mob, so he has Dance Macrabre, which is a frontal Charmga move. I think Keremet's version of Dance Macrabre is only single-target though, but just to be safe, make sure the tank is having Keremet facing away from the rest of the party. It helps if your primary tank is not a Paladin as well, since you will need to sleep your tank once he gets Charmed, and a Paladin's Resist Sleep trait can get...rather annoying. >_< Keremet is also highly resistant to all forms of magic, but if you must nuke him, use Fire-line spells only since he is, after all, an undead mob. Ice spells are a no-no here.


Once Keremet is defeated, he will drop a single Sealion Crest Key. Give the Sealion Crest Key to someone who is not holding a Coral Crest Key, and move onto (H-7) of the second map, where a pair of double doors awaits you with a "Large Keyhole" and a "Small Keyhole".


Have one of the people with a Coral Crest Key trade their key to the Small Keyhole, and have the person with the Sealion Crest Key trade that key to the Large Keyhole. Note that the person with the Coral Crest Key will be immobilized while using the key, so he/she will not be able to trade the Sealion Crest Key as well. (This is why you give the keys to two different people). The Sealion Crest Key must be traded within about ten seconds from when the Coral Crest Key was traded, and the doors will open. The Coral Crest Key will break after it's used regardless of whether the doors are successfully opened or not, while the Sealion Crest Key is multi-use.


Once inside, turn right and head to the Wooden Door at (G-8) and watch a cutscene. You are then asked to find a Requilarium Key.


Go back out into the passageways and start poking around each of the six rooms that are on the north and south side of Sacrarium. Each room has a ??? on the desk at the end of the room, which may or may not spawn a Ghost NM by the name of Old Professor Mariselle. Old Professor Mariselle is accompanied by two small ghosts named Mariselle's Pupil. If the pupils are killed, Mariselle will simply resummon additional ones, so ignore them as best you can. They dont' hit for much anyway- just keep them away from the mages.


However, Mariselle occasionally Warps back to her spawn point, which gets irritating rather quickly, not to mention that she has a noticeable regen on her, and likes casting Sleepga II (bring Poison Potions). We initially tried pulling Mariselle out into the corridor and fighting her that way, but it proved to be futile since she'd teleport back into the room and by the time we managed to Carby-pull her back out, all the damage we dealt her previously had been regenerated.


After a bit of experimenting, we figured that we actually needed to go into the room (yes, with all the Fomor) and fight Mariselle in the room itself. This is why you want zero Fomor hate, otherwise the Fomor in the room will aggro! Once we figured that it was safe to fight in the room, even without any Sneak and with yellow HP, Mariselle went down in rather painlessly, although be careful not to accidentally hit one of the Fomor by mistake!


Once Mariselle is defeated, click on the ??? again to receive a key item, a Requilarium Key.


Now, head back to the double-locked door and open it again (this is why you need a second copy of a Coral key) and head to the same Wooden Door where you got the earlier cutscene. You'll get another rather lengthy cutscene that goes quite deep into the storyline, and from there, you're essentially done with Sacrarium!


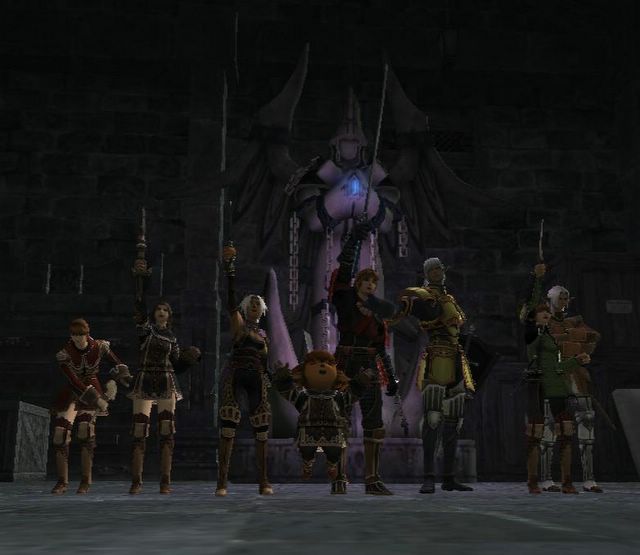
Be sure to take a picture with the statue of Promathia that's lying in the corner. ^^


Also note that all the doors here are one-way, so once you exit, that's that. Once we were done, a bunch of us decided to stick around and try farming up subligar. We got a RDM Subligar to drop, but I didn't get it. >_< Ah well...guess I'll have to come back here again sometime then...; ;


Next up, Promyvion-Vahzl. {fear}!

12 November, 2005

The Savage, Part II

About one month ago, TrueRune tried taking down Ouryu is the Level 50 cap CoP mission, with the help of Subligar Connection. Unfortunately, things didn't quite go as planned, and there was a lot of grumbling as we failed to get people past that fight time and time again. That particular night wasn't a total loss though, since of the seven attempts to take down Ouryu, the very last attempt (which I was part of) managed to take Ouryu down.


However, that then meant that I was the only one in our group that was actually cleared to enter Sacrarium. Tonight was when we would go fight Ouryu again, for the rest of us. Granted, it took a month, but hey...^^


We decided to stick this one out on our own though, since there was quite a bit of confusion the last time, and people weren't quite used to working with one another, and so for everybody's peace of mind, we did this all TrueRune.


With lessons learnt from that last attempt, we decided to take no chances on this one. And when I mean no chances, I mean, no chances. Our first order of the day was to head down to Riverne Site #B01 and farm up some more Hippogryph Tailfeathers to trade in for Mistmelts. Whiel the last time we went, we brought just 3 or 4 Mistmelts, we learnt the hard way that that was far too little. Mistmelts are fantastic for the fight, and so we decided to bring more in with us, and then some more just for good measure.


In the end, we farmed up enough Hippogryph tailfeathers to supply us with ten Mistmelts for the Ouryu fight. What's more, during this process, we also got two Hippogryph feathers which are the AH'able drops, that sell for a very pretty 300k/ea down in Jeuno.


With 600k in funds to blow on this fight, we all decided that we really wanted to beat this dragon, and nothing was held back in terms of medicines. That was 600k well spent though. Hi-Potions were upgraded to X-Potions. We got a Reraise Earring for everybody. 3-4 Yagudo Drinks per mage, since we realised the RDM's too busy to rely on Refresh. Heck, we even got each mage a Vile Elixir (80k!) each! We should've probably also gotten Akanea an Icarus Wing, but that didn't occur to me at the time. >_<


In short, we were ready, and raring to go.


Our strategy was altered significantly in lieu of the last attempt. The big difference was that the idea was to not sleep Ouryu during the fight, instead using Mistmelts to keep him under control. Sleeps were to be saved for the very last part, when the BLMs really needed the Sleeps to both land and stick for Freezes to go off safely.


And so, we came up with this plan. For the record, here's the setup we took in with us:


Me (BLM/WHM)

Saoirse (BLM/WHM)

Ksayyah (SMN/WHM)

Akeem (RDM/WHM)

Seraphpdh (PLD/WAR)

Akanea (SAM/WAR)


We broke the battle up into three sections, with the following strategies:


Stage #1 (100%HP ~ 80%): Just melee Ouryu and use Mistmelts to keep Ouryu under control. BLMs on light nuking with backup healing. SMN main healer. RDM to enfeeble/Dispel, heal, and keep buffs on PLD if they get Dispelled. PLD Mistmelts.


Stage #2 (80% ~ 45%): SMN Astral Flows with Garuda (Aerial Blast). BLMs are now main healing with RDM support. PLD and SAM Mistmelts keep Ouryu under control still.


Stage #3 (45% ~): Freeze. Everybody disengages while RDM Sleep IIs Ouryu and BLMs get the Freeze cycle in action. Use Vile Elixirs and Manafont to cast Freeze if mana is an issue.


With the plan set, everybody knew what they were doing. Basically, the idea was to just endure Ouryu, come hell or shine. The only time we agreed we would sleep Ouryu was if we were in dire need of a recovery period. Even if Seraph was Terrorized, we wouldn't sleep Ouryu (since Terror only lasts about 10 seconds, anyway).


That being said, we lost the first time on Windsday. We were doing really good as well when we realised just how low we were actually getting Ouryu down to without any fancy tricks or anything. However, Ouryu's continuous dispels on Seraph made things a little hard. Just as Ksayyah was about to Astral Flow, Ouryu used Geotic Breath and one shotted Seraph (he dispelled Barstonra) >_<. I died shortly thereafter, and we slept Ouryu and ran for it.


Unfortunately, Ouryu had dispelled Seraph's Reraise, and when he selected "Yes" to reraise, he didn't realise that the question he replied "Yes" to, was not, in fact "Accept Raise?" but instead "Return to Home Point?"


As such, when we saw Seraph back in the Tavnazian Safehold, we really ran for it then. >_<


The second time went a lot smoother though. We adjusted things a little to give Akeem more responsibilities (keeping buffs on Seraph, including Barstone), and realised that we could've started the Aerial Blasts earlier. I Escaped to escourt Seraph back to Monarch Linn (since I had the only other Giant Scale), and by the time we got back, it had turned to Iceday.


We still went for it anyway. ^^


The second attempt had its moments of {excitement} as well, but on the whole, went rather smoothly. Sure, there was some yelling (on my part >_<) going on, but that was because we were approaching the very end, and I really did not want to lose it. ; ; Ksayyah Astral Flowed as planned and got off two Aerial Blasts before Astral Flow wore off. Before too long, we started the Freeze routine. Three Freezes later (and two Vile Elixirs), Ouryu gave up!


It sounds really anticlimatic, I know, but I can't remember very many details about the fight since I was rather tight-strung. I remember trying to Stun a Geotic Breath that somehow must've gone off despite the fact that Ouryu's supposed to resist Stuns (Stun is Lightning-based) and literally spamming Cure IIIs on Seraph trying to keep him alive while Garuda did its work. The fight didn't go perfect, but we beat Ouryu and that's all I was looking for. ^^


In retrospect, I feel Ouryu's very possible without the "optimal" setup. Sure, it's rather easy when you have BLMs and SMNs to take out large chunks of his life, but Aka alone was dealing a fair amount of damage to Ouryu when he could, so I'm sure the BLMs and SMN could be swapped in for other jobs if your CoP group can't get ahold of any. The only job I'd say is a must in this fight though, is a RDM. Ouryu's Stoneskin is {Incredibly tough}, and a RDM's enfeebles work very nicely versus Ouryu. In fact, there was one part where Paralyzed caused Ouryu to skip three of his turns, which got quite a few /cheers out of us. ^^ RDM is also needed to land Sleep II and Silence on Ouryu as well.


Mistmelts are also invaluable to the fight. Not only does it force Ouryu down to the ground, it does so without Touchdown damage, and keeps Ouryu grounded so he doesn't go berserk with his attacks in the air, where his attacks do double damage . They also let the melees (well, in our case, just Aka) actually play an active role in the fight as well. We used a total of six Mistmelts in that last fight. If you're taking in a non-BLM/SMN party for this, obviously bring more Mistmelts to accomodate for this. Overcompensate too. Heck, it's better to have Mistmelts and not need them, than to need them and not have them, rightaru? ^^ Besides, just think of all the time and money wasted if you lose the fight...


Now then, onto Sacrarium...^^

16 October, 2005

The Savage

After some weeks of planning, today was the day TrueRune would attempt the next Promathia mission, CoP 4-2 "The Savage", better known as the fight against Ouryu.

After beating Diabolos and reading the various forums out there for ideas on strategies, we initially came to one conclusion: we would be very hard pressed to beat Ouryu with our typical setup of SAM PLD THF SMN mage + one other. All the strategies out there (at least the ones that make him easy) involve a manaburn strategy of some sort, usually involving a combination of up to three BLMs or SMNs. Furthermore, Ouryu is a wyrm, and as such as most of the typical Wyrm attacks, including Spike Flail, which is triggered by getting hate from behind Ouryu.

In short, {Sneak Attack}{No thanks.} ; ;

And so Saoirse undertook the long, arduous journey to level a BLM to 50 for this very battle. It took a while, but she eventually managed to get it done, and I really thank her for taking the trouble to do so, especially since she really wants to level her THF up. >_< We also managed to find a 6th member for our CoP group, a RDM by the name of Akeem, and so our Ouryu party could look like PLD SAM BLM BLM RDM SMN, which didn't look too bad.

Then one day, after talking to Onekomaru about CoP missions, we got the idea of allying with her social LS, Subligar Connection, and using all our combined BLMs, we theoretically would be able to whisk everybody through the BC without too much of a hassle. After the initial chit-chat was done, all that was left was to decide on a day to actually go try to beat Ouryu.

That day was today.

Of course, there was some preliminary work that needed to be done first in order to make the battle easier. Notably, one of the bigger problems with Ouryu is when he decides to fly. Not only does it make him immune to regular melee attacks (since the melee can't reach him), he also hits twice as hard while flying and is generally a bigger pain to deal with. However, certain EX items, called Mistmelts, can be used to force Ouryu to the ground, at least temporarily.

You get Mistmelts by farming Hippogryphs in either site in Cape Riverne, and trading two tailfeathers to Ferchinne, who can be found at (G-9) of the ground floor of the Tavnazian Safehold. Previously, TrueRune went out to Riverne Site #B01 and farmed up twenty Hippogryph Tailfeathers, or enough for ten Mistmelts. If you are going to do this BC anytime soon, Mistmelts are incredibly important, so don't skip this!

Of another note, be sure to note that while the tailfeathers can be traded between players, the Mistmelts are EX. In addition, the person who uses a Mistmelt in the battle may be stunned for a short period of time, so I prefer giving it to the melee, since they need something to do while Ouryu's in the air anyway.

And so, when the time came, we all trooped over to Monarch Linn once again, where we discussed our battle plans. It was decided that we'd split up into three runs, and have each BLM go twice. Of course, this didn't work out in the end, but that's another story altogether.

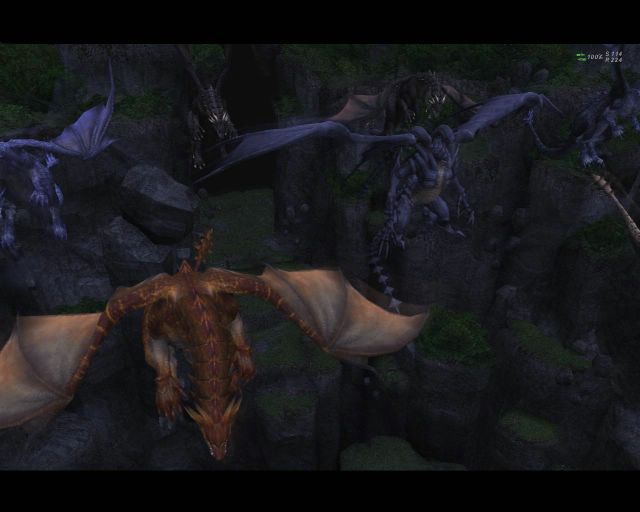
Anyway, entering the BC, who did we find, but Bahamut! Evidently, something was going terribly-werribly wrong with the world, for Bahamut had this strange notion that the return of the Keeper of the Apocalypse would spell out the doom of all the children of Altana! In short, Keeper of Apocalypse returns, and everybody dies. Yeah...

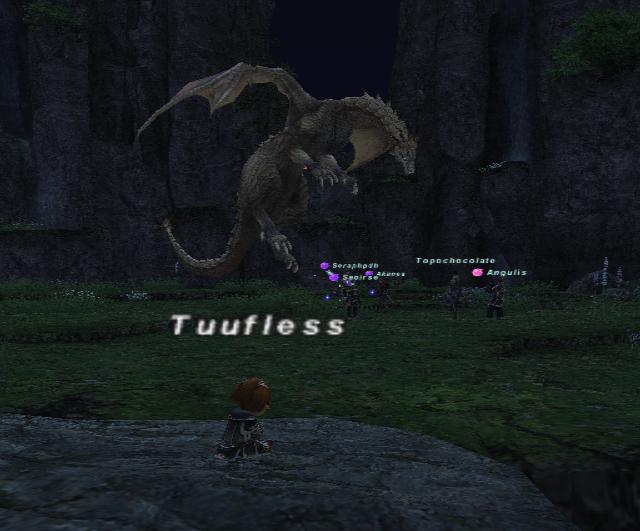
Calling out all his brothers, what resulted was an impressive display of dragon power. Just imagine all the dragons together in one place- Bahamut, Tiamat, Jormungand, Vitra, Ouryu, and a bunch of other dragons I couldn't recognise. Nidhogg, perhaps? >_<


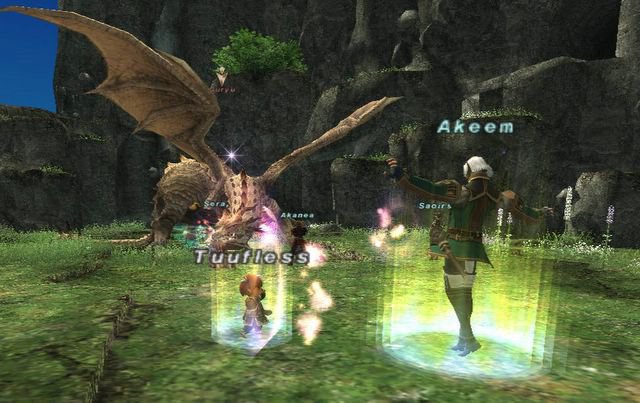
Of the wyrms, we would be fighting this one in particular:


Here are some notes about Ouryu for those who are thinking of going up against him sometime in the future:

* As I've mentioned, Mistmelts are very important. One thing that led to our (eventual) failure was that we didn't bring enough of them. I'd recommend the party bring at least six Mistmelts against Ouryu. The one time we did beat Ouryu (more on that later), we had five Mistmelts on us and we still ran out.

* Ouryu is earth-based, and so is weak to wind. That being said, do not cast Earth-based or Lightning-based spells against him.

* Keep positioning in mind. The last thing you want is a Spike Flail to wipe your entire party. On the other hand, Ouryu also has a conic frontal attack, so having the mages stand right in front of him isn't such a great idea either. The trick is to find the balance between the two.

* He is fairly easy to enfeeble with Silence, Paralyze, and Blind. Red Mages also need to Dispel his Stoneskin, which is very strong. His Enstone attack evidently cannot be Dispelled.

* He builds resistance to Sleep and Bind as the battle goes on. The third sleep gets pretty hard to land, and from then on, you'd need an Elemental Seal to stick Sleep for a whole...five seconds or so. >_<

* His Slowga cannot be Hasted over- it needs to be Erased first, then Haste reapplied.

* If Ouryu is slept, he will fly when he wakes up.

* You only need to get Ouryu to 30% HP in order to "win" this fight.


The plan was to randomly whittle away at his life until he flew. Then, one of the melees would use a Mistmelt, and the BLMs would Sleep him. Then, the Freezes would start. Gathering at Ouryu's front leg, all three BLMs would simultaneously cast Freeze. When the Freezes go off, Ouryu will fly again, whereby another Mistmelt can bring him down, and then the mages put Ouryu to Sleep again before going for a second round of Freezes.

The problem with this was that we were sleeping after each time Ouryu flew. That meant that when it was time for the {Freeze}{Full attack!}, we could not sleep Ouryu. After going through the battle many times (I died like, five times ; ;), many of us were feeling very disgruntled and frustrated at this fight. Finally, it came to the last group's turn.

Ironically, this was the group that we thought would stand the least chance at beating the BC. Our setup was NIN WHM RDM BLM BLM BLM. That is to say, one tank and five mages.

However, we actually managed to beat Ouryu, despite three of us, including the tank, dying! Personally, I haven't the foggiest idea how we managed to do it, especially since Ouryu also got off an Absolute Terror that forced us to Sleep him so our tank could wait out his terror (which can't be Erased). I think it must've been the extra healing support the WHM gave us in exchange for a melee, that, and we had an extra Mistmelt which we put to good use. Another deciding point was recognising that sleeping Ouryu after the first Mistmelt just wasn't going to work, since in all the previous runs, Ouryu's sleep resistance was too high by the end of the battle to execute the Freeze plan smoothly.

Despite all these improvements, the battle was still on the ropes. After the initial Freeze volley, I got hate and died when we couldn't ground Ouryu and Sleep him in time. I activated my Reraise, and then ran over to try and wait out weakness safely. That was one of the longest five minutes I've ever had, during which our RDM and NIN died. >_< What resulted was a rather (in hindsight, amusing) attempt at kiting Ouryu by the members left standing, that is to say, we were kiting Ouryu with mages. >_<

Somehow or another, we managed to actually last five minutes for my weakness to wear. One more round of Freezes later, Ouryu was at around 45% HP, or something like that. However, we were slipping away. Using our last Mistmelt, one of us landed an Elemental Seal'ed Sleep II on Ouryu and tried to rest up enough mana to get the 307mp needed to cast Freeze again. We hit 307mp, and went straight for the kill...

...except Ouryu woke up while Freeze was in midcast. >_<

The last few seconds basically involved me praying things would go well. I was unfortunately positioned behind Ouryu after Ouryu got turned around, and I really did not want a Spike Flail in my face, especially with us so close to victory. Two Freezes went off, to when we realised that Ouryu had run out of range of the third BLM's! >_< The last BLM ran closer in range and started casting Freeze.

In the 19 seconds it took to cast Freeze, we were all dropping like flies. I had long died after giving my last shot at an Aero II, the Ninja was down. A Stonega II from Ouryu took out two more members and soon it was just the White Mage, and the Black Mage desperately trying to get Freeze to resolve.

Thankfully, the final Freeze went off (no physical attacks to interrupt Freeze! ^^) and the next thing we knew, /cheers were going off as we realised we had actually managed to beat Ouryu! ^^

Of course, now I have to figure out how to get the rest of the TrueRune contingency through this BC, but I think I've learnt enough from our losses (and victory) that we are in good shape for trying again.

Here's a quick rundown of what I would recommend for everybody:

Have 8+ Mistmelts split between members. Everybody have a Reraise Earring and Hi-Potions for the melee. More Potions, obviously (15-20) for the tank. Since this is a very intense battle for the RDM, the RDM will probably not be able to keep Refresh up on the mages. Thus, everybody with a mana pool bring 3+ Yagudo Drinks. Melee should be able to perform some form of a ranged attack too, so they're not completely useless when Ouryu's in the air.

For the first part of the battle, use Mistmelts to ground Ouryu when he flies. However, do not Sleep him. You need his Sleep resistance to be low when it's time to start the Freeze volley, so just try to whittle his HP down. BLMs just alternate between Aero, Aero II, and Drain, while throwing in Cures to keep the tank alive. When Ouryu is at around 60% HP or so (I'm not sure exactly when), then it's time to start the Freeze plan as detailed above.

I'll try this strategy out with TrueRune's next attempt. I'll have to obviously change a few things to accommodate for Ksayyah's Astral Flow, but hopefully things will work out alright. ^^

15 August, 2005

Darkness Named

Oh yes, Darkness has a name. And it is called...


Yep, it's that time. >_<

We decided to plan for today to continue onwards through the Chains of Promathia storyline. While Riverne Saite #A01 was the last really trying BCNM fight, this next fight would take the cake.

For completeness's sake, I'll just gloss over the prepatory work, which involves killing an NM Malboro in Carpenter's Landing, and another Antlion NM, then climbing a mountain in the Attohwa Chasm (which, by the way, is actually quite fun ^^). All this was setup leading up to our introduction to Pso'Xja, for what Allakhazam refers to as CoP 3-5, otherwise better known as the Diabolos fight.

First off, one must gain the Tenshodo's approval to enter the inner realms of Pso'Xja. That requires farming some chips in Pso'Xja to bring back to the Tenshodo in exchange for a key item pass. The chips are found in three different places in Pso'Xja, but the easiest (for us, at least) was farming the Diremite Assaulters in one of the uncapped areas of Pso'Xja. The particular entrance we went to can be found at F-7 of the Beaucedine Glacier. From the entrance, make a turn right, where you will find a small, square hole, and drop down to find Bats and Diremites. These all have a chance of dropping a coloured chip, and the drop rate is high, so this isn't particularly difficult.


The mobs here con Decent Challenge to a Level 75, and while there are three different coloured chips, each person only needs one of the three to gain access. Florid Stones also drop, but those were for the ENM fight, so we didn't bother with those. ^^

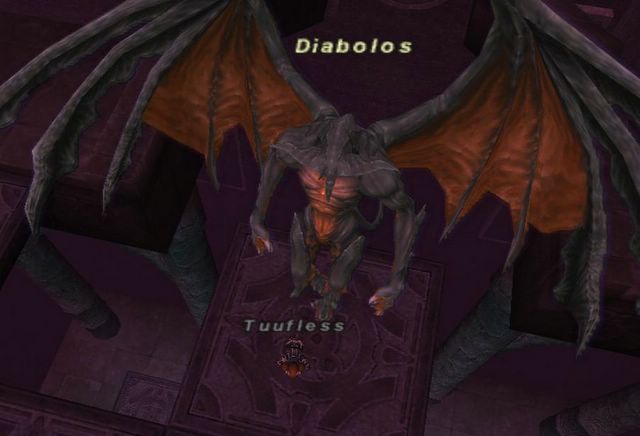
Then came the hard part. Diabolos.

All in all, we tried a grand total of eight times before finally beating him, and even then, we only just managed to beat him by a sliver. As you may know from reading other sites, Diabolos has multiple abilities, such as Phalanx, and a multi-Absorb-stat move. However, what really makes Diabolos hard is a particular move of his called "Nightmare".

What Nightmare does is put everyone in the party in a deep sleep, one that poison, or other DoT effects do not wake you up from. Not only that, Nightmare comes with an incredibly lethal Bio effect, that drains 20-22hp per tick! In case you didn't notice it earlier, I'll reiterate this part: This Bio DoT does not wake you up from Sleep! Not only that, the affected area is essentially the entire battlefield, so there's little chance you will be able to get out of range to avoid Nightmare, although it certainly is possible.

To give you an idea of how silly Nightmare can be, on one of the attempts we did, Diabolos decided to use Nightmare really early into the fight. In fact, we hadn't even gotten into position (more about this later) before Diabolos used Nightmare. And there I was, with Barsleepra and Stoneskin on when Nightmare hit me. When the Bio finally killed me, I still had not woken up from the Sleep effect of Nightmare. It is that silly.

That being said, it is very important that one party member be able to Cure another. Even then, the problem then becomes trying to cope with the Bio effect, since there is just not enough time for the White Mage to Erase the Bio off everyone in the party, especially if another Nightmare just sets everyone back to square one.

However, Nightmare can be stunned. The window might not be terribly long, but there's a long enough pause for anybody to jump in and try to interrupt it. Dark Knights are clearly the best job for the task, especially since a DRK is the only job within the Level 40 cap that can cast Stun. Samurai can use Tachi: Hobaku, while any melee with a Sword can Flat Blade in an attempt to stop it.

Stunning Nightmare is of paramount importance. Forget stuff like skillchains and all that- save TP for stunning weaponskills, and use Meditate, Meikyo Shisui, or Icarus Wings to make sure your melee are always ready to Stun that Nightmare when Diabolos readies it.

Sometime during the fight, Diabolos will also take away some parts of the floor! Should you then go off the edge, you will fall down to the bottom floor where six Diremites will be more than happy to take care of you, so that's a sure death. To make matters more interesting, Diabolos also has a knockback move which, if you're positioned badly, will promptly knock you off the top floor, down below, end of story.

There are only a few possible patterns in which the tiles are removed. Long story short, there are two (actually) three safe "tiles" on which to fight on. When you enter the arena, you will notice that the battlefield is essentially a 5x5 grid. The two safe squares are Diabolos' starting square, and the square directly opposite Diabolos. Put melee on one square, mages on the other. Simple.

Our party at first was myself (WHM), Akanea (SAM), Saoirse (THF), Ksayyah (SMN), Skurlover (RNG), and Moonbeam (PLD). Having no stunners, we tried, and failed all four attempts we made before calling it a night. We did learn that Akanea's Tachi: Hobaku would prove to be very important, and we also learnt that Diabolos is actually quite easy to enfeeble with regular spells, like Silence and Slow. Paralyze, in particular, seemed very useful against him. Despite all that, one Nightmare from Diabolos can easily lose the battle for you. >_<


After giving up, we decided to try again the next day, except this time, since Moonbeam couldn't make it, we swapped him out for Tesutamento, who was nice enough to come on his Ninja. Once again, we wiped three times because of Nightmare, before the last time in which he did not use Nightmare until fairly late into the battle, which Akanea was then able to successfully stun with Tachi: Hobaku. The next Nightmare resolved though, and suddenly, the fight was on the ropes.

We were so close to beating him that time too, it was one of those "now or never" moments. Two hour abilities started flying all over the place, and in retrospect, I don't think the fight could have been won if it weren't for that. Granted, I only noticed one Searing Light go off, and Meikyo Shisui was integral at keeping Diabolos at bay, while I made a last-ditch effort at a Benediction to keep the other party members alive after Tesu bit the dust. Eagle Eye Shot...um...missed. >_<

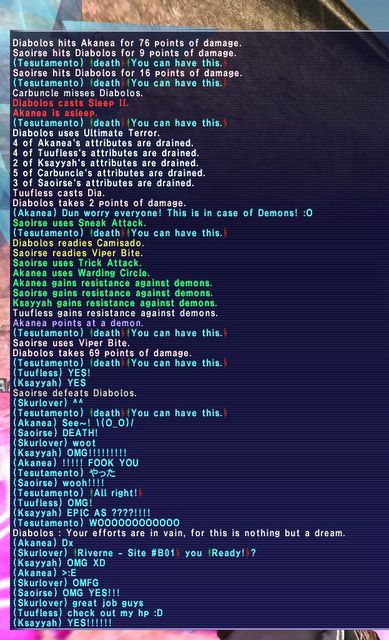
When Diabolos literally had just one line of health left, I decided to go all the way, and activated Reraise to toss one last Cure onto Akanea and Dia Diabolos one more time. I was completely spent at this point, weakened, and with no health or mana to contibute. Thankfully, Saoirse managed to get in a SA'ed Viper Bite for the kill, and there was much rejoicing. ^^


Heh. We (those lying face down) were grimacing at how close the battle was, and were literally spamming the party chat with "{death}{You can have this.}" and "OMG!! KIILLLLL!!!!!" Suffice to say, we were very relieved to have won. ^^

To those of you out there who have yet to attempt this fight- I strongly recommend the following. Do a dry run first, just to get used to what the battle is like. Try to have a Dark Knight if at all possible, and keep him Hasted to reduce the Stun recast. Have melees with a weaponskill that Stuns bring an Icarus Wing to make sure they are prepared to Stun Diabolos when the time comes. Everybody, including mages, bring multiple Hi-Potions. Yagudo Drinks are a must for mages.

White Mages, keep Stoneskin up. Any time you can buy yourself in the event of Nightmare is very valuable, and Stoneskin could very well make a difference. Also Barsleepra also helps shorten Nightmare's duration. Regen is a buffer against Nightmare as well, although since it wears off quickly, it's not exactly the most practical of precautions to take. I'd Regen yourself and the tank, and try fitting it on the other members as you see fit.

Make sure everybody is at least capable of curing themselves with Hi-Potions. Thinking about it, I would say that a Paladin tank is preferred over a Ninja tank, simply because Diabolos' physical attacks will wake the Paladin up from Nightmare first, and the Paladin is then free to wake the White Mage up with Cure. A plan against Nightmare is very important in this battle, so don't underestimate it.

Of course, you could have everybody bring in a Vile Elixir +1, but I don't think people are willing to risk that much money on one fight. ^^

In any case, it's onto the Level 50 cap series of the Promathia missions- good luck for those who have yet to attempt this!