
To briefly summarize, the Airship battle is actually a series of three fights put together. To start, you have to first take on five Mammets (yes, those Mammets back from Riverne Site #A01), following which ou then have to fight Omega Weapon, before culminating in the final showdown against Ultima Weapon.
While the Mammets aren't all too difficult, both Omega and Ultima Weapon have plenty of monkey wrenches that they can throw into your plans. However, the kicker here is that you only have 45 minutes to clear all three fights, and this includes cutscene time (there are three cutscenes, too!)
After defeating the Snoll Tzar about a month and a bit ago, TrueRune had been very laid back when it came to CoP missions. I guess a large part of that was because ToAU also came out, and people found new things to get distracted by. However, I still very much wanted to at least see sea.
It was while I was randomly on my way through Mount Zhayolm to solo some xp for my BLM when I got a /tell from Sollanon, inquiring if I had a WHM60+, and if I was wiling to help them out. There was some initial confusion when they didn't realise that we were on the same CoP mission, but eventually things got straightened out, and all of a sudden, I had the chance to give the Airship battle a shot.
But first, some introductions are in order. Sollanon, Joachim, and Ladyrikku are all members of a Singapore-based linkshell called Doom, that was set up by Apocalypse a long time ago, and was my first linkshell that Glueforever gave me when I started the game. Since then, I've since moved on, although am still friends with the people inside the linkshell. When Apocalypse decided to hang up his scythe for greener pastures in Azeroth (HAH!), the linkshell kind of stagnated, and everyone else went their own way.
Yet, somehow, small as though it may be, the linkshell somehow survived all this time, and now I could work together with old friends to try and clear the Airship battle.
And so, I decided to join them for the ride.
Our party setup was NIN NIN MNK RDM WHM BLM, comprising of myself, three people from Doom, and two Japanese who were with the Doom folks. Of the six of us, only Ladyrikku had previously cleared the Airship battle, and we took our time to first enter the battlefield to clear the initial cutscene, and discuss strategy while we, y'know, actually had an airship to stand on. Each of us had the requisite medicines, not to mention a Reraise item of some sort.
Things to do before entering the battlefield:
* Enter the battlefield and exit so you can opt to skip the cutscene on the real run.
* Having someone with a timer to keep track of the time remaining is very useful.
* Bring Reraise items!
* Bring medicines!
* Bring CCB Polymers!
We spent a good time going over the details of the plan. The good news with the Mammets are that they feel like they are the same level as those fought back in Riverne Site #A01, so they aren't too difficult to handle. However, you should recognise that they are a speed bump, and it really is in your best interest to clear this part of the battle in as little time as possible.
In other words, your party needs to be able to clear the Mammets with no deaths, no 2hrs, and no medicine.
It's still not too bad, really. We had the NINs each tank two Mammets, while Joachim and Sollanon (MNK and BLM respectively) tried blasting their way through the fifth, while Zeek and I (RDM and WHM) ran around trying to keep some semblance of order around. Yellow Liquids are nice here for locking Memmets into Dragoons when they change into them, and better yet, they drop aplenty from fallen Mammets.

Some things to note:
* Once again, your goal is to clear this without any deaths, 2hrs, or medicines.
* You are told the amount of time remaining at the start of each section. Finishing the Mammets with around 35 minutes left on the clock is good.
* Use Yellow Liquids liberally to help make things easier.
* Remember Mammets have buffs that let them absorb physical or magical damage, so be attentive.
* Try keeping all the Mammets Silenced, even if they aren't in BLM form, as a pre-emptive measure.
* As the Mammets have a lot of AoE moves, spread out to minimise collateral damage.
* After clearing the Mammets, there will be another "rest period" before continuing onto Omega Weapon, where your HP and MP will be reset to full. Dead people however, sta dead.
After the Mammets come the real challenges: Omega and Ultima Weapon. Omega first. (D'uh.)
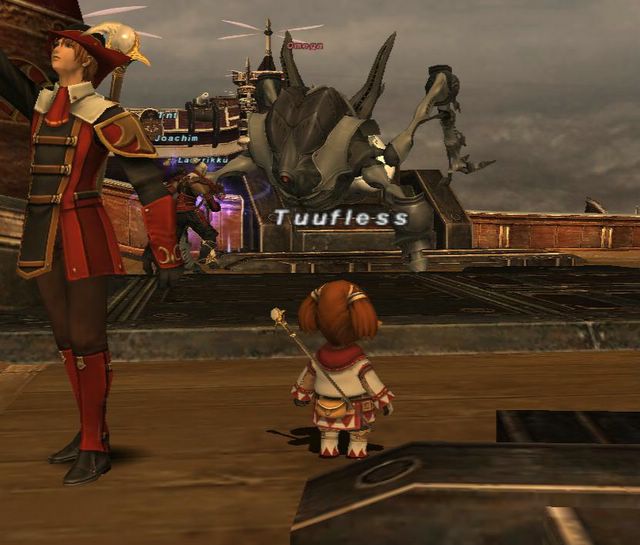
As you might be able to discern from the screenshot, we are fighting in specific spots on the airship. When you exit the cutscene after the Mammets, you "spawn" at one end of the ship, with Omega Weapon standing opposite you where the door is. You are far enough such that Omega Weapon will not aggro you, and you want to stay at this end of the ship for a very simple reason- you will probably wipe, and in doing so, you must be able to Reraise without getting aggro from Omega.
While I'm on the topic of wiping, both Omega and Ultima Weapon will return to their spawn point in front of the door in the event of a full party wipe. However, the important thing to note is that they do not regain health while unclaimed and yellow. This means that it is perfectly viable to wipe, reraise, rest up, and pick up from where you left off. However, given that recovering from a wipe is a rather time-consuming process, you really don't want to wipe more than twice in the three battles. Three wipes is certainly pushing things.
The thing is, Omega has quite a number of really annoying TP moves, and as he approaches death, he starts spamming them more and more. Your White Mage will need to be very attentive and alert to keep up with things. Two moves- Ion Efflux and Rear Lasers require -na attention (Paralyna and Stona respectively). Target Analysis drains stats, although the effect is negligible enough that you don't really need to worry about Erase.
What you are worried about is a move called Pile Pitch, that is a Throat Stab-like move, in addition to a hate reset. Omega Weapon will start spamming this move as he gets closer and cloer to death, and this is where you want to start using those CCB Polymers to jam things up a bit, because otherwise, maintaining any semblance of hate control practically becomes impossible, not to mention that people start dropping like flies.
Because of that, one observation that people have made is that it is actually quite likely that you will wipe to Omega Weapon with Omega at just 1 or 2% HP. What you can do here is just to Reraise and then have your BLM cast Ancient Magic on it once it has returned back to its starting location. Your BLM will need to have enough mana to cast Ancient Magic while Weakened, though, through food and gear.
About Omega Weapon:
* In my opinion, Omega Weapon is really the big stumbling block in this whole sequence of fights, so be prepared.
* Omega Weapon has a LOT of HP.
* Aim to defeat Omega Weapon with about 20 minutes left on the clock.
* Ion Efflux = Paralyze
* Rear Lasers = Stona
* Use CCBs proactively.
* Mages should use their mana aggressively, for maximum efficiency in the event that the party might wipe.
* Your White Mage will probably need Ethers for this stage. I personally used my Pro-Ether here, and just barely had enough mana left, and this was with /SMN, too.
* To use a CCB Polymer, you just "Use" it from the menu. You do not need to run up to Omega/Ultima Weapon to use it.
Once you're through with Omega Weapon, only Ultima Weapon stands in your way.
Ultima Weapon is very much like Omega Weapon, except that while Omega Weapon has a lot more HP, and thus takes longer to kill, Ultima Weapon has deadlier moves, but less HP. Ultima Weapon can do most of what Omega Weapon does, including directional Paralyze and Petrifies. To add to that however, Ultima Weapon also has a move called Chemical Bomb which puts both Slow and Elegy on the target. If you have NIN tanks (which we did), be sure to Erase them off, for Chemical Bomb quite literally kills NIN tanks. I'm pretty sure it overrides Haste, too. Once again, you want to be standing in the same positions as you did for Omega Weapon- at the back of the ship with melee and mage separate on starboard and port.
The two moves that you really don't want to be seeing however, are Equalizer and Anti-Matter, both of which are massive amounts of damage, AoE and single target, respectively. Once Ultima Weapon starts using those, it's time to kick things into high gear, and use the remaining CCB Polymers on him while everyone goes on {Full attack!} mode. Even still, chances are you will just run out of CCB Polymers and wipe with a sliver of health remaining.
If you are fortunate enough to be in this situation, you can always get the BLM to quickly Reraise and try landing Ancient Magic on Ultima for the kill. Of course, make sure he puts Reraise back on first, just in case. ^^
That outlines the general strategy for the fight. I cannot stress to you how important a good, solid plan is for the fight. We tried a total of three times to get this fight down, and might've very well won on our first try had Ladyrikku not realised halfway that she had come as a NIN/WHM by mistake. (Divine Seal from a NIN in the middle of the fight got a {Huh?!} out of me, although at the time, I thought it was a rather odd plan to being able to Paralyna herself. XD)
Our second attempt was more shaky, and I ended up dying to the Mammets through a whole bunch of collateral damage. We quickly aborted that run after we cleared the Mammets, choosing to return to the mainland instead.
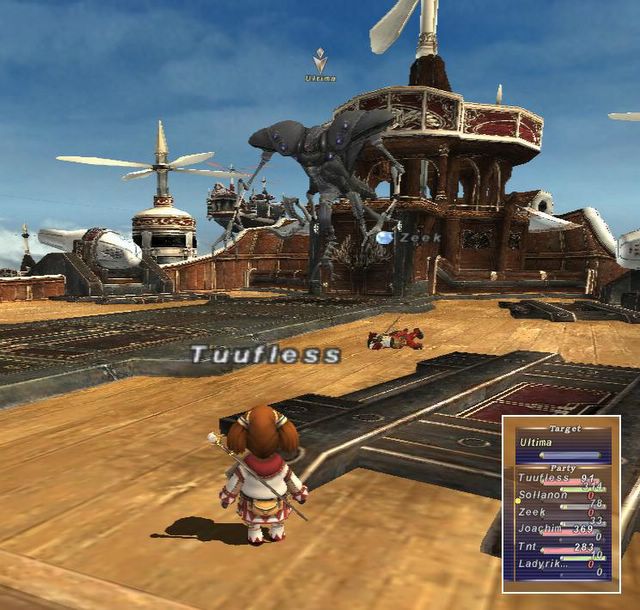
Finally, things fell in place on the third run, now that Ladyrikku actually, y'know, came as NIN/WAR. -_- We powered through the different stages of the battle in excellent time, and when we eventually wiped to Ultima Weapon in the screenshot above, with Ultima having just a sliver of life left, we still had a good ten minutes to go on the clock. Granted, Sollanon accidentally messed up by casting Blizzard II instead of say, Freeze, but a Chi Blast from Joachim and a Holy from me quickly took care of that. ^^
From my perspective, I came as WHM/SMN because I wanted the mana, and I am very glad I did. Despite the increased Max MP pool, and Auto-Refresh, I found that, once I had the feel for the battle, I was very busy. I sitll had my filters up from Dynamis on my first run, so I missed all the detrimental effects, like Petrification and Paralyze, so I was slow in reacting to them, but taking the filters off fixed that. On the third run, I ended up using my Pro-Ether and Benediction after an Equalizer as a rather pro-active Cure. For one, I was low on mana anyway, and the hate reset was actually a good thing, since Ultima Weapon did not come chasing me around the ship after the Bene. XD
As a WHM on the fight, being attentive is very important. I'd sub SMN if at all possible, and bring at least a Vile Elixir +1, Pro Ether, a CCB Polymer, and a couple Yagudo Drinks to the fight. Like I said, if things are going correctly, you should be continually casting, which was something I wasn't doing on our first run.
In any case, TrueRune is finally starting to look towards its own run of the Airship battle, so now it's time to see how well this strategy templates onto our job setups, with a Paladin tank. (/grin Seraph ^^)
4 comments:
Hehe statics are nice huh c_c.
Well, it's always nice to know where we stand.
I can't tell from the tone of your comments how the two of you feel about things, so I'll reserve any further comment until I understand you two better.
Call it cautious treading to avoid misunderstanding.
Its a kick ass fight Tuufless!!! Our static did two dry runs, before going all out and beating it on our first (third technically) try. We had 9 minutes left when we beat it too :D.
Post a Comment