27 November, 2005

Dynamis Lord {Full attack!}

Hah, hah...
You cling to life so stubbornly... Troublesome fools...


Sightless grubs, how you struggle towards the light you cannot see.
Give up your painful strivings. Give in to the darkness of oblivion.


Fools...your deaths will serve to teach you the true nature of Dynamis...


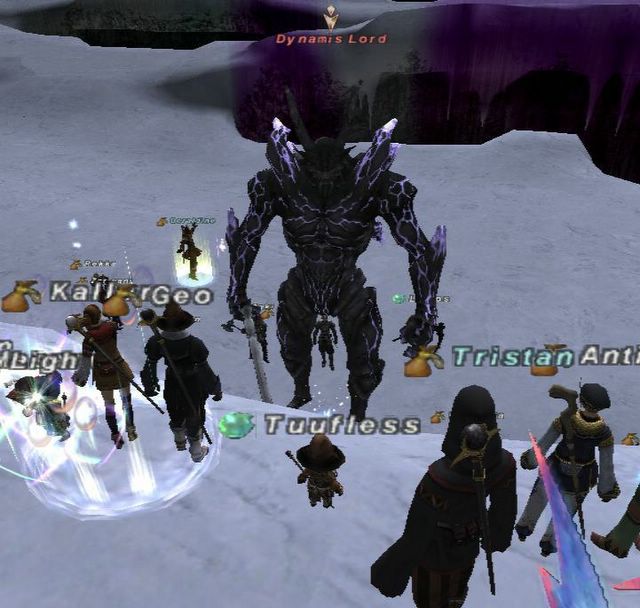
Well, we tried the Dynamis Lord again. >_<


It had been about three months since my Dynamis linkshell last tried taking on the Dynamis Lord. A lot has changed since then, we've gotten several AF2s for people, and the linkshell as a whole, has grown considerably. It's somewhat strange for me to say this given how I've complained about the linkshell in the past, but I'm actually proud of us and I'm happy to be a part of this linkshell. ^^


Our numbers are still not quite enough to really take on the Dynamis Lord. Other linkshells that "farm" the Dynamis Lord bring in a full compliment of 64 people (or close to), but we only tend to have about 45 people on a run, which while decent (and we have grown from before!), isn't really enough to take on the Dynamis Lord just yet.


However, last week, Elmas announced that this would be his last Dynamis raid, as he has decided that it was time for him to leave the game for good. ; ; As such, he decided that, perhaps, as one final hurrah of sorts, we should try the Dynamis Lord just, one more time? ^^


About Elmas as a leader; the Explorer linkshell has been running for about a year already, although I only joined some eight months ago. While Elmas has his flaws (and don't we all), he has managed to construct a linkshell from ground up, and nurture it to what it is today. While we are not the biggest, the most successful, or the most well known linkshell out there, I get a definite feeling of comradeship and unity within the LS, and the associated respect for the linkshell and its members, which I think is something all linkshells, no matter the purpose, should strive for. To that end, Elmas has my respect, and I tip my Wizard's Petasos off to him.


Anyway, as I said, this would be Elmas' last Dynamis run. He sold off his gear for the other jobs and with the funds, bought the medicines for the linkshell to use when fighting the Dynamis Lord. He missed a couple things though, like Poison Potions to deal with Sleepga, and the Black Mages could have used a Vile Elixir +1 and a Pro Ether (taken from the GWS forums ^^) but he really wanted to give the Dynamis Lord one last try before he left.


And so did we.


The run felt...different. Normally, on Dynamis-Xarcabard runs, all I really care about is whether a Sorcerer's Petasos has dropped, since that puts me one hat closer to mine (astute readers will know I'm also under time pressure to get my AF2 hat ; ;). However, I didn't care for the hat much this time through, since I was (or we were) all /psych-ed up for the {Mega Boss}{Battle}.


(And no, the Sorcerer's Petasos didn't drop. -_-)


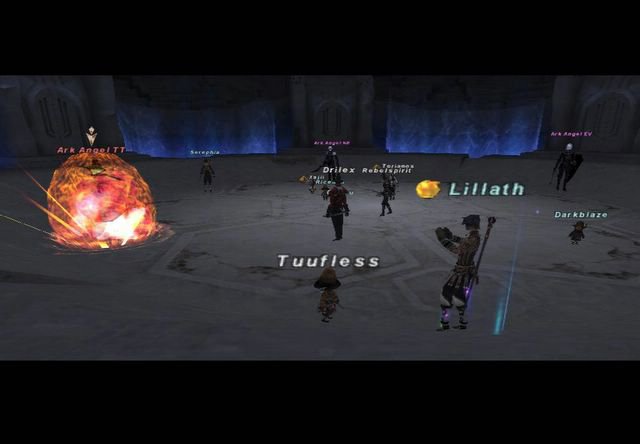
Anyway, we cleared Dynamis-Xarcabard up to Ying and Yang, the Dynamis Lord's two pet dragons with some time left to spare. We then did a complete rearrangement of jobs and party formations to cater to the big battle ahead. Literally. We were Warp II'ing people back to town so they could switch jobs and come back inside. For example, /NIN isn't very useful against the Dynamis Lord, so all melee set their subjobs to /WAR or /THF. RDMs went back to change their subjob to /DRK. Some other people went back to switch over to more damage-oriented classes, like Frisk (our resident PLD) who took out his SMN for a spin.


The first step in dealing with the Dynamis Lord is to first dispose of Ying and Yang. The tricky part is that given time, the Dynamis Lord will resummon his two dragons. However, their summoning can be delayed if Ying and Yang are both killed at the same time.


Positioning was important in this first as well. Our battlezone would be that final cliff edge before the funny, crack-like patterns leading back up to Castle Zvahl. That way, the mages can nuke from above and not get hurt, which is particularly important when dealing with the Dynamis Lord and his multiple AoE moves, like Oblivion Smash, which fortunately happens to be grounded. Since we (the mages) are nuking from above, the cliff edge would absorb the Oblivion Smash, and we could continue.


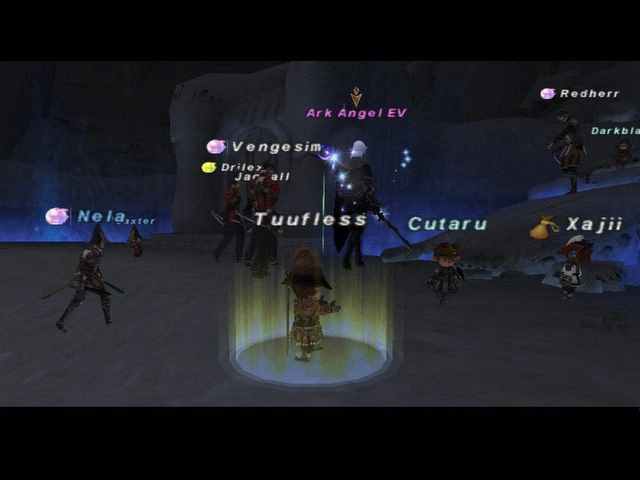
Anyway, we set out trying to kill both Ying and Yang. The idea was to whittle Ying down to 20% HP, then shift focus over to Yang. Once Yang is also at 20%, we'd gather the two dragons together, whereby the black mages would kill both simultaneously with a volley of Thundaga IIIs. On our first attempt, someone accidentally killed Ying, so we tried again after they respawned and we were successful the second time.


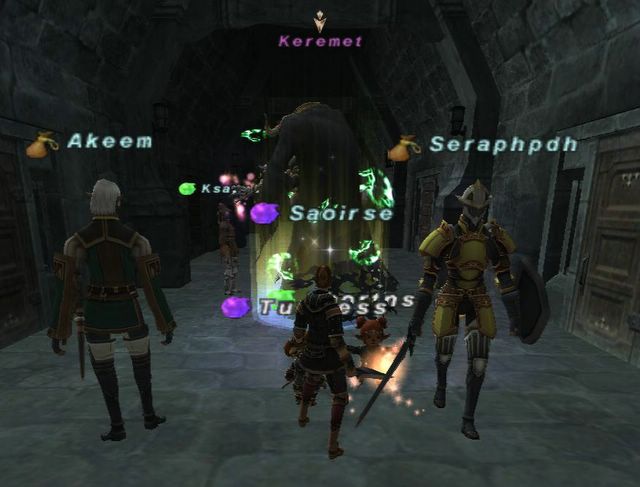
Melee then used Sleeping Potions and Opo-opo necklaces to get up to 300% TP, mages buffed, rested to full, and got everything ready, and after a bit of last minute discussion, we pulled the Dynamis Lord!


Our RDM/DRKs would Chainspell and spam Stun in pairs, since there is a chance that the Dynamis Lord will resist a Stun (which would be a very bad thing.) We figured from there, we had just under three minutes to kill the Dynamis Lord, which I guess isn't too bad if everyone was on {Full attack!}


We actually had a very nice start. It seems that the Dynamis Lord does start out with some Stoneskin-esque buff that needs to be worn down initially, but when we noticed that we actually were dealing damage to him, things started to look optimistic.


Then somewhere around 50% HP, the Dynamis Lord created clones of himself (two clones, to be exact), and teleported up to the mages before using Oblivion Smash. >_< Needless to say, that was firstly, unexpected and secondly, wiped out the mage row. >_< We managed to drag him back down to the cliff base, but things were slipping real fast. I Reraised and Manafonted into an Elemental Seal'ed Thundaga III which hit for pretty respectable damage (1100 damage or so). Alas, he teleported back up to the top and wiped out the mages once again, and that, as they say, was that. >_<


It was a pretty good shot at taking him down though, seeing as how there were only 47 of us in Dynamis-Xarcabard. It's too bad I didn't even get a chance to use any of the medicines I brought along with me (a Pro-Ether and a Vile Elixir +1), since the idea was to replenish my MP before I die, but oh well. I'm not quite sure just how far we managed to get his life down to, but from linkshell chat, it looks like somewhere between 30-40%, which as I said, is pretty decent given that this was our first real attempt at taking him down.


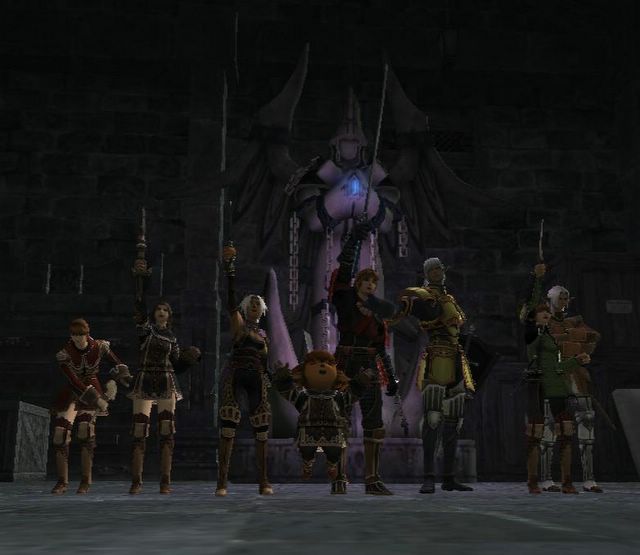
When time eventually expired, and we were returned to Xarcabard, we all said our farewells to Elmas with a bit of a fireworks party, thanking him for his efforts over the past year. I actually feel a little sad he's leaving, despite some of the things I've said about him, it's kinda strange...


In any case, from next week onwards, we move to ExplorerII, led by Lostman. がんばりましょう!^^


25 November, 2005

He-He-He-He-He-Hexa Strike!

Over the past few days, I've been doing random things with Enron with the intention of getting some progress on our crafting. One time, we went down to the Sea Serpent Grotto where Enron could steal me some Gold Beastcoins and another day we went down to the Kuftal Tunnel to farm the Recluse Spiders there for Spider Webs for Enron's Clothcraft.


However, as of late, these sessions have started to look more like skillup sessions, at least for me, than actual farming. Part of that is probably the difficulty in procuring synthesis materials for me. While we can spend a couple hours in Kuftal and come back with something like ten Spider Webs, that's ten skillup synths for Enron. Comparatively, we only get say, three Gold Beastcoins, which isn't even enough to fund one of my skillup synths. >_<


Anyway. Over time, I've been randomly skilling up my Club here and there. I can't exactly say I've actually dedicated myself to skilling up my Club much, although when it comes to random things like beating up Devil Mantas while waiting for Charybdis to pop, or helping an LS member with their coffer keys, I'll usually take out the Club for a little whirl. Recently, I found that, as a WHM/NIN, I can actually take on Robber Crabs on a one-to-one match and hold my own very well between Stoneskin, Flash and Utsusemi: Ichi. Since then, I've been making a more concentrated effort at skilling up my Club.


Why, you say? Because White Mages have one of the coolest weaponskills in the game: Hexa Strike.


I know, it's really strange that a mage, yet alone a White Mage gets such a weaponskill, but hey, that's how things go. So one night, I draggen Enron down to the Monastic Cavern to try and skillup, and perhaps get a few Gold Beastcoins while we were at it, too.


The mobs checked as "Decent Challenge" to Enron (THF75), while they were T-VT to me (WHM67). I had brought my skillup stuff along, which basically consisted of some leftover Tentacle Sushi and a Life Belt. And so we started skilling.


Initially, things went great, and I got a full +0.6 of the first mob alone within a couple minutes. However, things slowed down considerably after that, although I'd still get the odd skillup here and there. I wasn't even sure what level the orcs in the higher end of the Monastic Cavern would cap weapons at, but looking at how they're DC to 75, I suspect they might be skillup up to 230 or so.


A few hours went by, and I even ran out of Tentacle Sushi! Enron fixed that problem by eventually lending me about 16 million gil worth of gear just so I could hit the mobs. >_< Although granted, it was fun to wander around with a Sniper Ring and a Peacock Charm. I don't think I've ever worn a single piece of gear that cost that much, although you can make the argument that my staves are about 16 million gil as well, but that's divided into 8. >_<


Of all times, the developers decided that tonight would be the perfect time to get to work on some emergency maintenance, so time was against us on this. Fortunately, with about half an hour left before the servers would be taken down, I finally get the message:


...and wasted no time in sending globs of clubbing, fireball-ish, twacking goodness towards the Orc. ^^


Hexa Strike is so funny. I really cannot comprehend just why they stuck this weaponskill on a White Mage of all classes, but I guess each job has to have its perks. It's just that every time I see the massive explosions fly across the screen with a White Mage's (and a Tarutaru White Mage at that, too) hand flying across the place, I just crack up. At least Enron and I can now make a {Light} skillchain: {Hexa Strike}>{Shark Bite} for the win! ^^

20 November, 2005

The Secrets of Worship

In contrast to the month's delay it took TrueRune to organise a reattempt at Ouryu, we decided to go make a Sacrarium run just one scant week after Ouryu fell. Thankfully, Sacrarium isn't nearly as trying as Ouryu, although there still was a little bit of prep work that people needed to do.


First off, it is a good idea to head down to Sacrarium first and farm up two Coral Chest Keys, which drop from the Fomor there. We did this yesterday in preparation for "the run" today. The drop isn't too horrendous, although be prepared to stick around here for a while. Here's a map of Sacrarium.


Fomor can be found on the passageways through the second map, and you can camp just outside any of the six rooms to the north and south of the map. Not too close to the doors, mind you, otherwise you might pick up some unwanted aggro.


However, to get to this section, you must first navigate through the maze, which is displayed on the first map. The maze changes with each Vana'diel day, but navigating it isn't too difficult. However, it's still quite easy to get lost inside the maze, and in particular, it is easy for people to get separated, so stick together.


Lunaofsevi of Midgardsormr has penned up some fantastic maps to help you navigate Sacrarium, which I stumbled across on the Kool-Aid Linkshell's FFXI website. Alternatively, you can go visit Lunaofsevi's own website as well.


Basically, Lunaofsevi's managed to plot out just what the maze really looks like on the appropriate days, which is a huge help in nagivating through this place smoothly.


We had already come here previously to farm up some Coral Chest Keys off the Fomor here. You will need two Coral Chest Keys among your party in order to complete this mission. However, in order to open the double doors that's required for this mission, you need a second key, a Sealion Crest Key, which is a drop from a Corse NM named Keremet. This is where the "main event" starts.


Yes, that was just prep work. >_<


Before you set off to complete this mission, ensure you have the following things: First, have your two Coral Chest Keys. Secondly, make sure everybody's Fomor hate level is zero.


Here's how the mechanic works. Similar to Tonberry hate, your Fomor hate level increases as you kill Fomor. To lower it, simply kill the beastmen mobs (Orcs and Gigas) that are found in the Lufaise Meadows and the Misareaux Coast. I'm still not quite sure just how many beastmen you need to kill in order to lower your Fomor hate, but Alla has a rough equation at two beastmen for every Fomor killed. Having higher Fomor hate does not increase the amount of damage you may take from abilities like Everyone's Grudge, however, with higher Fomor hate, Fomor will start to aggro you, and will even start to aggro through Sneak if your hate level is high enough.


You can check your level of Fomor hate with Resauchamet on the top floor of the Tavnazian Safehold, (K-7). He will babble on about the dark blood of the undead dripping from your garments or something like that. Regardless of what he says, the important part is the line after he goes "Hmmm..."


You want him to say "Hmmm.../You still have a farily good head start, but they will not let up until they have found you and filled your heart with poison and pain."


If he says that, then good job, you have the lowest level of Fomor hate possible, and are now ready to proceed on with the rest of the mission. Please make sure everybody has reset their hate level, otherwise you may jeopardize the mission.


Going back to the mission, you will need a Sealion Crest Key from Keremet, who is found on the very eastern room of Sacrarium, on the second map. There are two passageways leading up to that big room, lined with six Azren skeletons each. The skeletons will all link with Keremet when Keremet is pulled, so clear all twelve skeletons before proceeding onto Keremet. Fortunately, all the skeletons are pushovers.


Keremet himself, on the other hand, is a bit of a pain to deal with. He is a Corse mob, so he has Dance Macrabre, which is a frontal Charmga move. I think Keremet's version of Dance Macrabre is only single-target though, but just to be safe, make sure the tank is having Keremet facing away from the rest of the party. It helps if your primary tank is not a Paladin as well, since you will need to sleep your tank once he gets Charmed, and a Paladin's Resist Sleep trait can get...rather annoying. >_< Keremet is also highly resistant to all forms of magic, but if you must nuke him, use Fire-line spells only since he is, after all, an undead mob. Ice spells are a no-no here.


Once Keremet is defeated, he will drop a single Sealion Crest Key. Give the Sealion Crest Key to someone who is not holding a Coral Crest Key, and move onto (H-7) of the second map, where a pair of double doors awaits you with a "Large Keyhole" and a "Small Keyhole".


Have one of the people with a Coral Crest Key trade their key to the Small Keyhole, and have the person with the Sealion Crest Key trade that key to the Large Keyhole. Note that the person with the Coral Crest Key will be immobilized while using the key, so he/she will not be able to trade the Sealion Crest Key as well. (This is why you give the keys to two different people). The Sealion Crest Key must be traded within about ten seconds from when the Coral Crest Key was traded, and the doors will open. The Coral Crest Key will break after it's used regardless of whether the doors are successfully opened or not, while the Sealion Crest Key is multi-use.


Once inside, turn right and head to the Wooden Door at (G-8) and watch a cutscene. You are then asked to find a Requilarium Key.


Go back out into the passageways and start poking around each of the six rooms that are on the north and south side of Sacrarium. Each room has a ??? on the desk at the end of the room, which may or may not spawn a Ghost NM by the name of Old Professor Mariselle. Old Professor Mariselle is accompanied by two small ghosts named Mariselle's Pupil. If the pupils are killed, Mariselle will simply resummon additional ones, so ignore them as best you can. They dont' hit for much anyway- just keep them away from the mages.


However, Mariselle occasionally Warps back to her spawn point, which gets irritating rather quickly, not to mention that she has a noticeable regen on her, and likes casting Sleepga II (bring Poison Potions). We initially tried pulling Mariselle out into the corridor and fighting her that way, but it proved to be futile since she'd teleport back into the room and by the time we managed to Carby-pull her back out, all the damage we dealt her previously had been regenerated.


After a bit of experimenting, we figured that we actually needed to go into the room (yes, with all the Fomor) and fight Mariselle in the room itself. This is why you want zero Fomor hate, otherwise the Fomor in the room will aggro! Once we figured that it was safe to fight in the room, even without any Sneak and with yellow HP, Mariselle went down in rather painlessly, although be careful not to accidentally hit one of the Fomor by mistake!


Once Mariselle is defeated, click on the ??? again to receive a key item, a Requilarium Key.


Now, head back to the double-locked door and open it again (this is why you need a second copy of a Coral key) and head to the same Wooden Door where you got the earlier cutscene. You'll get another rather lengthy cutscene that goes quite deep into the storyline, and from there, you're essentially done with Sacrarium!


Be sure to take a picture with the statue of Promathia that's lying in the corner. ^^


Also note that all the doors here are one-way, so once you exit, that's that. Once we were done, a bunch of us decided to stick around and try farming up subligar. We got a RDM Subligar to drop, but I didn't get it. >_< Ah well...guess I'll have to come back here again sometime then...; ;


Next up, Promyvion-Vahzl. {fear}!

12 November, 2005

The Savage, Part II

About one month ago, TrueRune tried taking down Ouryu is the Level 50 cap CoP mission, with the help of Subligar Connection. Unfortunately, things didn't quite go as planned, and there was a lot of grumbling as we failed to get people past that fight time and time again. That particular night wasn't a total loss though, since of the seven attempts to take down Ouryu, the very last attempt (which I was part of) managed to take Ouryu down.


However, that then meant that I was the only one in our group that was actually cleared to enter Sacrarium. Tonight was when we would go fight Ouryu again, for the rest of us. Granted, it took a month, but hey...^^


We decided to stick this one out on our own though, since there was quite a bit of confusion the last time, and people weren't quite used to working with one another, and so for everybody's peace of mind, we did this all TrueRune.


With lessons learnt from that last attempt, we decided to take no chances on this one. And when I mean no chances, I mean, no chances. Our first order of the day was to head down to Riverne Site #B01 and farm up some more Hippogryph Tailfeathers to trade in for Mistmelts. Whiel the last time we went, we brought just 3 or 4 Mistmelts, we learnt the hard way that that was far too little. Mistmelts are fantastic for the fight, and so we decided to bring more in with us, and then some more just for good measure.


In the end, we farmed up enough Hippogryph tailfeathers to supply us with ten Mistmelts for the Ouryu fight. What's more, during this process, we also got two Hippogryph feathers which are the AH'able drops, that sell for a very pretty 300k/ea down in Jeuno.


With 600k in funds to blow on this fight, we all decided that we really wanted to beat this dragon, and nothing was held back in terms of medicines. That was 600k well spent though. Hi-Potions were upgraded to X-Potions. We got a Reraise Earring for everybody. 3-4 Yagudo Drinks per mage, since we realised the RDM's too busy to rely on Refresh. Heck, we even got each mage a Vile Elixir (80k!) each! We should've probably also gotten Akanea an Icarus Wing, but that didn't occur to me at the time. >_<


In short, we were ready, and raring to go.


Our strategy was altered significantly in lieu of the last attempt. The big difference was that the idea was to not sleep Ouryu during the fight, instead using Mistmelts to keep him under control. Sleeps were to be saved for the very last part, when the BLMs really needed the Sleeps to both land and stick for Freezes to go off safely.


And so, we came up with this plan. For the record, here's the setup we took in with us:


Me (BLM/WHM)

Saoirse (BLM/WHM)

Ksayyah (SMN/WHM)

Akeem (RDM/WHM)

Seraphpdh (PLD/WAR)

Akanea (SAM/WAR)


We broke the battle up into three sections, with the following strategies:


Stage #1 (100%HP ~ 80%): Just melee Ouryu and use Mistmelts to keep Ouryu under control. BLMs on light nuking with backup healing. SMN main healer. RDM to enfeeble/Dispel, heal, and keep buffs on PLD if they get Dispelled. PLD Mistmelts.


Stage #2 (80% ~ 45%): SMN Astral Flows with Garuda (Aerial Blast). BLMs are now main healing with RDM support. PLD and SAM Mistmelts keep Ouryu under control still.


Stage #3 (45% ~): Freeze. Everybody disengages while RDM Sleep IIs Ouryu and BLMs get the Freeze cycle in action. Use Vile Elixirs and Manafont to cast Freeze if mana is an issue.


With the plan set, everybody knew what they were doing. Basically, the idea was to just endure Ouryu, come hell or shine. The only time we agreed we would sleep Ouryu was if we were in dire need of a recovery period. Even if Seraph was Terrorized, we wouldn't sleep Ouryu (since Terror only lasts about 10 seconds, anyway).


That being said, we lost the first time on Windsday. We were doing really good as well when we realised just how low we were actually getting Ouryu down to without any fancy tricks or anything. However, Ouryu's continuous dispels on Seraph made things a little hard. Just as Ksayyah was about to Astral Flow, Ouryu used Geotic Breath and one shotted Seraph (he dispelled Barstonra) >_<. I died shortly thereafter, and we slept Ouryu and ran for it.


Unfortunately, Ouryu had dispelled Seraph's Reraise, and when he selected "Yes" to reraise, he didn't realise that the question he replied "Yes" to, was not, in fact "Accept Raise?" but instead "Return to Home Point?"


As such, when we saw Seraph back in the Tavnazian Safehold, we really ran for it then. >_<


The second time went a lot smoother though. We adjusted things a little to give Akeem more responsibilities (keeping buffs on Seraph, including Barstone), and realised that we could've started the Aerial Blasts earlier. I Escaped to escourt Seraph back to Monarch Linn (since I had the only other Giant Scale), and by the time we got back, it had turned to Iceday.


We still went for it anyway. ^^


The second attempt had its moments of {excitement} as well, but on the whole, went rather smoothly. Sure, there was some yelling (on my part >_<) going on, but that was because we were approaching the very end, and I really did not want to lose it. ; ; Ksayyah Astral Flowed as planned and got off two Aerial Blasts before Astral Flow wore off. Before too long, we started the Freeze routine. Three Freezes later (and two Vile Elixirs), Ouryu gave up!


It sounds really anticlimatic, I know, but I can't remember very many details about the fight since I was rather tight-strung. I remember trying to Stun a Geotic Breath that somehow must've gone off despite the fact that Ouryu's supposed to resist Stuns (Stun is Lightning-based) and literally spamming Cure IIIs on Seraph trying to keep him alive while Garuda did its work. The fight didn't go perfect, but we beat Ouryu and that's all I was looking for. ^^


In retrospect, I feel Ouryu's very possible without the "optimal" setup. Sure, it's rather easy when you have BLMs and SMNs to take out large chunks of his life, but Aka alone was dealing a fair amount of damage to Ouryu when he could, so I'm sure the BLMs and SMN could be swapped in for other jobs if your CoP group can't get ahold of any. The only job I'd say is a must in this fight though, is a RDM. Ouryu's Stoneskin is {Incredibly tough}, and a RDM's enfeebles work very nicely versus Ouryu. In fact, there was one part where Paralyzed caused Ouryu to skip three of his turns, which got quite a few /cheers out of us. ^^ RDM is also needed to land Sleep II and Silence on Ouryu as well.


Mistmelts are also invaluable to the fight. Not only does it force Ouryu down to the ground, it does so without Touchdown damage, and keeps Ouryu grounded so he doesn't go berserk with his attacks in the air, where his attacks do double damage . They also let the melees (well, in our case, just Aka) actually play an active role in the fight as well. We used a total of six Mistmelts in that last fight. If you're taking in a non-BLM/SMN party for this, obviously bring more Mistmelts to accomodate for this. Overcompensate too. Heck, it's better to have Mistmelts and not need them, than to need them and not have them, rightaru? ^^ Besides, just think of all the time and money wasted if you lose the fight...


Now then, onto Sacrarium...^^

04 November, 2005

Divine Might (again!)

As of late, my campsite project has been taking up quite a bit of my time, partially due to a particular insistence at actually checking out the place to "verify" the campsites.

One of these excursions brought me to Ro'Maeve to check out the {moon} camps down there. I was about to head out from Jeuno, when I get a very excited tell from Redherr,

Redherr>> TUUF!!!

Normally, excited tells that involve my name followed by one (or more) exclamation marks can only mean one thing. I'm needed for something, and that something usually involves me dying. More than once. >_<

Anyway, Redherr had Divine Might on the agenda!

I had already completed Divine Might in the past, although that was with a Black Mage alliance. Since then, I've wanted to try Divine Might again with a regular alliance, and this was the perfect opportunity to do so. ^^

So off I went to the La'loff Amphitheater where I met up with the rest of the alliance. I don't remember the exact setup, but we had five BLMs, a WHM, two RDMs, four NINs, three SAMs, a BRD, and I don't remember the last two members. >_<

As this is one of the hardest BCNM fights the game has to offer, we sat down and talked strategy for a little bit while waiting for the last Ninja to arrive from Jeuno.

Actually, the basics of the Divine Might strategy is more or less set in stone by now. First, the Ark Angel TT has to go first, simply because not only is the Tarutaru the one with the lowest HP, the Taru will also wreck complete havoc should he be allowed to live. In short, the Taru is the one that will kill everybody if left alone, and so must go first. Our plan was simple- take out the Taru with a volley of Thunder IVs and Blizzard IVs while each of the tanks provoked their respective Ark Angels and started their kiting routine around the Amphitheater.

Meanwhile, the rest of the party would drag the Ark Angel MR (Mithra) over to the steps and start engaging it. This was where things started getting fuzzy. First off, we had people assigned to sleep the various pets that would be in the arena at the same time, however, we were unsure whether the Mithra could Charm players with a pet out. Most of us initially thought that the Mithra could not charm a player with a pet, but we decided to work out a backup plan, just in case. This backup plan basically involved sleeping whoever was charmed (probably the tank), and everybody going on {Full attack!} to kill the Mithra before too much damage was done. That'd be 2/5 down.

Our plan then involved having the BLMs rest a bit while the party then engaged the Galka upstairs, following which the Hume would be the next to go down. The Elvaan was saved for last mostly because of the 2-hour abilities she can use- both Invincible and Benediction. -_-

With that, we buffed up, entered the arena, and started the fight! Our first attempt showed the numerous flaws in our battle plan. For one, we couldn't kill the Tarutaru quite fast enough, since the Tarutaru has more than enough HP to take on the initial onslught of nukes, following which he will simply Warp away when we try to follow up with a Blizzard IV. Not to mention that initially, Lillath and I (both BLMs) were supposed to sleep the pets, only that...sleeping the pets meant that we couldn't kill the taru, and the taru really was the one you wanted to to kill fast.


After the taru was down, we turned to the Mithra, who we found out does not only charm a player with a pet out, but also has an AoE Sleep attack of some sort which really put the brakes on how quickly we could kill her. As it turned out, we wasted too much time trying to wake people up with Cures, and by the time we killed the Mithra and got around to killing the Wyvern, two of the tanks who were supposed to be on the Hume and Elvaan, had died. >_<

At which point, we made a bold effort at killing the Galka before the whole alliance wiped, but alas, failed to do so. ; ;

We waited for the Ark Angels to regroup back in the center before activiting Reraises and giving out Raises to those who had already used their Reraise. It was then we discovered our third oversight- some of us had died in the center of the BC. Since Tractor is disabled inside an arena, there was no way we could raise them without getting aggro and wiping all over again. From then, we resolved to make sure that if you were going to die, die at the steps.

After we had all reraised and rested up to full, we tried once again, to no avail. The Galka has some nasty AoE moves, including one that has Bindga or Stunga, which threw quite a large monkey wrench into things, not to mention the HP of a Galka which, suffice it to say, is rather considerable. -_-

Anyway, we managed to kill the Galka before the Hume and Elvaan tanks died again, and they killed the rest of the alliance. By the time we all wiped, there was only 6 minutes left on the clock, so we let it slide and waited to be kicked out of the battlefield so we could get ready to try again.

The second time was even shorter-lived than the first. We made some tweak to our plan, such as having the BLMs immediately cast Blizzard IV on the Tarutaru instead of having two of us sleep the pets (we gave those to the Red Mages), except the tanks didn't voke the Angels when the nukes went off, and as a result, some BLMs got hit and their spells interrupted. The Tarutaru warped away, we followed in hot pursuit to cast our spells.

The Ark Angel TT then used Amon Drive = massive damage + Paralyzega + Petrifyga. Not good.

However, as they say, third time's a charm. ^^ Things just went better this time, although I'm not sure why exactly. Sure, we killed the Tarutaru in record time, thanks to an additional attack by a SAM who opened with Meikyo Shisui on the Tarutaru which, in combination with five BLMs, dealt enough damage to kill the Tarutaru in no time.

The Mithra posed the same problems, but this time we were ready with preemptive Poison Potions for the Sleepga attacks, and when Jaxter (NIN) was Charmed, our plan of just sleeping Jaxter and going all out on the Mithra worked nicely. We killed the Galka's pet Wyvern next (which died really quickly, but unfortunately, engaged the Galka too low down the steps. As a result, the Galka's AoE Stun attacks hit the tanks that were kiting the Elvaan and Hume past the steps, and from that, the tanks were killed eventually.

So we wiped, but everybody had the sense to die at the steps so we could all raise without drawing aggro once the Ark Angels had returned to their starting location. From then on, things went more smoothly. Recognising what went wrong with the Galka, we resumed the fight, only with the Galka much further upstairs, actually all the way up in the hall since some of the melees had trouble navigating the stairs. -_- After some time, the Galka was killed without much further ado.

The Hume was also a piece of cake, but we had to remind the mages to put up Barfira in the event of Mijin Gakure, while all the mages scattered out of Mijin Gakure range. We actually dealt quite a lot of damage to the Ark Angel HM without Mijin Gakure going off, and for a second, I thought it wouldn't go. Alas, it had to go off at some point, but because his HP was so low by the time he chose to use it, it wasn't too bad. Also keep in mind that unlike players, Mijin Gakure does not kill off the Ark Angel HM when he uses it, so no free kills there. :P

That left the Elvaan.


By now, we could all taste victory, and from here on, it really just felt procedural. The only thing we really needed to keep in mind was that the Elvaan had access to both Invincible and Benediction, so all we needed to do was go easy until the Elvaan Benediction'ed, then hit her with everything we had.

And hoo boy, did we go all out once we saw that cloud of dust and her HP soar to full. 2-hour abilites were flying everywhere. And in the end, it was inevitable...


...WE WIN! ^^

I have to admit, it was very nice to beat this BCNM again, and the challenge made victory ever more sweet. ^^ Of course, now I can say that I've beaten Divine Might both with a Black Mage alliance and a normal alliance, so HAH! ^^

On a side note, we also have confirmation that you can only get one earring. Ever. One of us who had already previously cleared Divine Might threw away his Suppanomimi in an attempt to verify this and...he wasn't given the option to get another earring. ; ;

02 November, 2005

Campsitarus!

Even though I've been online doing various things, including starting up Bard (at least for now), I haven't been updating the bloggaru. >_<

Why? I've been working on a {secret} projectaru instead!

Of course, it's still not completed, but there's at least some semblance of a start. Hopefully everybody will find it useful, and with more people's input, maybe it will grow to something bigger as well. ^^

So, check it out here! ^^