
The first order of the day was the Disaster Idol. I have to admit, for a full party in their 70s, this thing was a piece of cake, although I can see how a party in their 60s might have some trouble.
Some notes about the Disaster Idol is that firstly, it does not (at least, not to my knowledge) Meltdown, so you're saved from that, at least.

Secondly, its attacks and weaknesses are dependant on the day which you fight it on. For example, we fought the Disaster Idol on Windsday, so all its spells were Wind-based, and thus, it was weak to Ice. (Personally, I had never seen a Doll mob cast Blink before...^^)
If you want an easy fight, I hear Lightsday makes him the easiest, for obvious reasons, although I'd imagine the multitude of Cure spells could get rather annoying. As a high-level party though, we didn't really care, and took out the Idol with little trouble. With new knowledge that lay in the depths of Delkfutt's Tower, Tenzen had this burning desire to return to Pso'Xja (not again...), and so, off we went. >_<
The last part of Tenzen's path involved a return to Pso'Xja, in the tower closest to the Batallia Downs zone, and is thankfully, Level 60 cap! (It was also now that I noticed that all my RDM71 gear, with the exception of my Torques, are level 60 and below. XD)
Unlike the 50-cap section, this part is easy enough that you can solo. Your aim is the same, to get to an elevator in the center of the room. There are no mobs to fight (well, if you can avoid it), just another sixteen rooms arranged in four groups of 2x2 surround the elevator which you need to get to. However, it is a maze with tricky, one-way doors, and gets a little bit confusing if you don't know where you're going. Fortunately, the directions are simple if you know it:
1) Follow your right-hand wall, until you enter a room from the south, facing north. (This means you've almost completed the whole circuit around the elevator).
2) Go west, drop down the hole there.
3) Keep going, turn right at the first room, and walk up the stairs.
I found that it's a little difficult to "keep going straight" if you're manually moving forward, since the camera angle snaps back at you when you pass through a one-way door, so unless you paid attention, you'll be in a room with more than one exit, and you don't remember which side you entered from (since it's one-way). Auto-running through the doors makes things easier though, since it preserves direction. ^^
Once you're at the elevator, the same deal awaits. Sneak and Invis up at the top of the elevator, before going down. Then, you'll find another Avatar Gate, where this time, Fenrir himself has something to say to you and Tenzen.
And that's Tenzen's path complete!
Next, onto Louverance's path, and the Moblin BC fight. Simply get your required cutscenes, and head down to Mine Shaft #2716 by any means possible, by either flipping switches and ghosting around Newton Movalpolos, farming Snow Lilies, or my preferred way, cold hard cash to Twikblix, who'll then teleport you straight to the Mine Shaft entrance. Convenient, no?
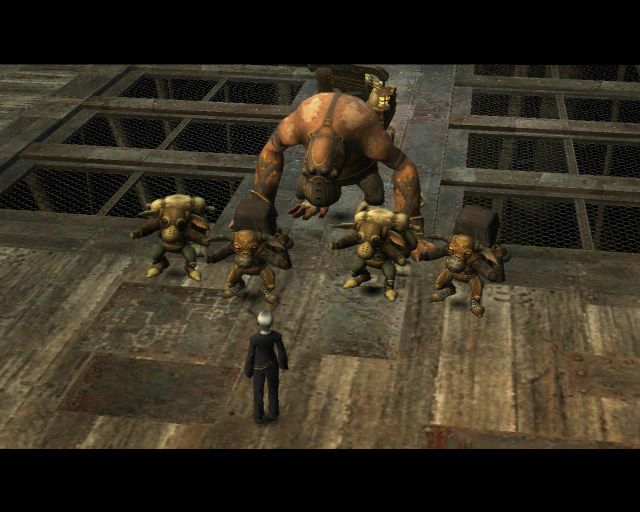
As the picture shows, this fight pits you against four Moblins (RDM, BLM, WHM, and THF) and one Bugbear, who can somehow use both Mighty Strikes and Counterattack. All of them are immune to Sleep, so people need to kite everything around. It's a little chaotic, but really quite fun.
The problem with kiting the Bugbear is that, at least for the first part of the battle, the Moblins can command the Bugbear to assist whoever made the call. From then on, the Bugbear will attack only the person who has the Moblin's hate, and try as we could, we couldn't get the Bugbear to change its mind.
So we just killed the Moblin anyway and went on with things.
The original plan was to kill the BLM Moblin first (Chekochuk), and then take out the WHM, RDM, and THF in that order, but that all went to hell, and we just changed focus to whichever Moblin was closest, since the others were being kited.
Initially, the plan was to stick Chummy (SMN) onto one Moblin, myself (RDM) on the Bugbear (and I later switched to a Moblin), Seraph (PLD) on another Moblin, and then have Akanea (SAM) and Saoirse (THF) take out the BLM quickly with a Distortion skillchain. Tumble (being WHM), would Cure from the center of the room.
It's a fun fight, although it's too bad that the Moblins were really quite weak. Their mid-battle comments were really quite funny, especially after one of them apparently blew themselves up with a backfired Bomb of some sort, that got the other Moblins yelling, "No! Bombs, BAD!"
And that's Louverance's path completed! Thankfully, it's been all rather easy until now. We warped back to Jeuno, and started prepping for the one last big fight ahead that, now, was all that separated us from completing all three Forks.
Yep. Snoll Tzar.
No comments:
Post a Comment